Mega-Tree (-ish?)
Well, sort-of. There is some debate over what actually constitutes a “Mega-Tree” in size and construction. I’ve been calling it a Mega-Tree, but technically it is a “flat tree”.
So my wife started working on musical sequences and was skimming YouTube for inspiration. She found a display she REALLY liked, and determined that our little Mini Mega-Tree was just not going to be adequate for what she wanted to do. I had just gotten in a new order of pixel strips and pixels that were supposed to be for finishing some other projects, so…
We have a 46″ Boscoyo star that we already plan to mount on our porch roof. It was originally going to be a center piece when we were originally JUST going to do the roof lines. When we started this, I had no intention of doing any yard props or trees. I ruined that though when I decided to make the Mini Mega-Tree out of leftover strips and pixels. Since then, things have escalated quickly with Jumping Arches, Peace Stakes, Pixel Columns, and SparkleBalls (which I still need to do a story for).
So, we decided the easiest way to do this new Tree is to just hang it off the porch roof under the star. This gives the star streamers for some effects, and otherwise we can apply typical Mega-Tree effects to it.
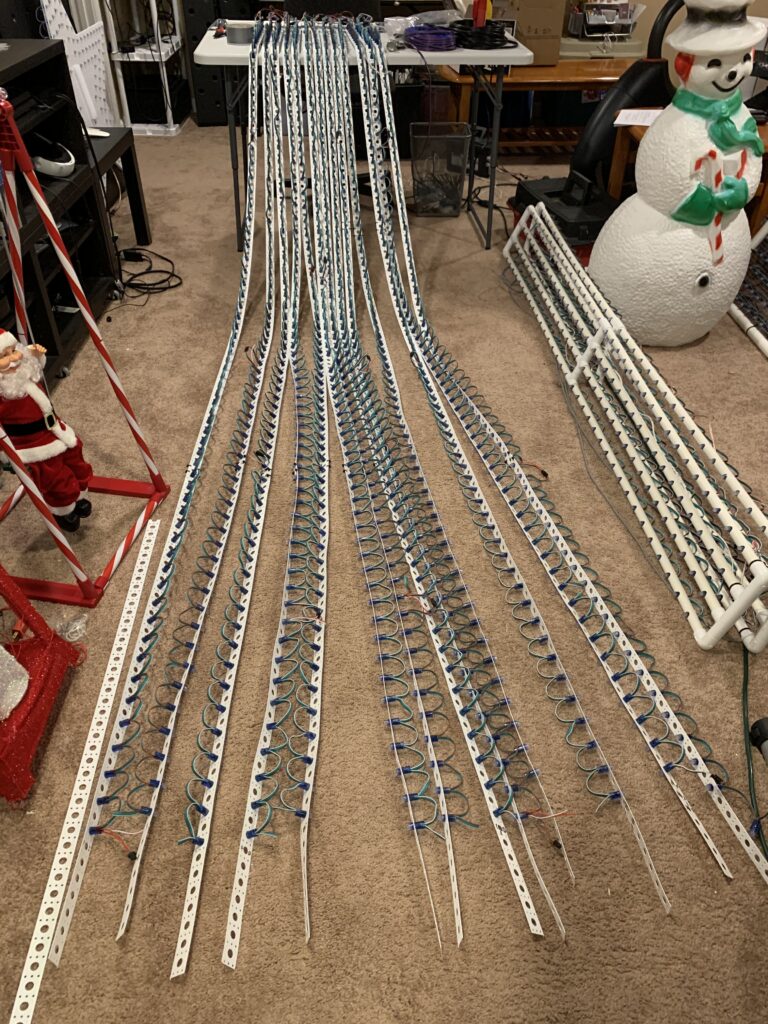
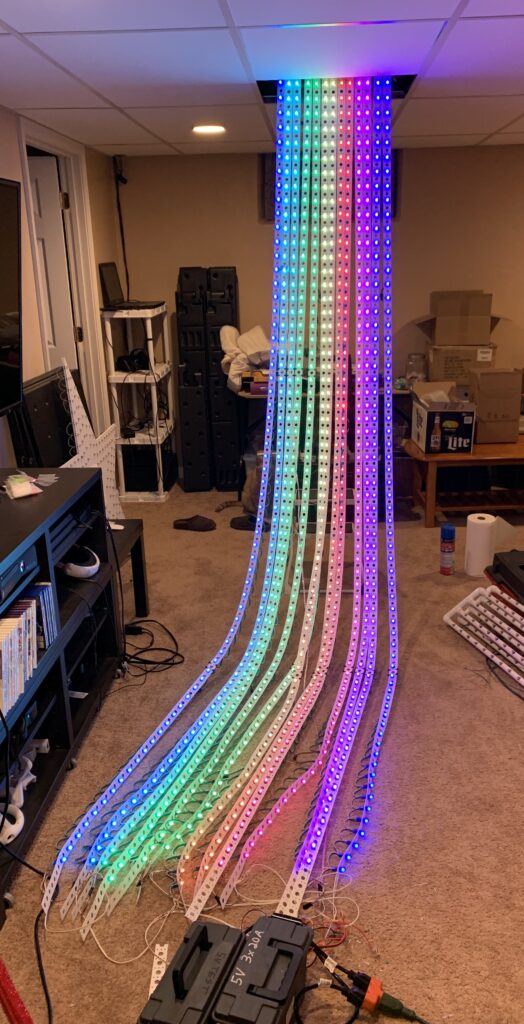
So, with measuring and minimal planning- construction started. It will be made from 13 strands of pixel strip. Each strip will be 138″ long with 65 pixels at 2″ spacing. So- time to push pixels…
I just use a wood block in a vice with a 5/8″ hole drilled in it, and a 3D-printed pixel-pusher tool, available here: https://www.thingiverse.com/thing:3849793
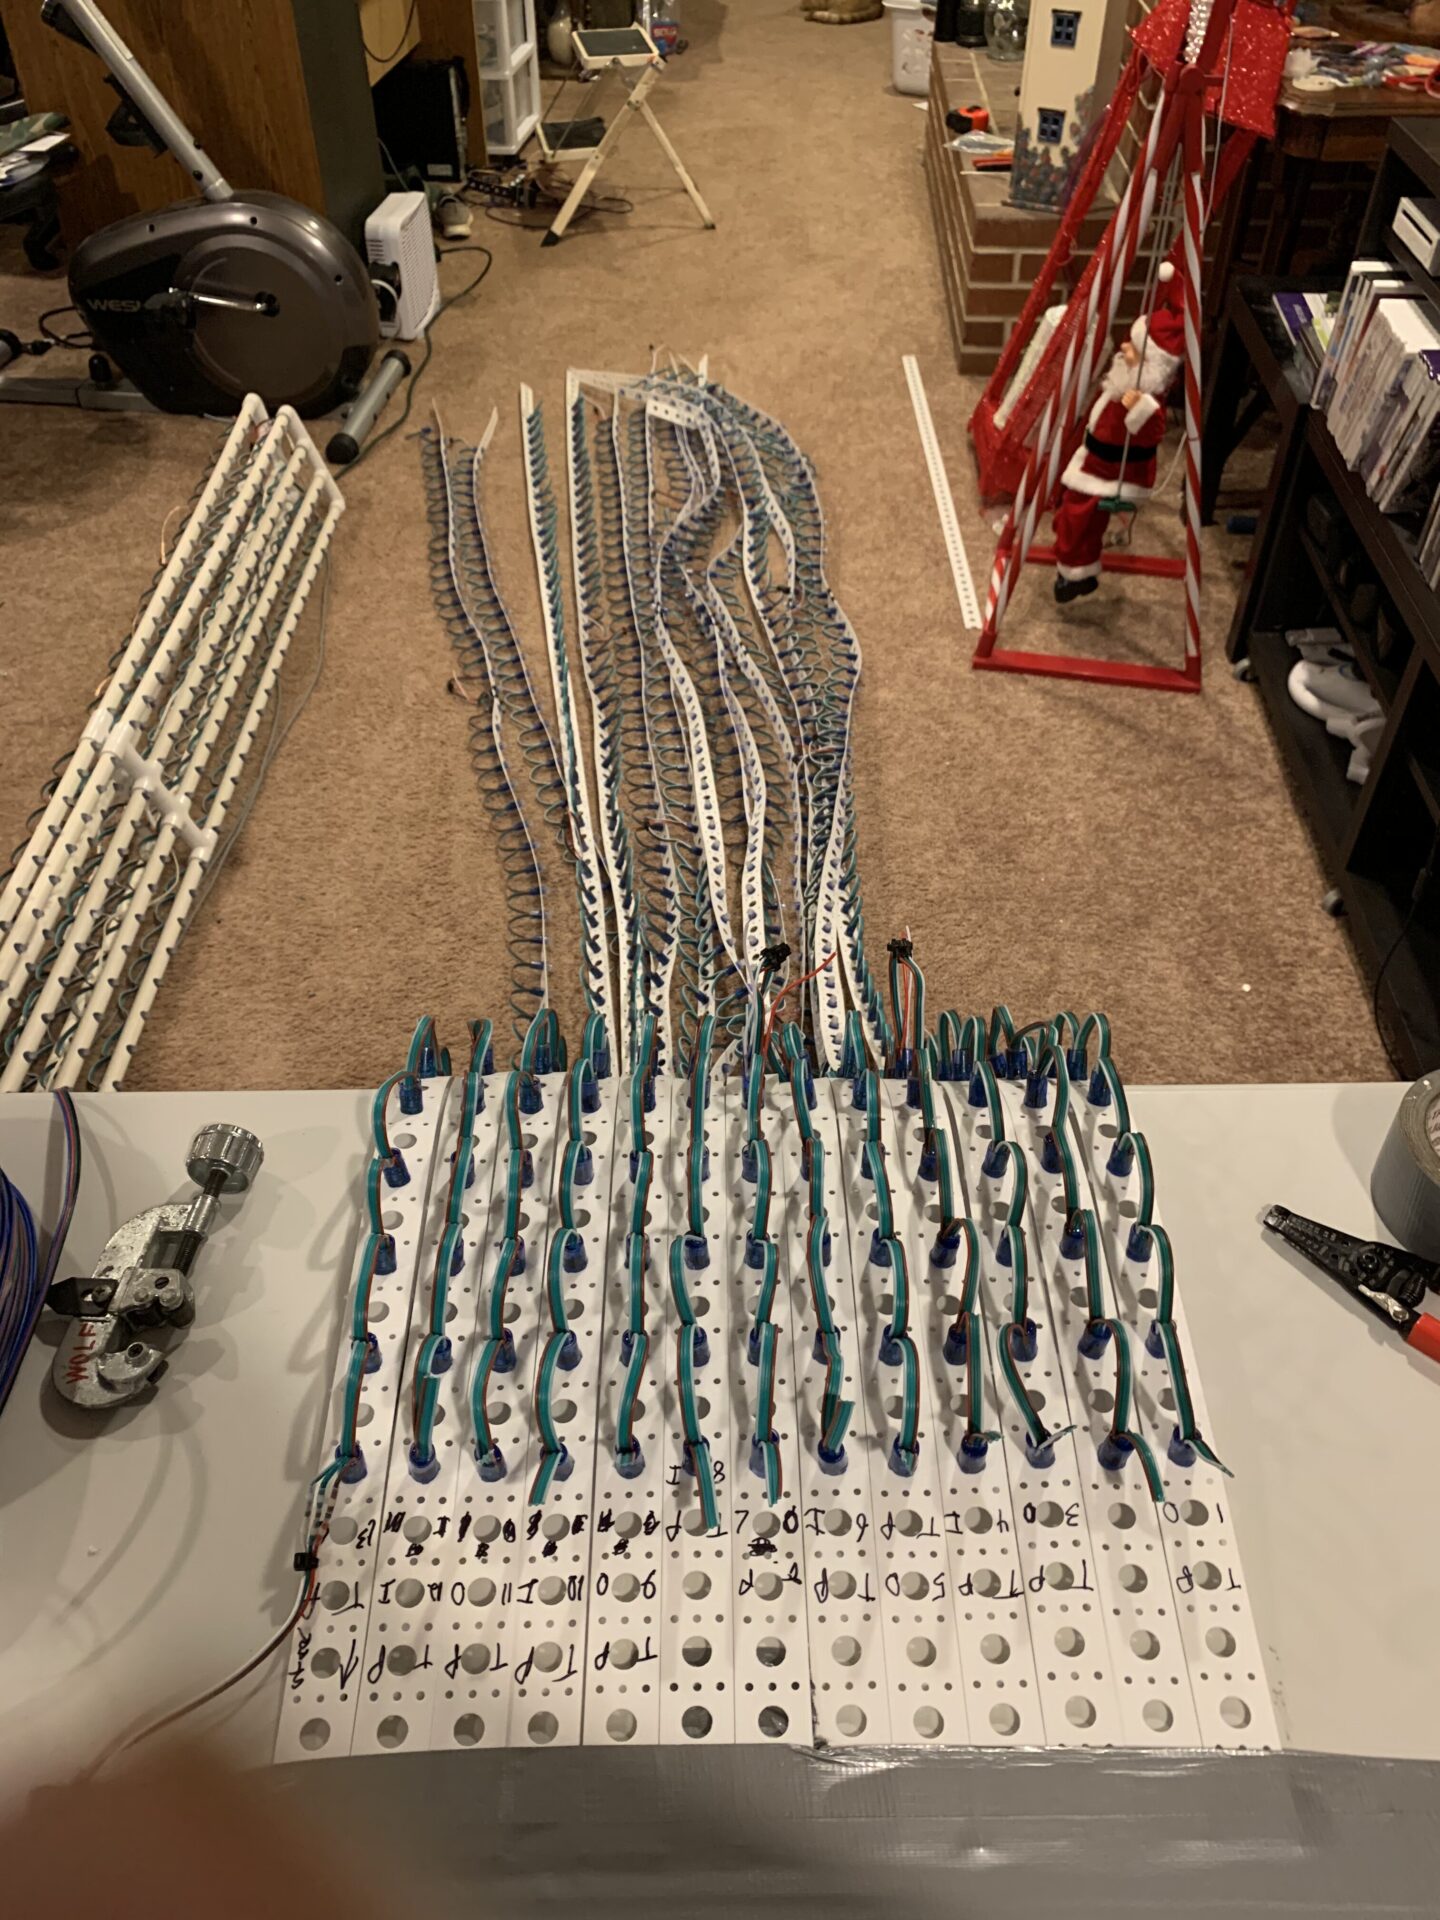
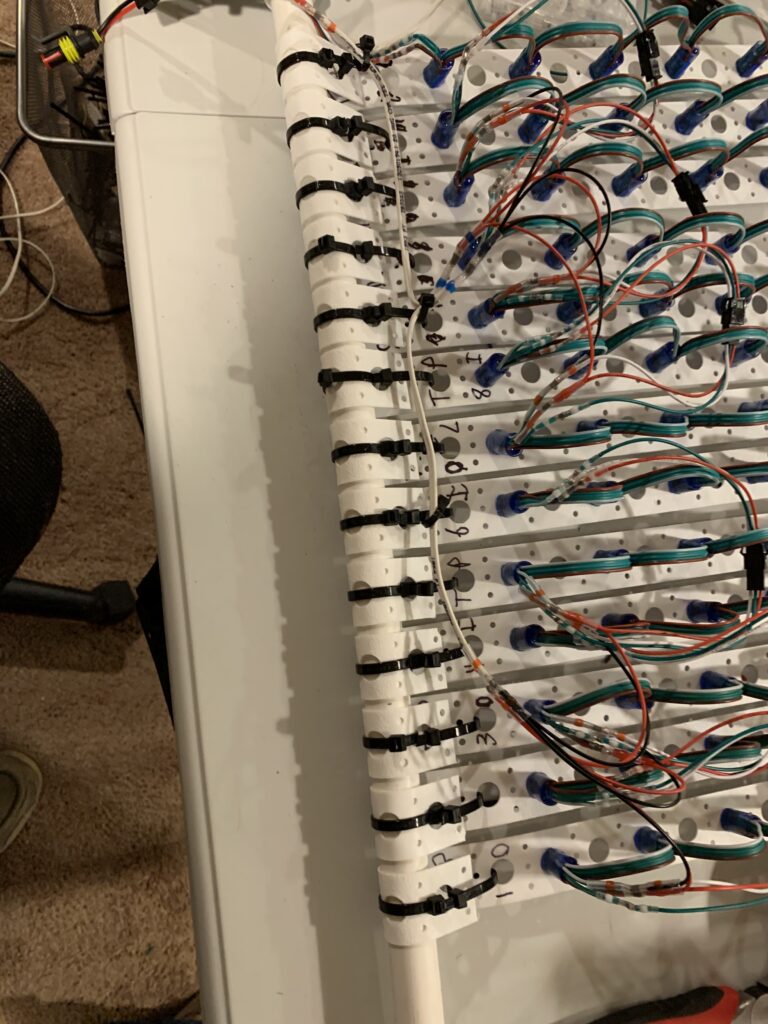
After spending a Sunday afternoon pushing 845 pixels into strips, it was time to start assembling it. I laid out the strips on the floor and made sure everything was lined-up right. I did screw up a few of them, so had to make some last-minute changes. (I accidentally swapped the top and bottom spacing on a few strips.) Once I had everything lined up- I taped the top down on a table so I could start connecting data and power together.

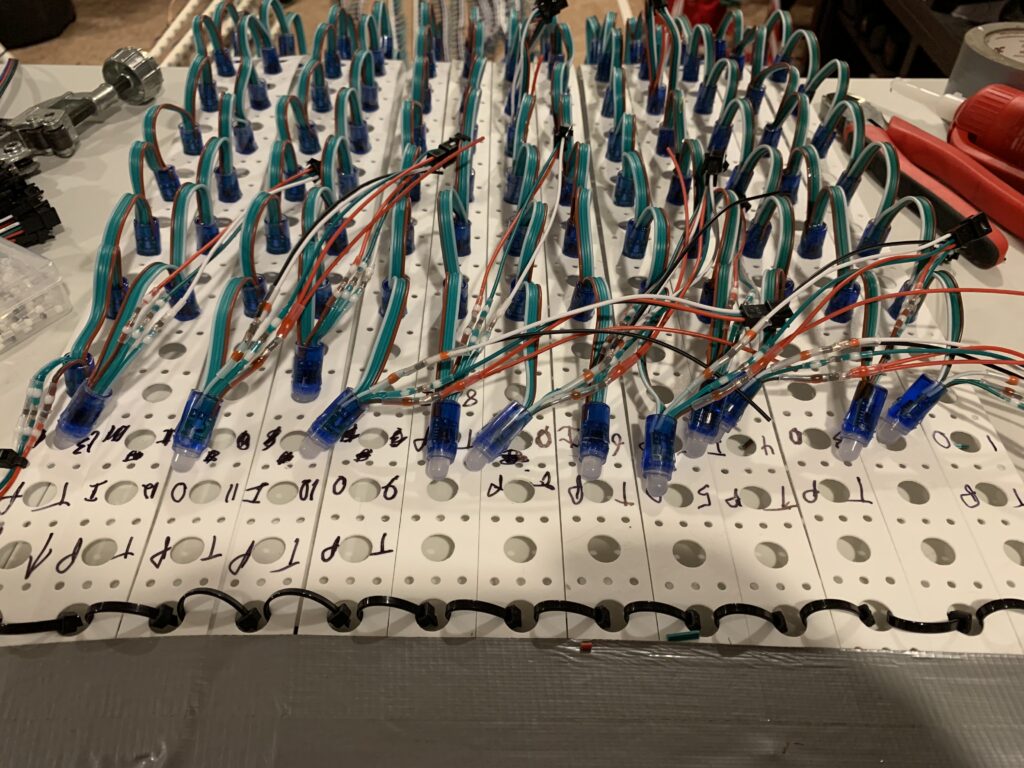
I use JST connectors, with dielectric grease for water protection. The pixels I buy already use them, and I don’t feel the more-expensive connector options are really warranted. More information here: JST Connectors
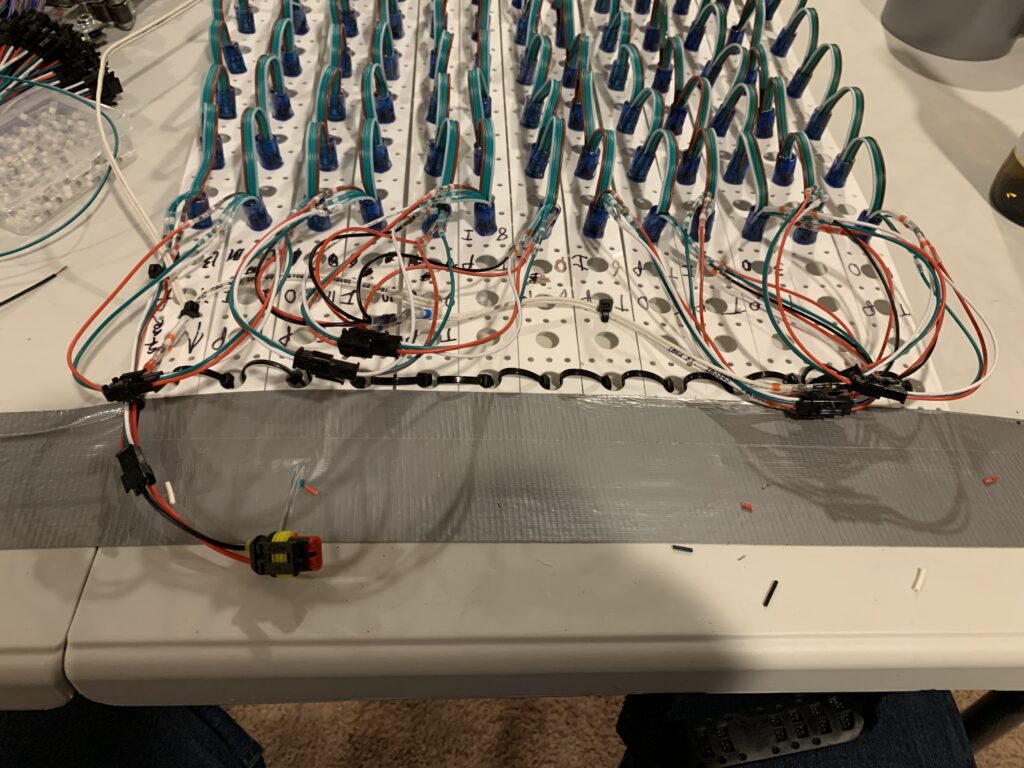
So, I’m running a typical zig-zag pattern with the pixels. Because these are 5v pixels- I have to power-inject at least every 100 pixels (so there are no more than 50 pixels from any power injection point). Since each strand is 65 pixels long- it made sense to power inject at the top and the bottom. I probably could have fudged it for 15 pixels and just done the bottom, but would rather avoid any potential problems once it is hung up.
So- above you will see data and power injection lines between each strip. The JST data/power and automotive power connector at the top of the tree (bottom-left of the picture) will go to the Boscoyo 46″ Star. I’ve already retrofitted the star to use wired data, instead of it’s own NodeMCU controller.
Have I mentioned how much I love Solder-Seal Connectors?
I temporarily mounted the strips to PVC pipe. This isn’t strong enough to hold the tree up under any kind of load, so I will use 3/4″ EMT for the final install. I mostly wanted to work out the best way to mount the strips, and have a way to keep them organized while I worked on the rest of the tree.
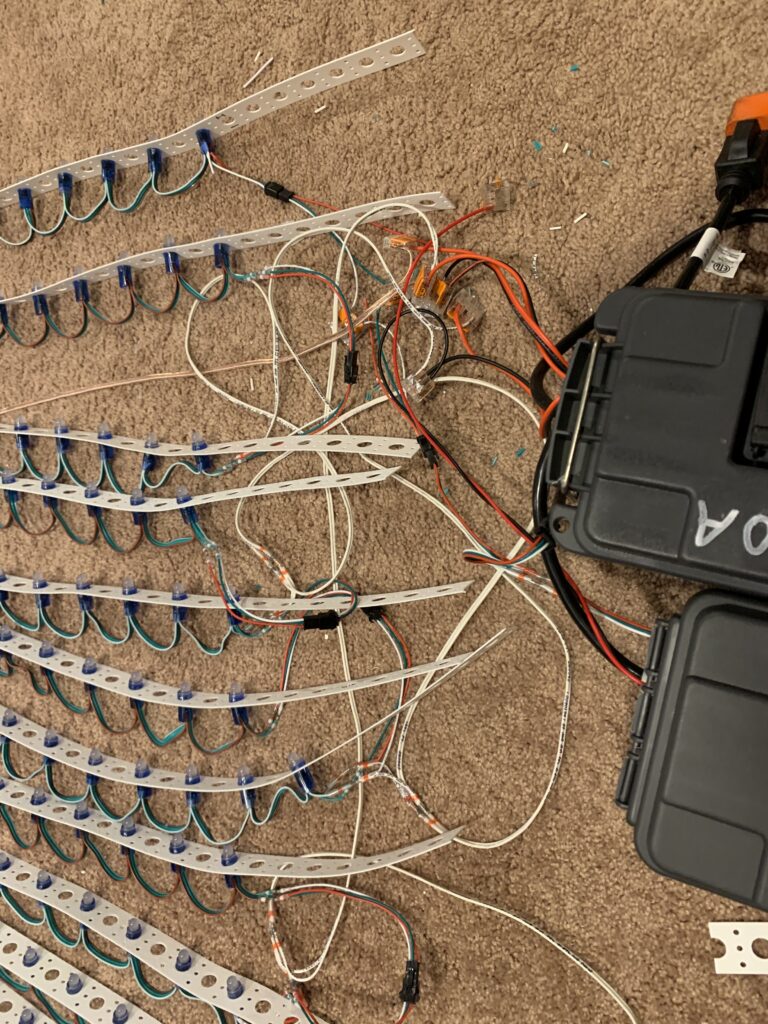
I neglected to take a picture of my bottom-wiring setup. I transferred the top of the tree to 3/4″ EMT and hung the EMT from floor joints above the drop ceiling using clamps. I moved my work table so I could work on each end pair one-by-one, and wired them up similarly to the top- JST connectors for data/power and heavier-gauge wire for power injection.
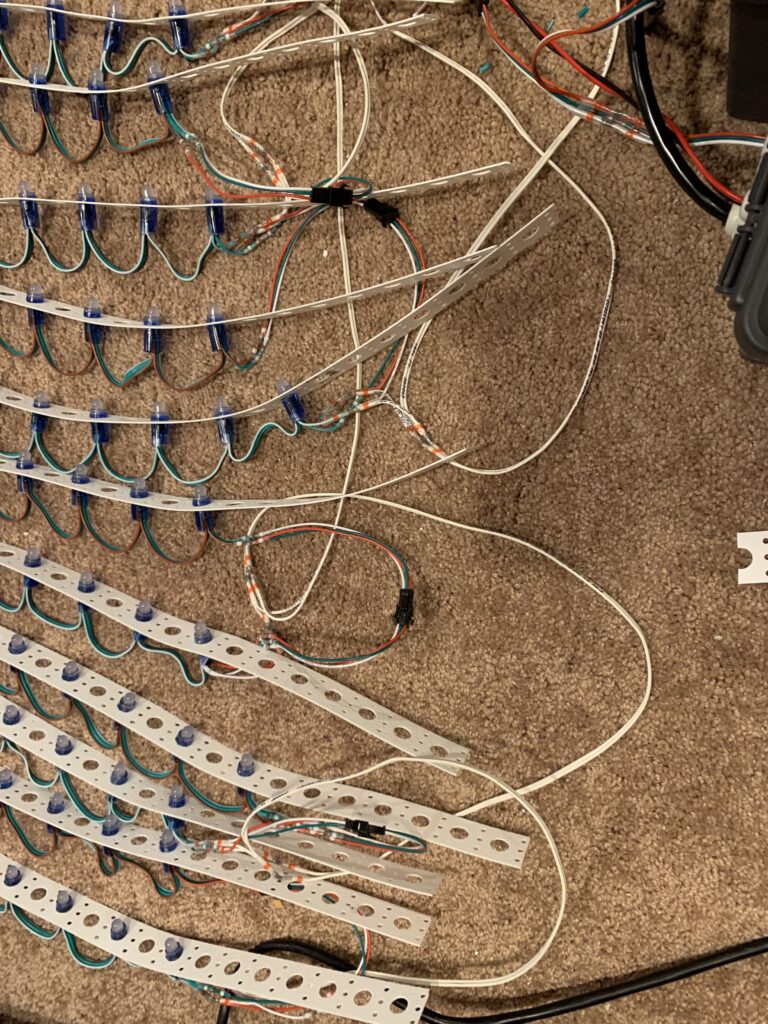
I figured out that two JST pigtails were longer than the distance the bottom strips will be once they are installed, so I didn’t need any additional wire for them. I put connectors on all of the strips so they would be reasonably easy to swap out if-needed.
And, it’s alive!
Now, I have to admit here- I was amazed that this actually worked the first time when I plugged it in. Like most people in this hobby- I’ve had my share of crossed connections and wrong-way data. I really expected at least SOME of this not to work, and even jokingly told my wife to get the fire extinguisher “just in case”.
I did end up with two bad pixels- one has red on all the time, and the other has green on all the time. I’ll cut them out and solder in new ones before it gets hung up. Right now- I’m letting it “burn in” for a couple of days to see if any other problems crop up.
Next Steps…
We need to get the 3/4″ EMT top hung up on the front of the porch roof, under where the star will go. We are planning to use 1/4″ galvanized studs that we can just paint and leave in during the off season. We might find some kind of decorative medallion or some other element we can mount up there for the summer months.
I also want to build a half-round metal hoop for the bottom, also out of 3/4″ EMT. We could just lay it out with spray paint and stake the strips down, but I’m concerned about the high winds we get here, and would rather have some extra hardware to weigh things down and insure the strips stay even.
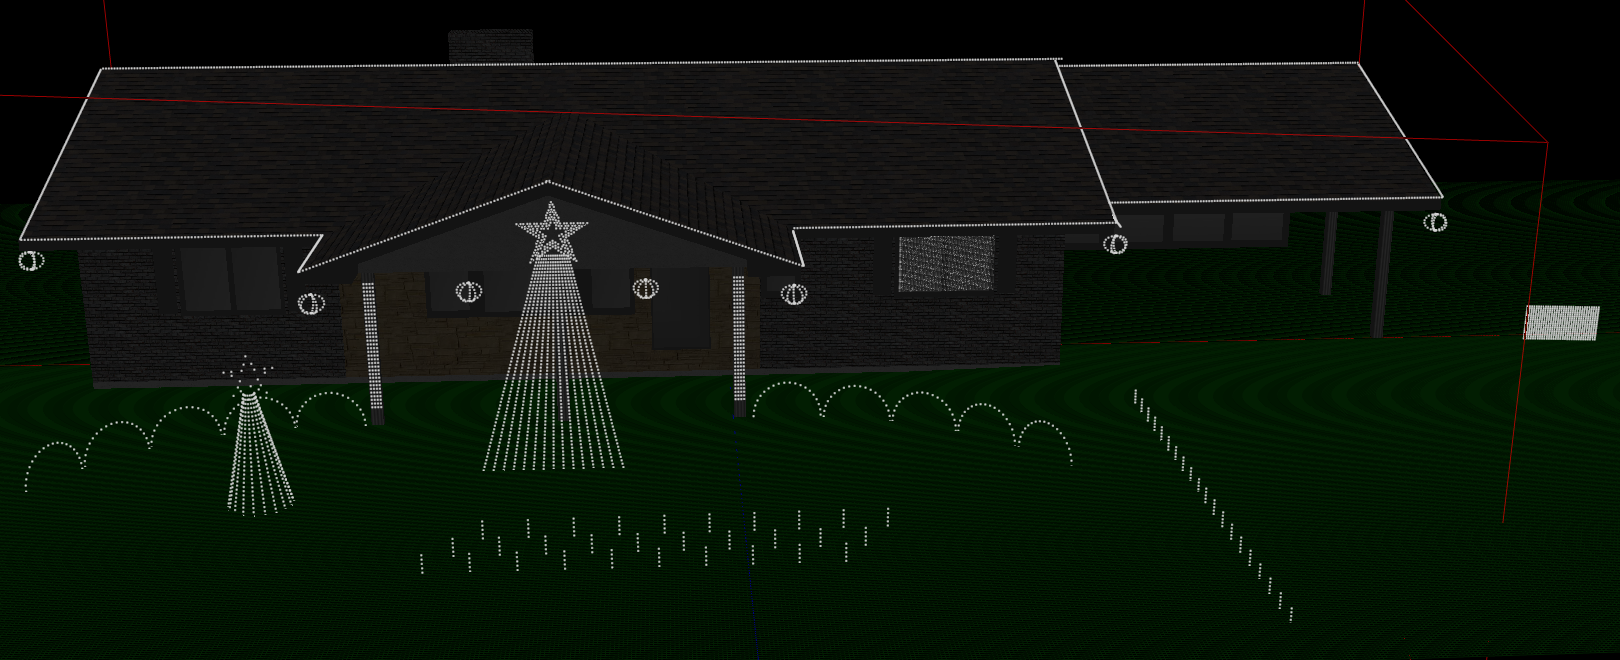
Just for a bit of reference- here is the 3D model of what it will look like when it is done (along with the star):

UPDATE, Nov. 12, 2020:
We got the tree set up last weekend, along with most of our other props…
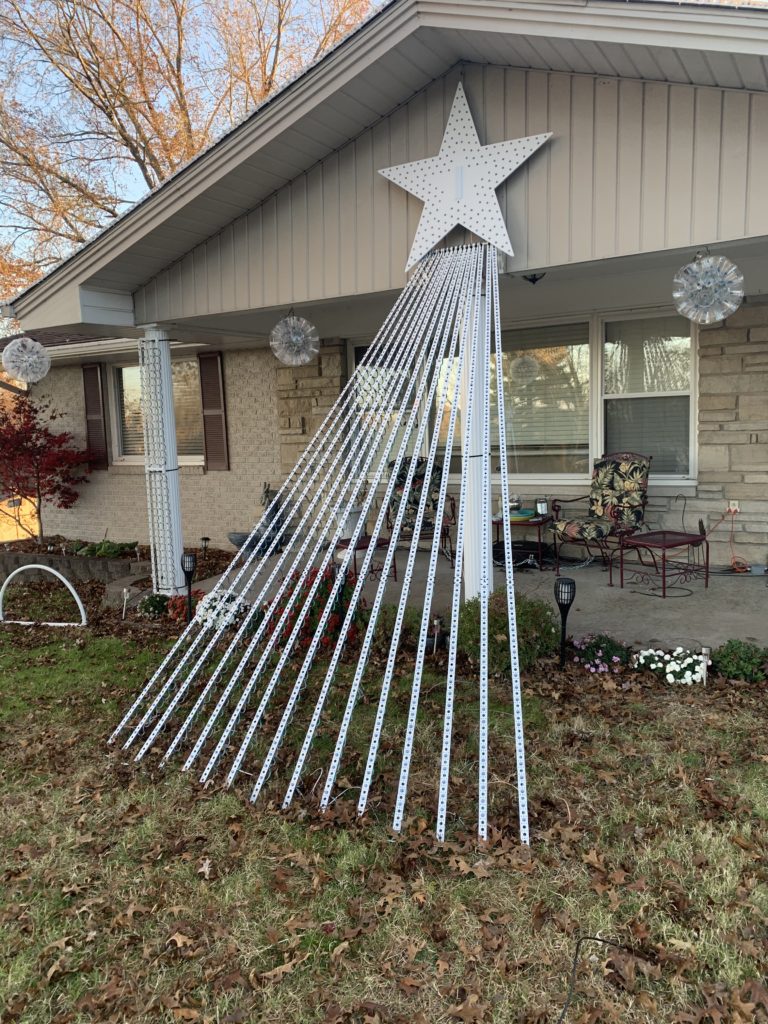
The strips ended up coming out further than I thought they would (I thought I measured it right!) but my boss (wife) originally wanted a star with “streamers” so this works as both. I actually STILL need to replace those two bad pixels- it’s on my list. I added two more strips as-well, as the original 13 just didn’t give us enough resolution for “mega-tree” stuff. 15 actually made a huge difference, although next year I’m planning to go bigger!
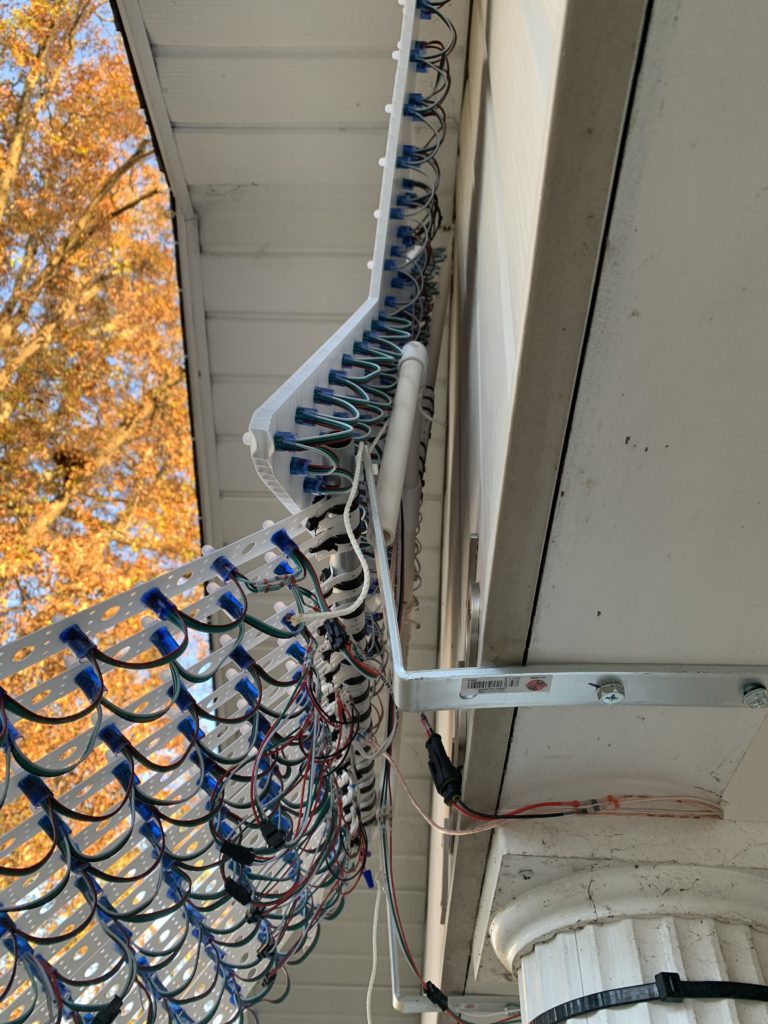
We were trying to minimize holes in the siding, so I came up with the idea of using a couple of L-brackets lag-bolted into the wood beam on top of the columns to hold the EMT pipe at the top of the tree…
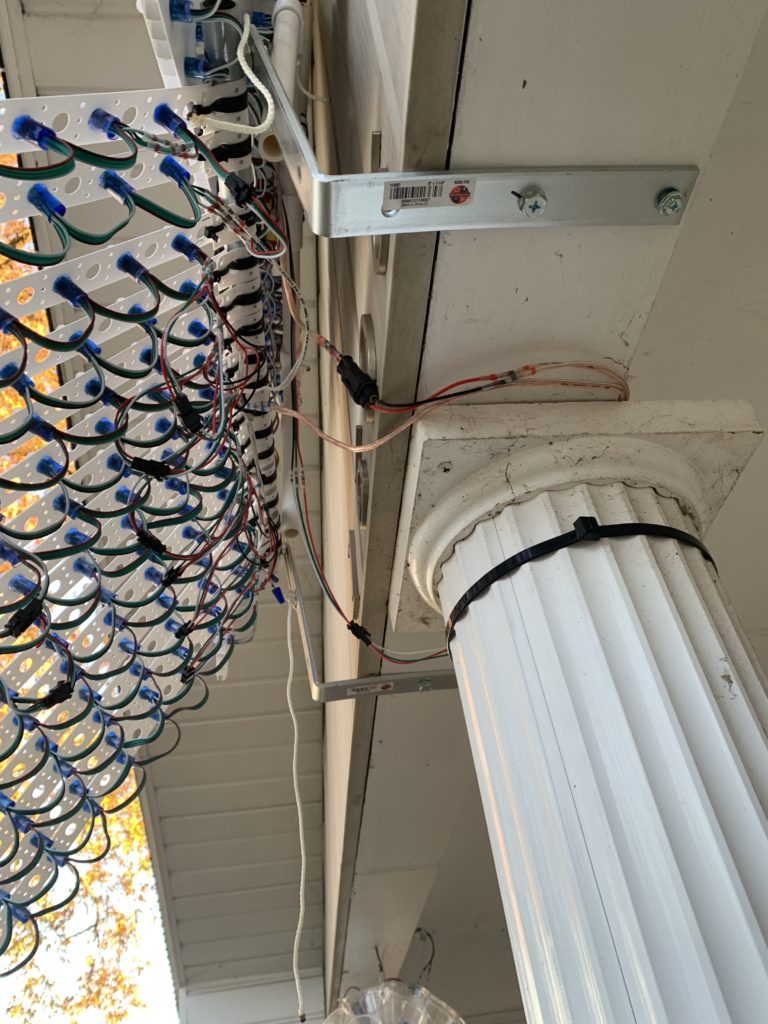
These are pretty thick and heavy, but they are still bending a bit. I’m hoping they won’t bend more and fail, so I will be keeping an eye on it.
For the star, I made a sort-of an upside-down “Y” shaped structure out of 1/2″ PVC that is zip-tied to the connector built-in to it by Boscoyo. The top of the pipe has holes in it that we ran clothesline through to hang it from an eye hook near the top of the gable. It has two legs that extend from the bottom and hook behind the EMT that makes up the top of the tree. This keeps it very stable, with only one small hole in the siding near the very top where it won’t be noticed.
The bottom is just staked down using 12″ galvanized spikes/tent stakes. So far it has held up will in the wind, even with no reinforcement. I’m keeping an eye on that as-well. I may double-up the bottom strips and/or use grommets as some have recommended.
As a bonus- here is our current 3D-modeled layout. It’s changed quite a bit from previous versions… We have added a video/virtual matrix in the window on the right side, and moved almost everything else around.