Add an OLED to a Raspberry Pi
It’s kind of silly since they spend most of their time closed up in a weathertight box, but I really like the little OLED screens on the Kulp controllers. They give me a quick indication if the controller is working, so I can at least rule it out (for the most part) if there is any kind of a problem.
I figured it was probably pretty easy to put an OLED on a Raspberry Pi, and there are Caps that do just that, along with buttons and additional outputs. After seeing settings for OLED support in FPP, I decided to dig into it a bit more.
It turns out- it’s dead-easy. Nothing really special required. If you don’t do any prototyping you might need to buy some connector wires or do a bit of soldering, and having a long standoff is nice for mounting it, but you can get creative with that too if you want.
Here is all you need to do…
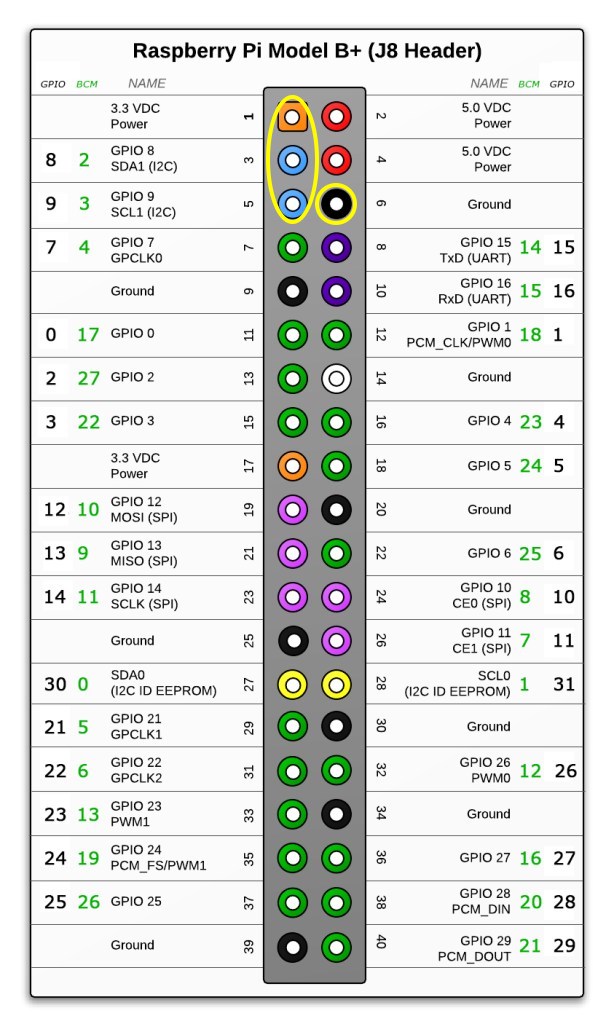
Identify the four GPIO pins you will need to use. They are all next to each other:
Now- take a look at a typical 128×64 OLED display. These come in single colors or two color. I generally just use the white ones.
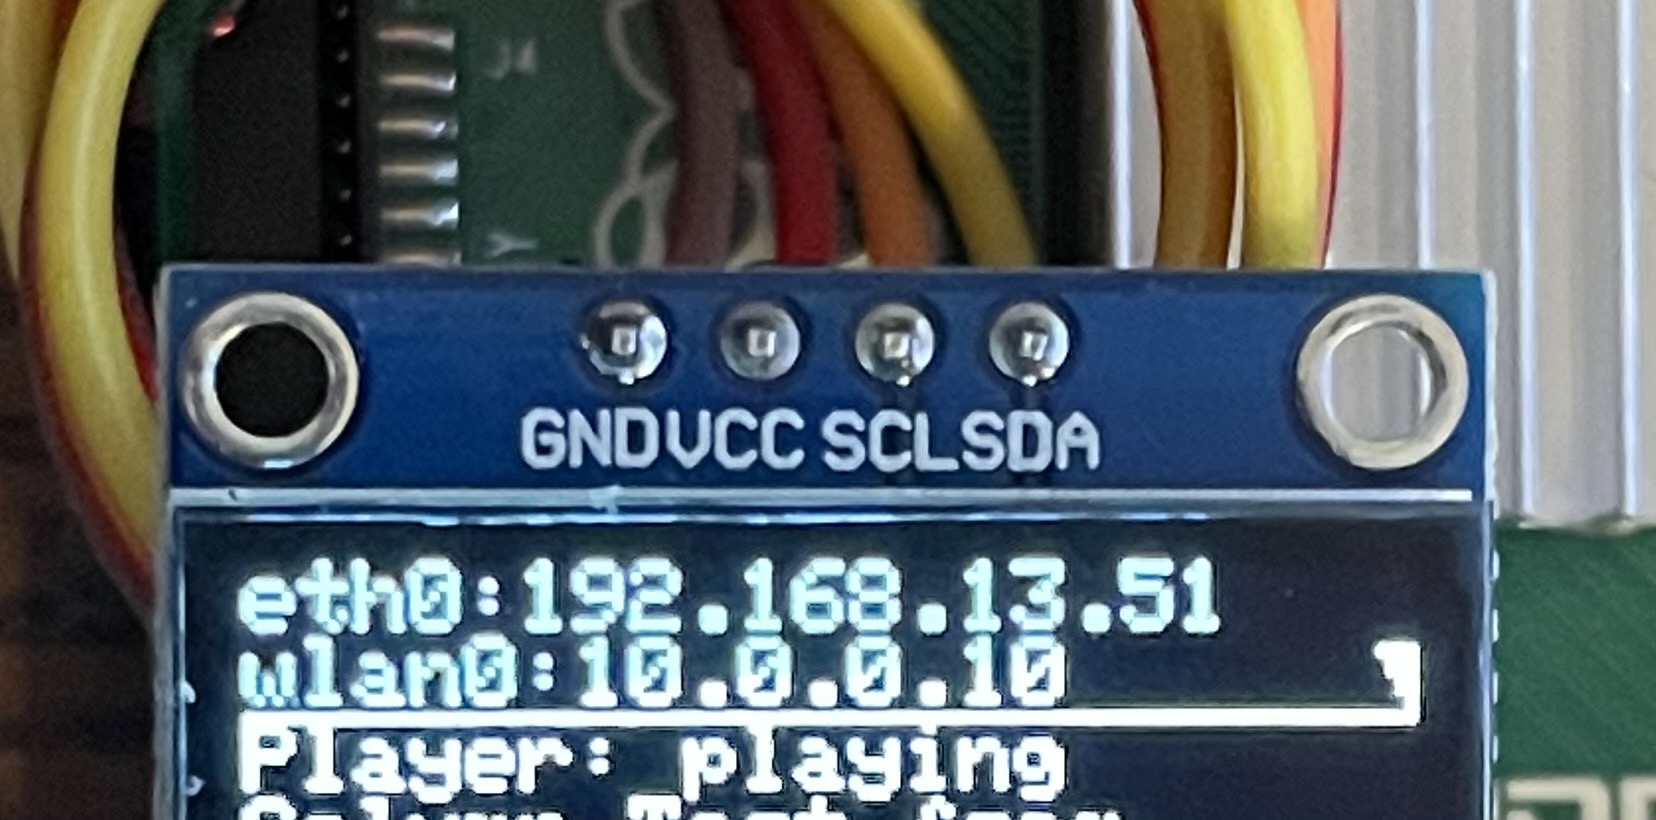
Notice that the four pins are labeled the same as those four GPIO pins! All you need to do is connect them up! I just used prototyping/connector wires, which I keep around all the time anyway. Like these (affiliate link):
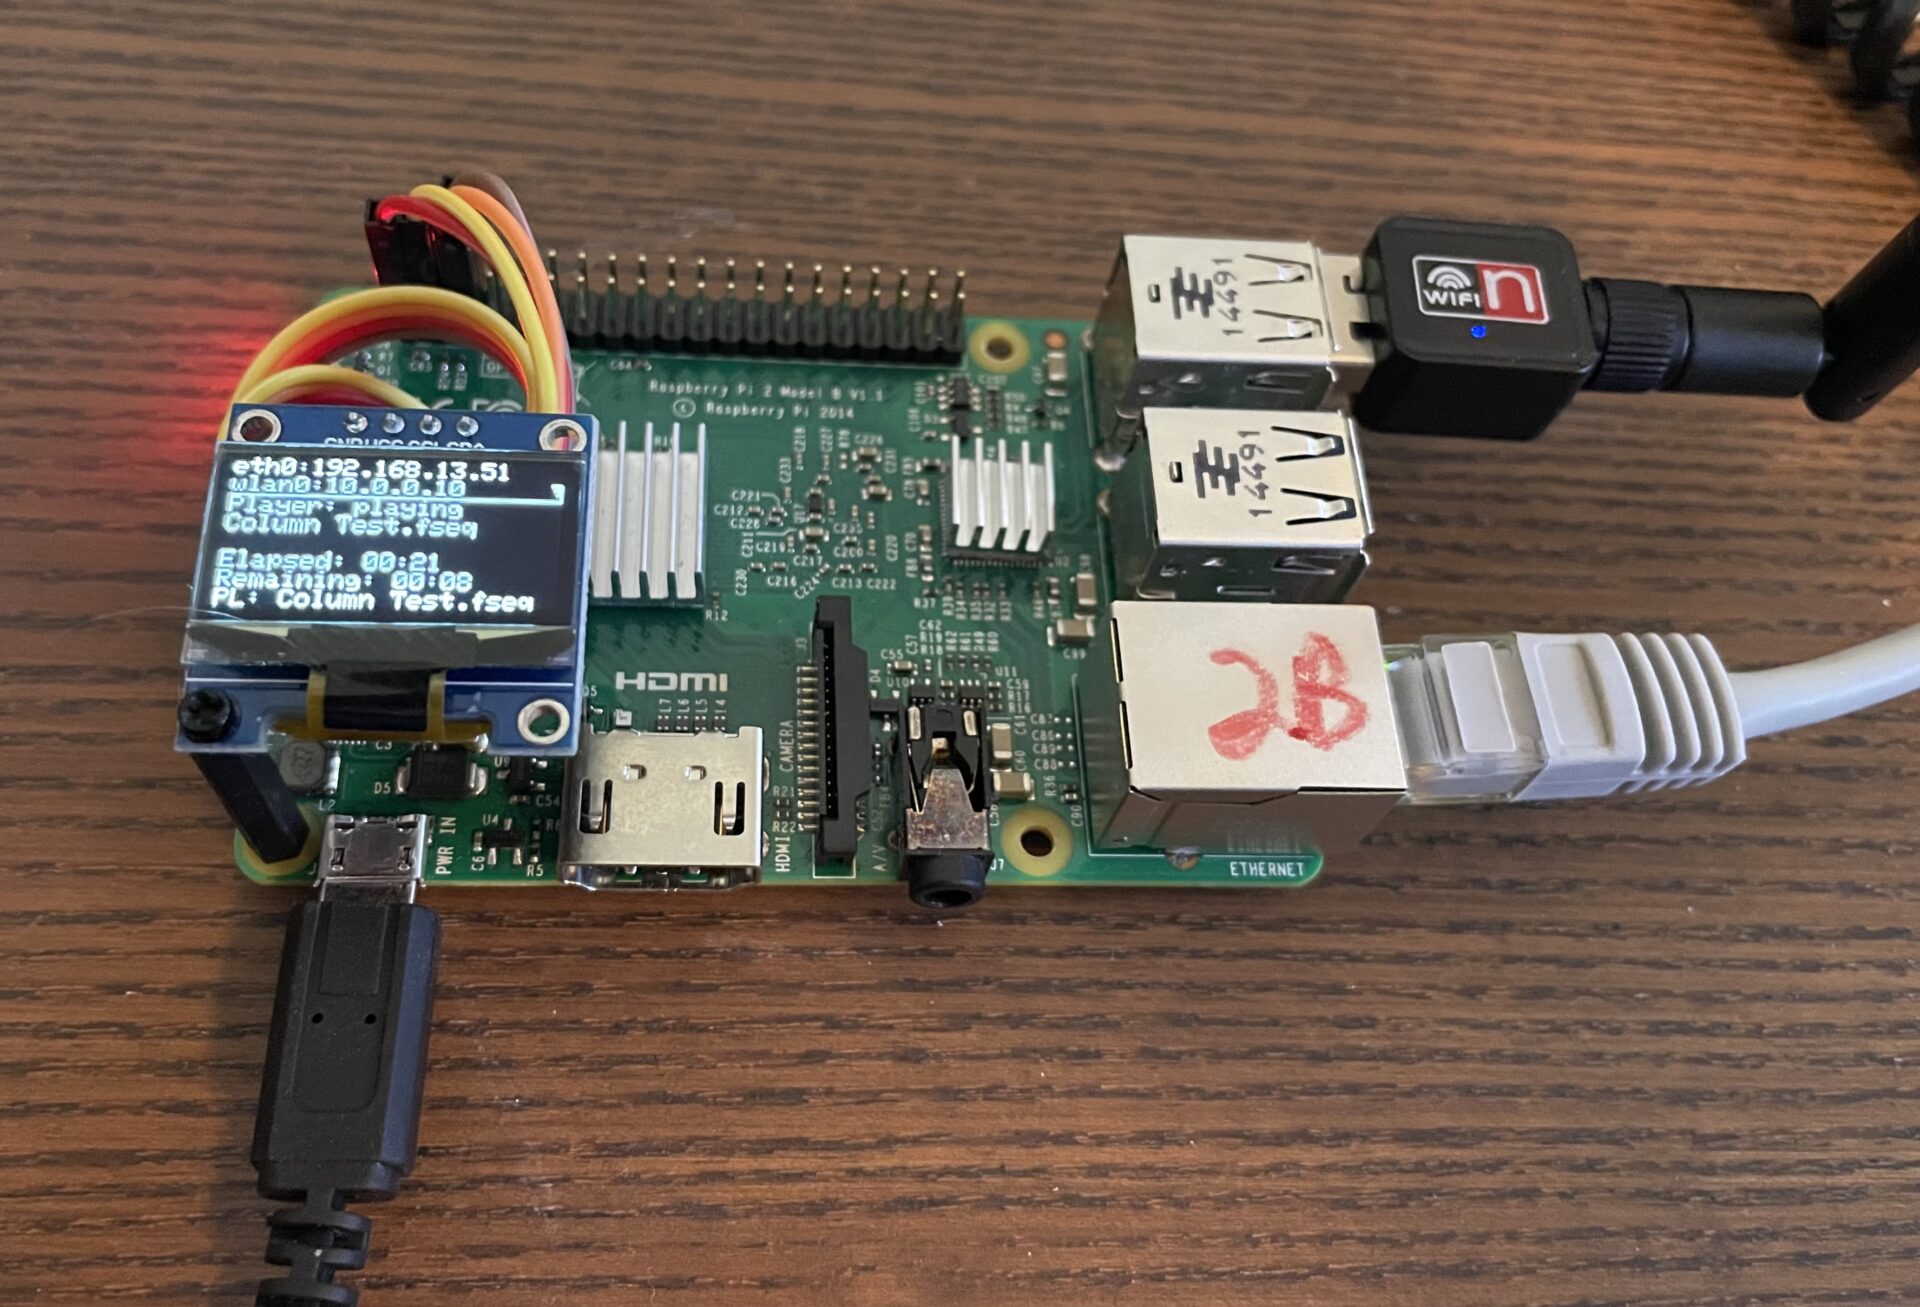
Next, I mounted it to one corner of the Raspberry Pi using a long nylon PCB standoff.

The last step was just configuring FPP. I’m using FPP 5 (Alpha Build), but I believe the same setting exists in v.4. Just open up Status/Control -> FPP Settings and click on the System tab. Look for the “Status Display” setting and change it to your OLEDs settings. The ones used by Kulp are “128×64 I2C (SSD 1306)” for single color, or “128×64 2 Color I2C (SSD 1306)” for 2-color. There are other options if that setting doesn’t work for your OLEDs, including “Flipped” options if you want to orient it differently.


I’ve found it best to actually unplug/re-plug the RPi after saving the changes, instead of just doing a warm reboot after making a hardware configuration change.
That’s all there is to it. Now I have a Raspberry Pi with an OLED display, dirt cheap.

I might build some little adapter connectors out of prototype PCBs so I don’t need to use wires, but for now- this works great.
If you need OLEDs, I buy these, which are the same (or similar) to the ones you can get on Kulp and other controllers:
You can probably buy them in bulk from China a lot cheaper, and at least for Kulp controllers- they are actually cheaper to order with the controller than buy on Amazon. I still like keeping extras on-hand for projects like this, and Amazon is a good quick-ship source.
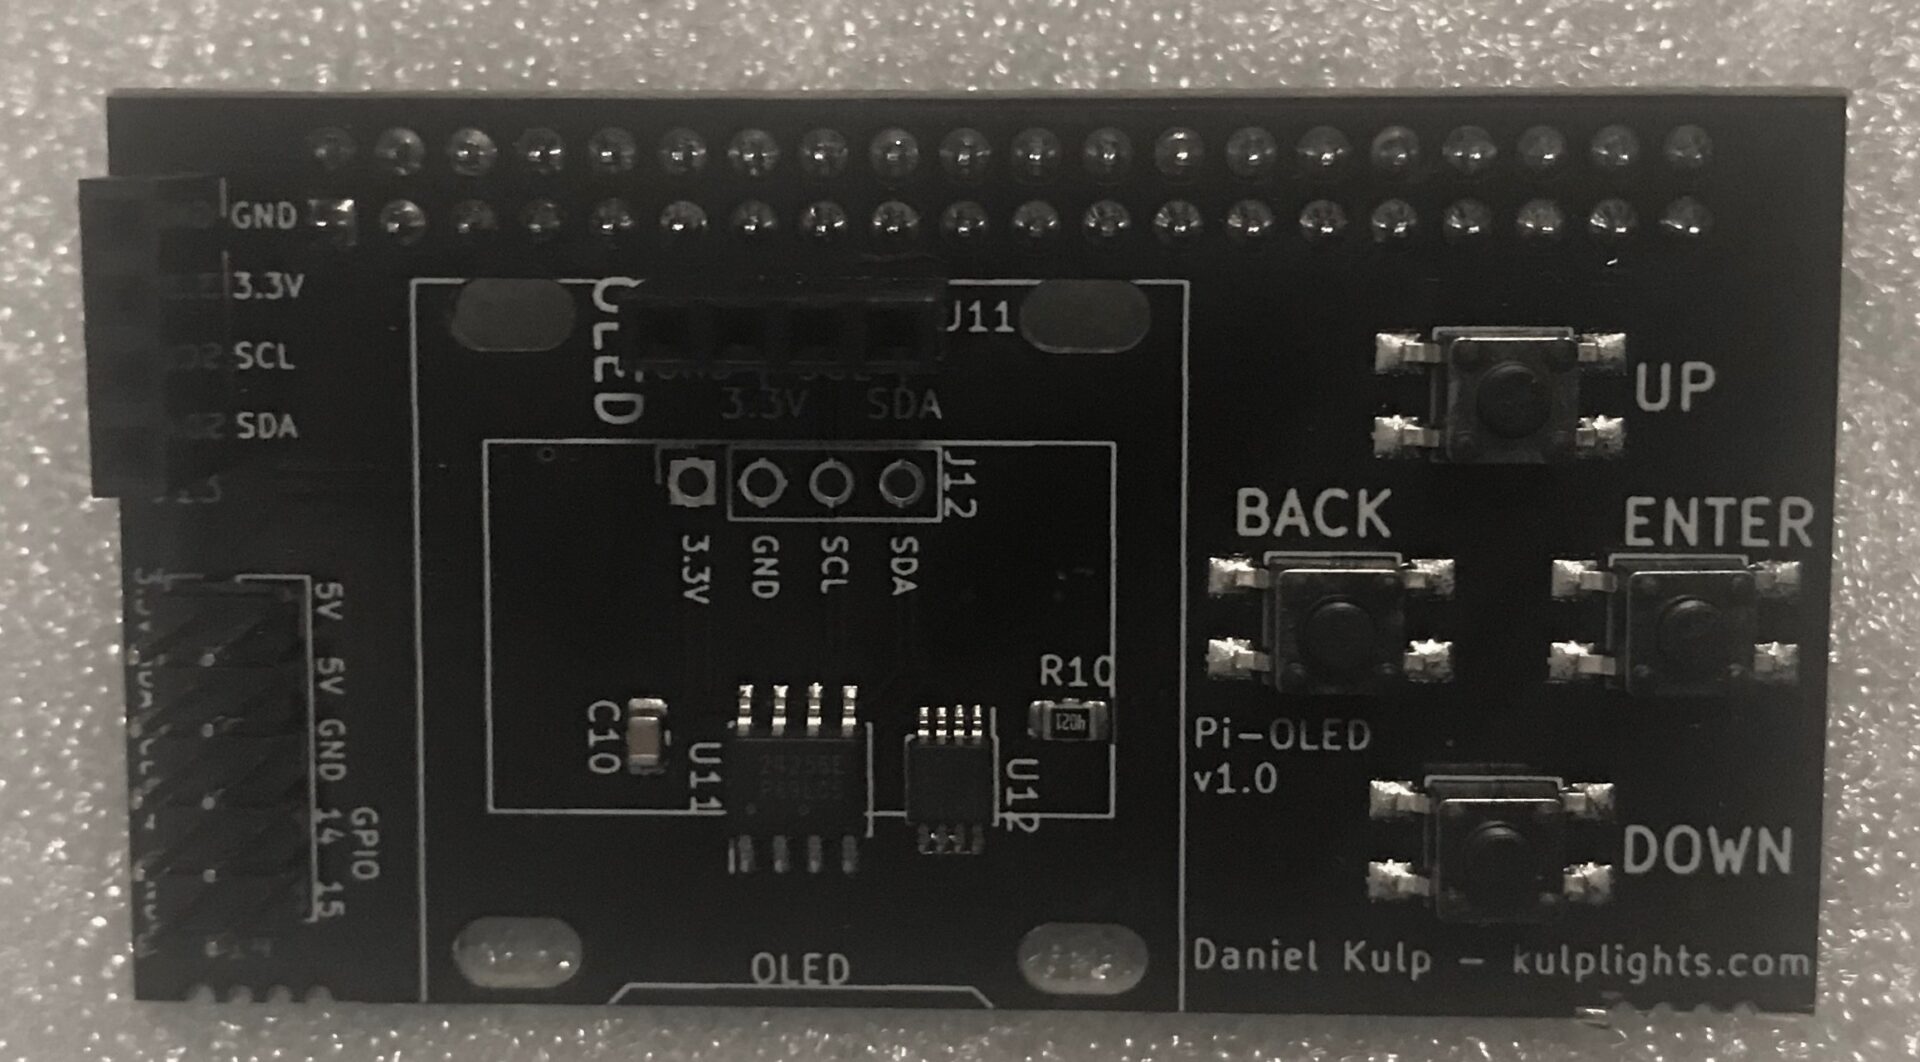
If you do want a more-elegant solution that includes selection buttons and additional headers, check out Kulp’s inexpensive Pi-OLED cap: