
Redneck Matrix Mark II
Important Notice
This site is no-longer being maintained, and the content and links found here may be irrelevant and outdated. It is online for archival purposes only.
As my holiday lighting plans continue to get bigger and bigger, I decided I should just go ahead and get an FM transmitter for music, which then requires a “Tune In” sign. Still not sure if I will actually do musical sequences (they are a lot of work and I’m running low on time), but at least I will be ready.
At any rate- I needed a matrix. I looked at P5 and P10 panels, and at pre-made plastic grid made just for this, but why go that expensive? I’m literally planning on putting this on the tailgate of my old pickup truck, so I think this will fit right in.
I’m calling this “Mark II” because I actually did make a small matrix when I first got into this. It was a bunch of pixel strips zip-tied together. It sort-of worked, but was unruly to deal with and just wasn’t practical.
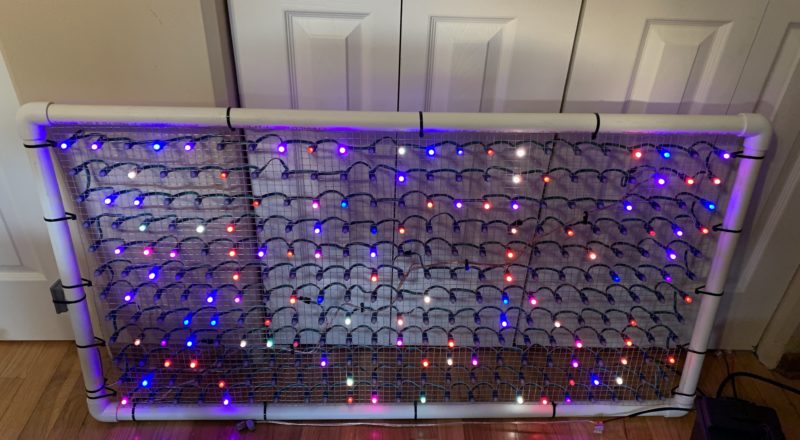
I want to say up front that this isn’t a new idea at all. There are probably thousands of matrixes built just like this out there. Fortunately I had the stuff on-hand to do it, so it was easy to throw together in a couple of hours. It’s obvious from the pictures, but all you need is some 1/2″ square hardware cloth/fence mesh (usually used to keep critters out of holes), PVC pipe and elbows, and a bunch of zip ties. And- of course- enough pixels for your matrix and a controller.
I had 300 pixels to work with, so decided to do a 12×24 matrix, which would be 288 pixels. So- I made a frame out of 1″ PVC, cutting the pipe to 24″ x 48″, which at 2″ spacing gives me the matrix size I want.
Unfortunately- I screwed up. While stretching and cutting the metal grid (which is not fun- wear gloves!), I ended up cutting it short on the long side, so I could only do a 12 x 23 matrix. Not a big deal.
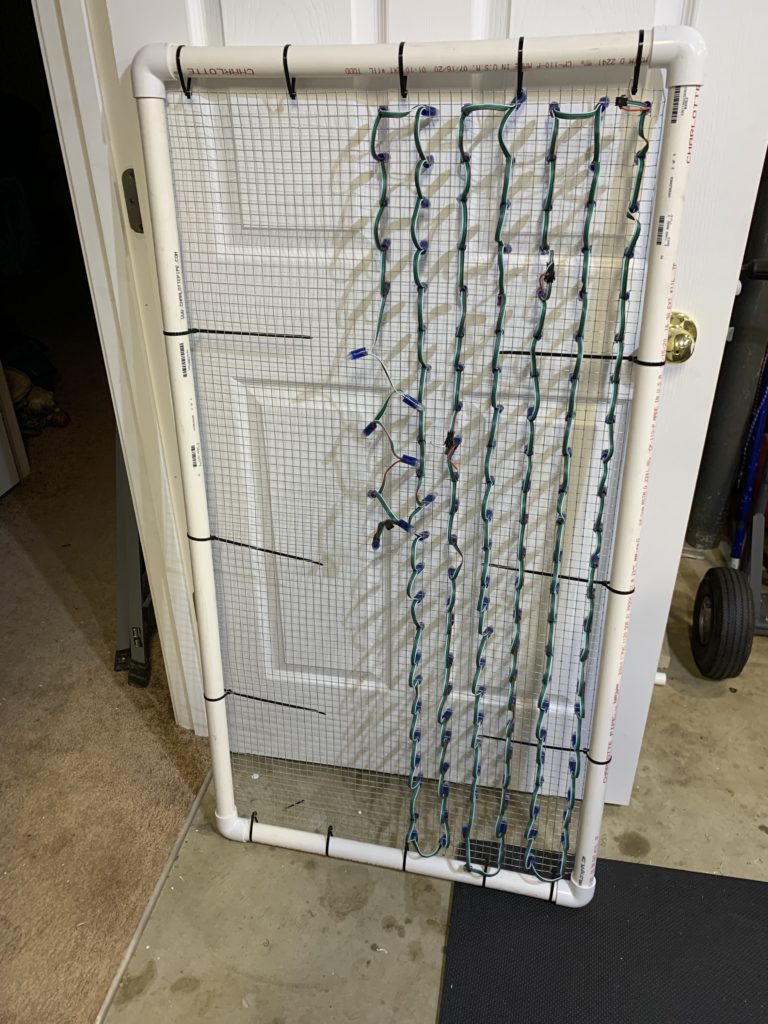
The pixels themselves slip into the 1/2″ squares really easily. (12mm is just a bit smaller than 1/2, and- round peg in square hole.) Because of this, it is necessary to pinch the corners of each square with a pair of needle-nose pliers to “lock in” the pixels. I decided this is actually more painful than pushing pixels (my hand still hurts after two days). If you can get it- use the plastic mesh I linked above.
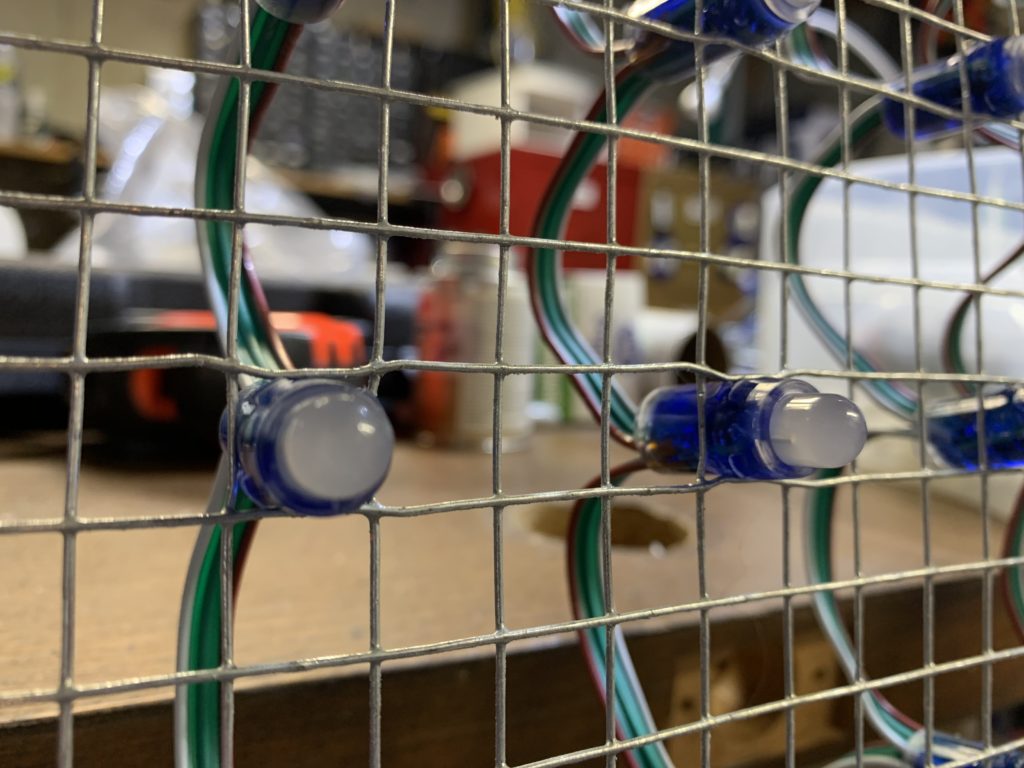
I’m thinking of supplementing this with hot-melt glue since some of the pixels still like to move around, and I don’t want to pinch them to the point that it will break the chips.
If you can find this stuff locally, I’ve been told it is much easier to work with than the metal mesh:
https://www.amazon.com/dp/B000HMA6W8
This is literally the ONLY plastic mesh that will work. None of the others have the right hole size. Trust me- I tried, and returned, several. My understanding is Home Depot has this stuff. Unfortunately the nearest Home Depot to me is about an hour drive away. That’s why I ended up with the wire mesh.
So, here is the end result:
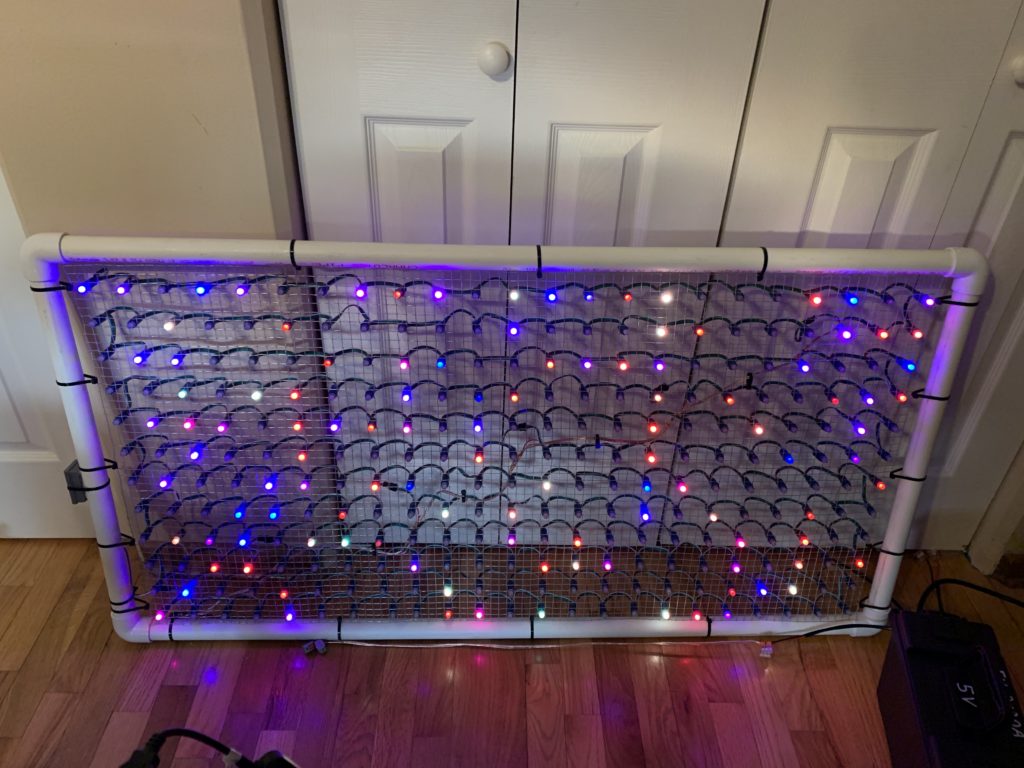
It doesn’t look like much, but at night and from 60-ish feet (on the street) it will be perfect. Here is a video of one of the “Tune In” messages:
At the beginning of each sequence- I display the FM frequency to tune to, along with the artist and title of each song. Once that is done- I display “matrix” sequence content (patterns, animation, etc.) Note- the white flashes are “sparkles”, and not errors.
Even though it was a bit of a pain to build, I like the design because it is as transparent as possible. This could work great in a window matrix as it will still let light in. It is also very versatile in that I can choose any spacing I want- close, 1/2″, 1″…3″, etc.