
Pixel Columns
Important Notice
This site is no-longer being maintained, and the content and links found here may be irrelevant and outdated. It is online for archival purposes only.
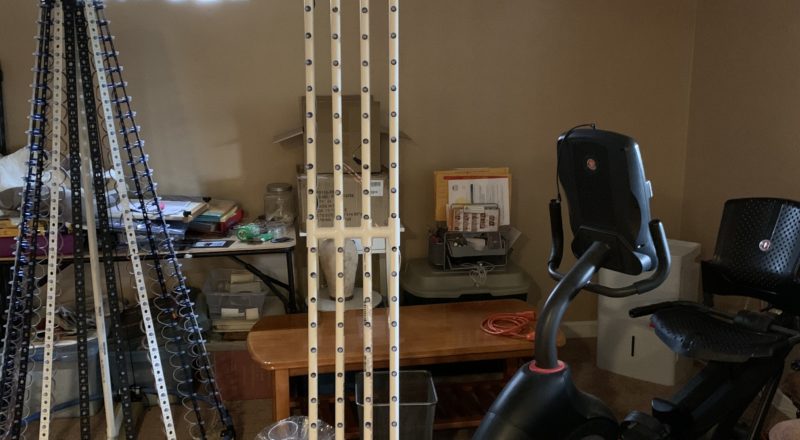
My house has three columns on the front porch, and I decided to light them up with pixels this year.
My original plan was to use pixel strips, but the strips themselves have been backordered and I wasn’t able to figure out a good way of mounting them, so I decided to go a different route. Of course- I’m using my favorite construction material- PVC pipe!
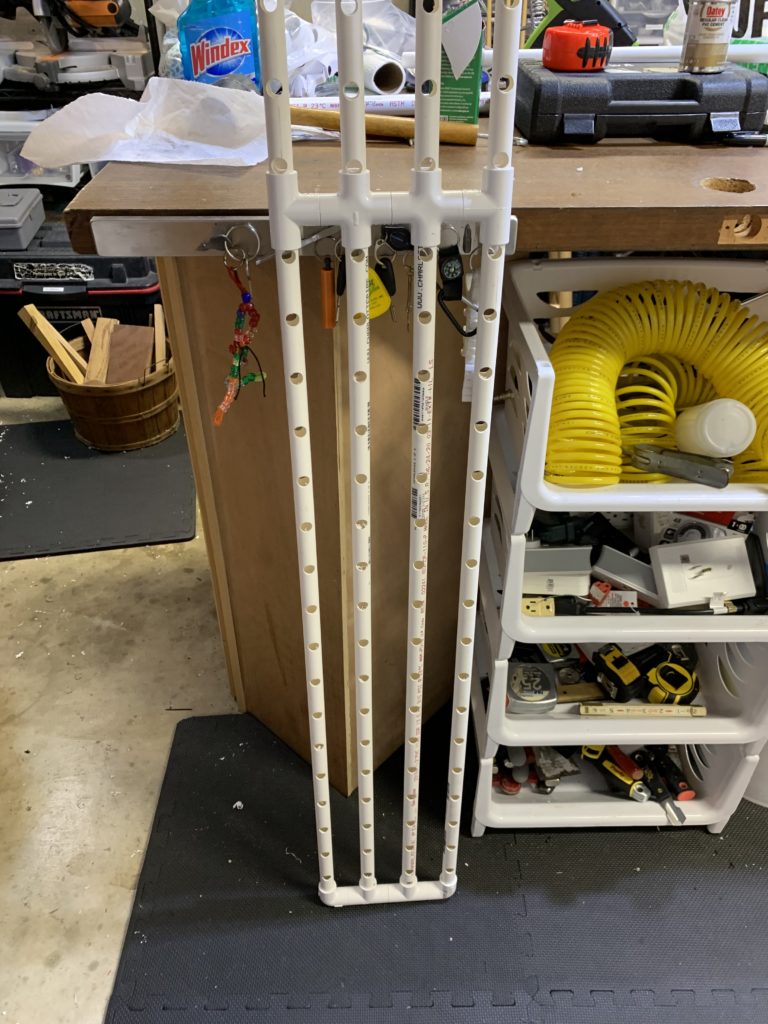
In this case- I’m using 1/2″ thin-walled PVC, although after building one- I will likely switch to Sched. 40. The thin-wall stuff is just too flimsy, and I’m concerned about any kind of longevity out of it.
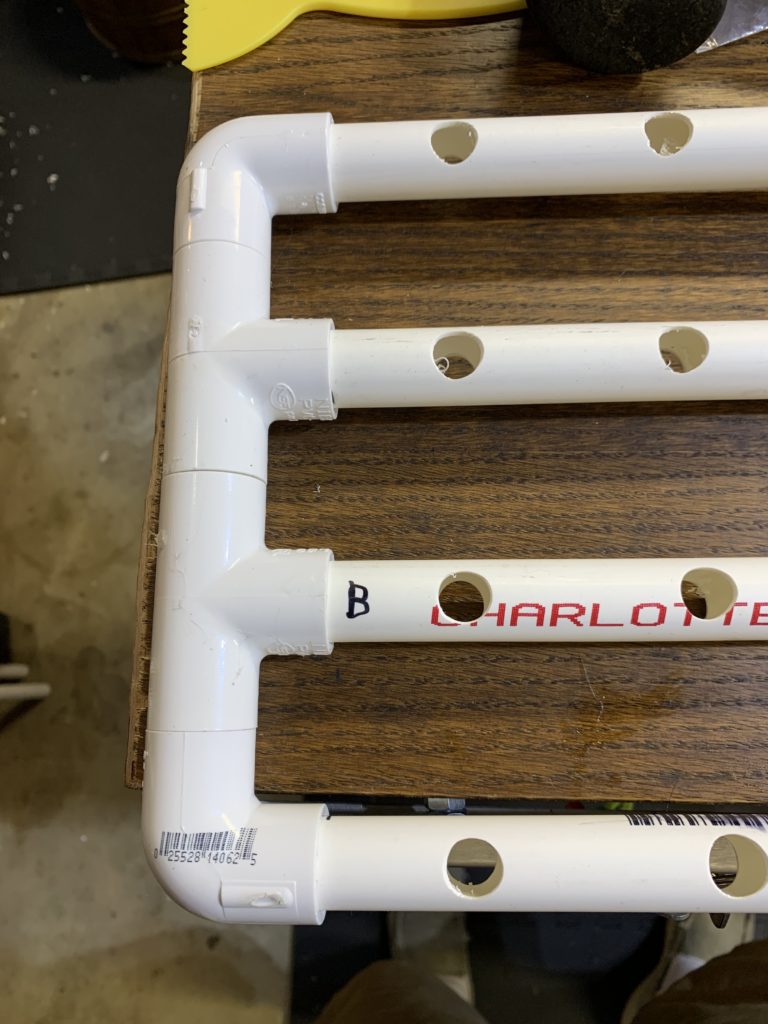
I figured out that the fittings spaced the pipes 2.5″ apart, so I had planned on using 2.5″ spacing for the pixel holes on the pipes to keep everything nice and even.
I made a jig, similar to the one I used here:
Peace Stakes
I used a 1/2″ Forstner bit in my drill press. I chose to use this over my usual step bit because the step bit wouldn’t travel far enough to drill all the way through with my drill press and jig, and I didn’t want to drill everything twice.
Of course- I made a mistake…
While building my jig, I used a really old square to measure my hole spacing, and somehow manage to space the holes 2.25″ apart. So- the vertical spacing is a bit smaller, BUT I ended up getting three more rows of pixels than planned.
I also tried to make sure one side of each drilled pipe didn’t have any writing on it, but I messed up installing one of them- so I have one section with red letters on it. It won’t show up at night though. 🙂
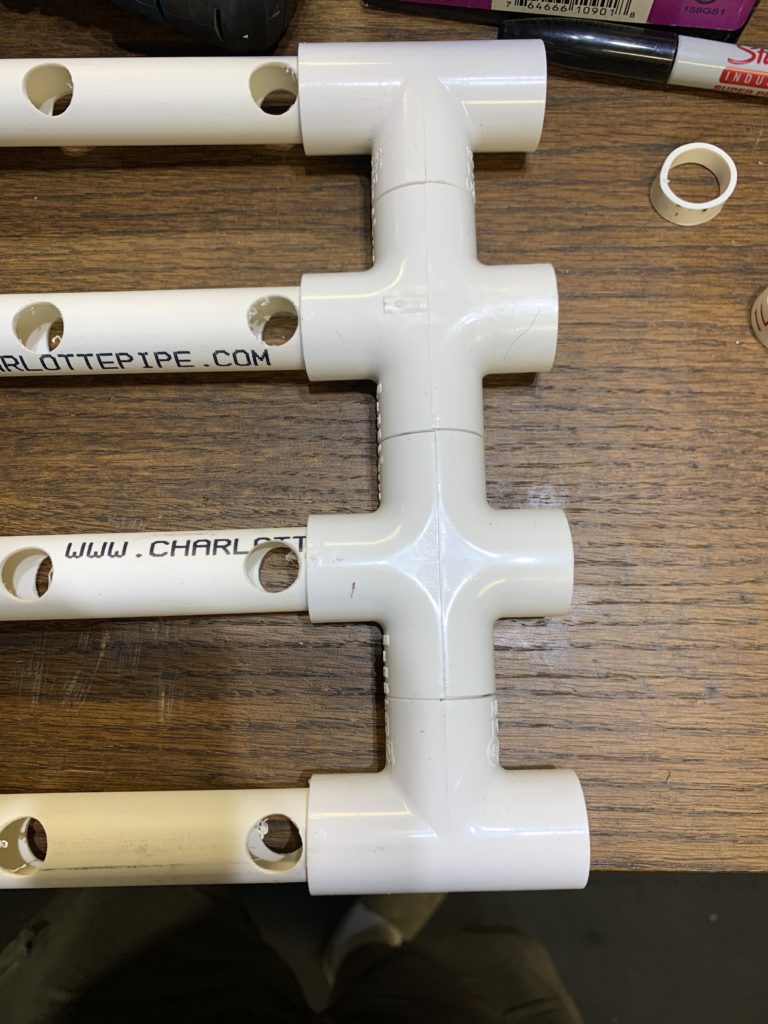
I wanted to make it collapsible for storage, so I built a middle section using Ts and crosses. The bottom half is glued, while the top half is just press-fit. This allows me to separate the two sections and fold them up (with the pixels in them) for storage.
The problem with the 2.25″ vertical spacing I accidentally did is in the junction in the middle. Because of the size of the fittings- there is 2.5″ spacing there. From a distance- it isn’t very noticeable though. They will be roughly 50′ from the street.

The pixels go in pretty easily. I may actually hot-melt some of them that are looser than others.
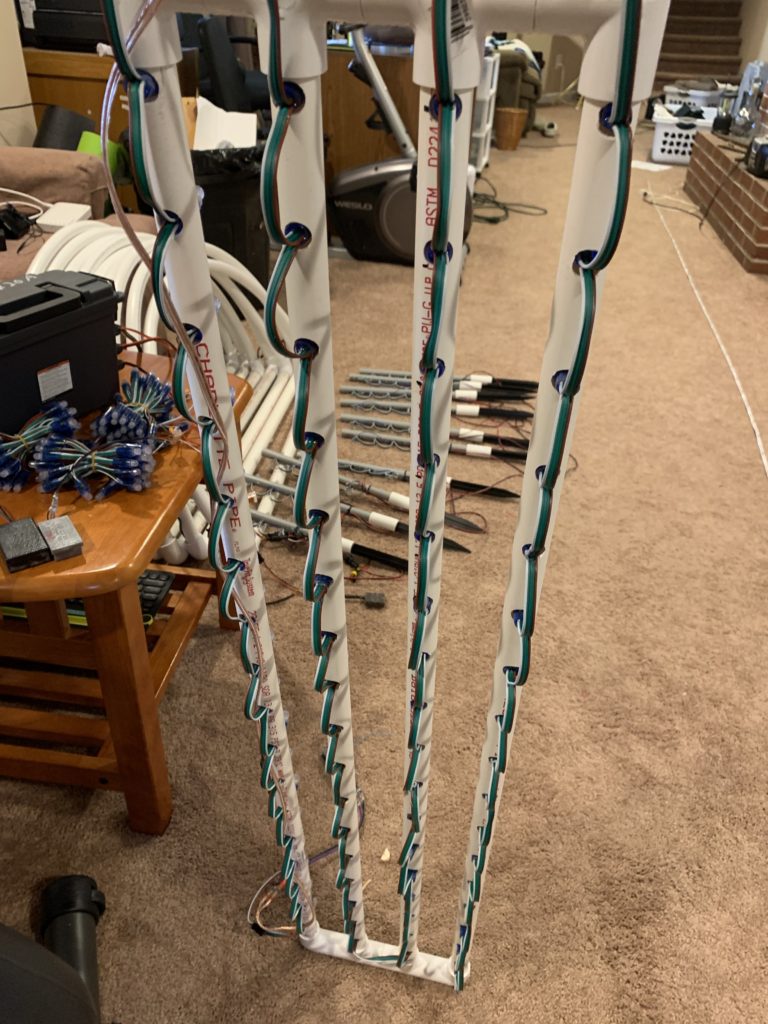
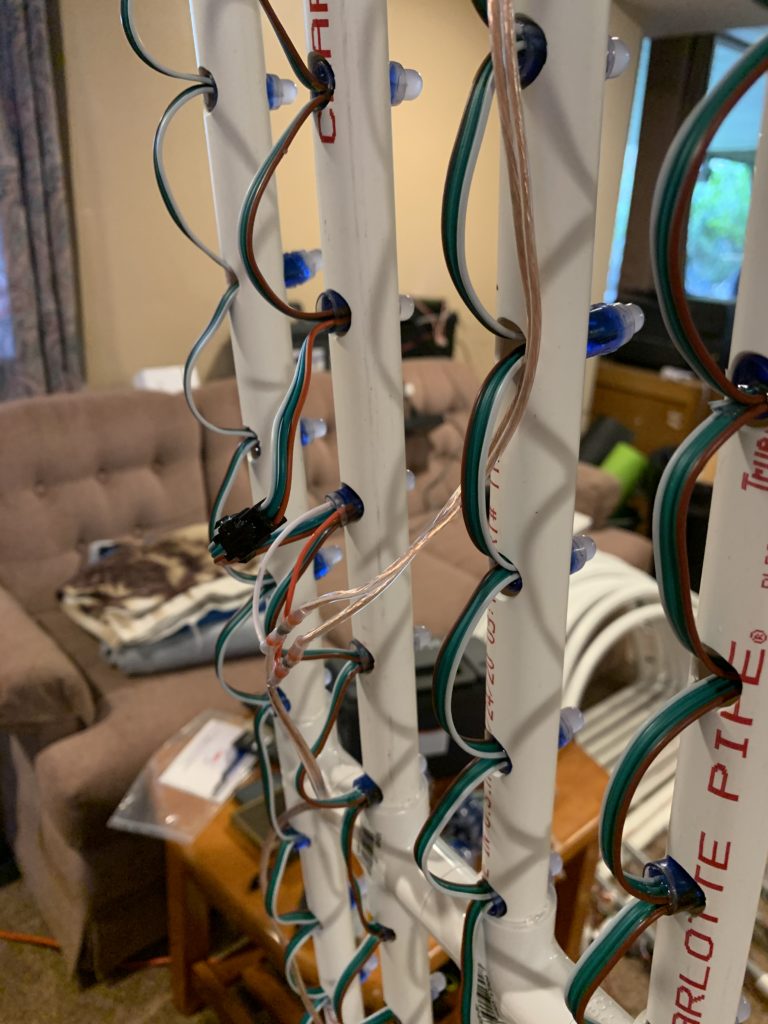
The pixels I buy have JST connectors and power injection wires already installed- so I just have to connect them together and supply power to the extra wires. This way I’m sure every strand of 50 5v pixels has plenty of power. I just dielectric grease in the JST connector to make them reasonably waterproof, and of-course solder-seal connectors for the power wires.
At the bottom- I have an X-Connect pigtail that connects to a controller, and an automotive-style power connector for power. (Similar to my other “props”.)
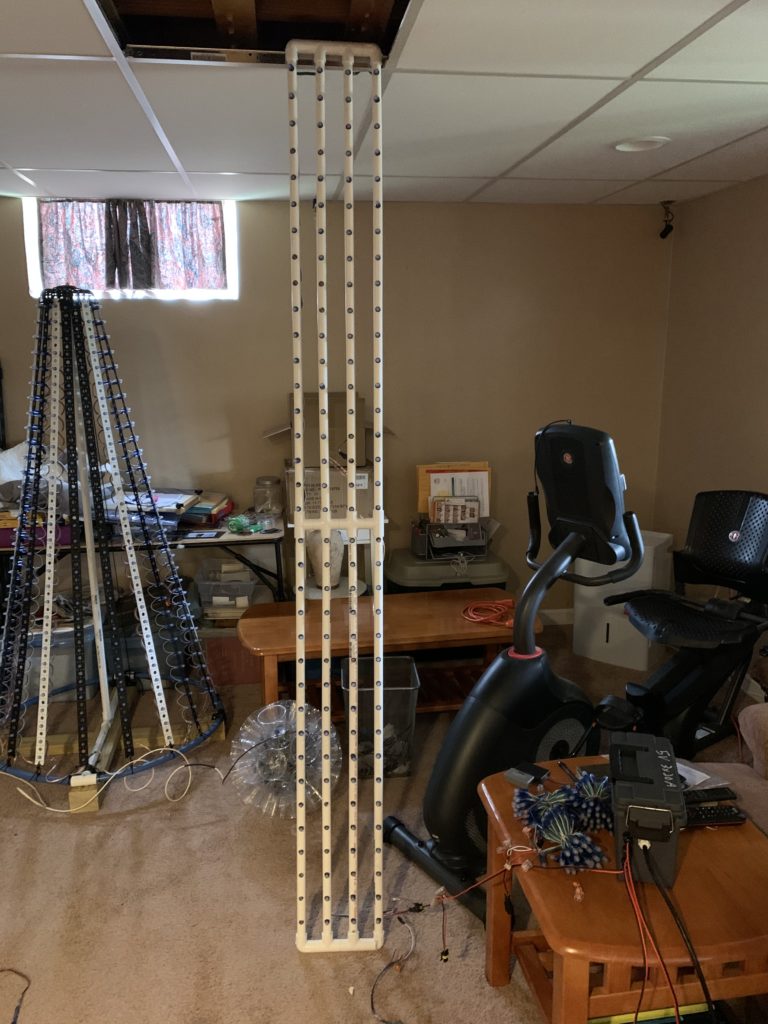
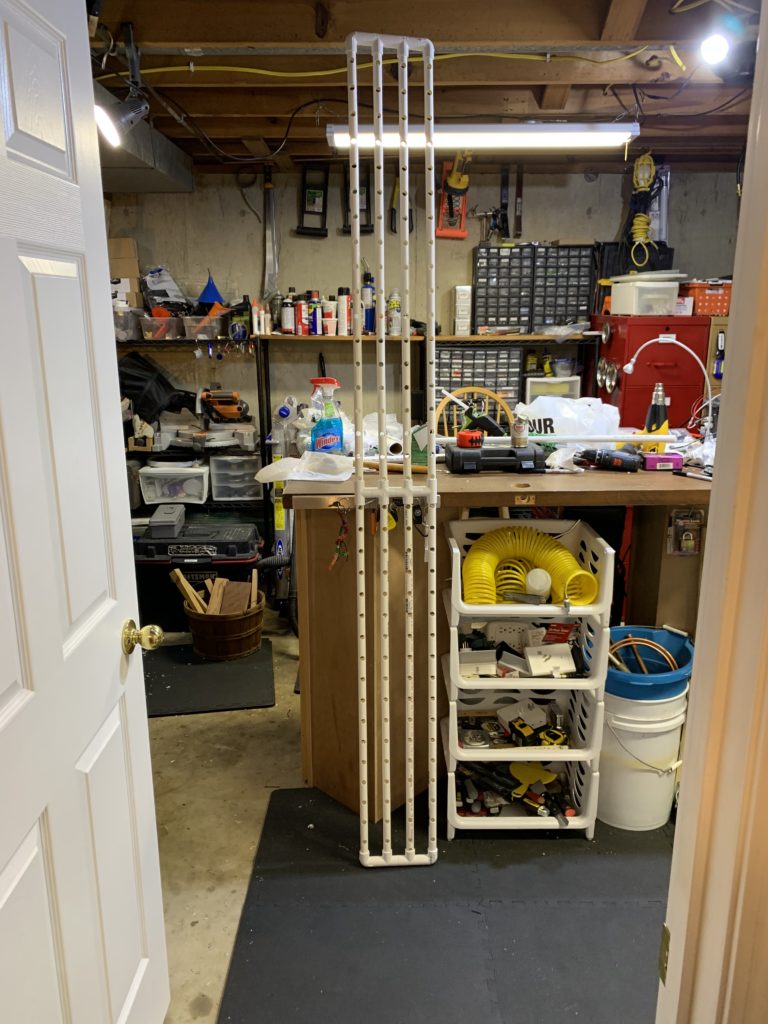
(Please ignore the messy basement.)
Here is a quick video of the column in action..
I’m pretty happy with how it turned out. I can separate it in the middle with the pixels attached to fold it in half to store. I should be able to fit all three of them in a larger tote, along with some other props.
I still need to build two more, and as I said earlier- I will probably make those out of Sched. 40 so they aren’t quite as flimsy. If that goes well- I may re-do this one. If that’s the case- I’ll try to re-use the drilled pipe as Pixel Sticks/Poles or maybe a variation of the Peace Stakes.
To mount them to the columns- I’m just going to use extra-long heavy-duty zip ties.