
HP Aruba Instant-On 1930 24G Fan Upgrade
Important Notice
This site is no-longer being maintained, and the content and links found here may be irrelevant and outdated. It is online for archival purposes only.
I’ve been preoccupied this year with trying to find a new job and trying to take care of things around the house without spending any more money, including limiting work on Oak Hills Lights. I hope to post more builds and updates later in the year, as our Halloween setup date draws nearer. I did spend $15 on this project though as it has made a huge difference in our network, which runs Oak Hills Lights, so it does tie-in. 😊
I’m using mostly HP Aruba Instant-On hardware for our network. One of the Ethernet switches is an Aruba Instant-On 1930 24-Port Gigabit switch. These switches have a big problem, in that they are outfitted with the loudest cooling fan I have ever encountered in a piece of network hardware. Running one of these in our basement, I can hear the fan throughout most of the house. This isn’t as much of an issue in a commercial environment where they are running in an isolated computer/equipment room with a bunch of servers and other hardware, but it’s a big problem in a SOHO environment. It wouldn’t even be possible to run one of these in the same room as an office- you wouldn’t get any work done because of the noise!
I found this video which demonstrates to some extent how to replace the fan, and shows the noise difference between the factory fan and a Noctua fan.
The fan used is a Noctua NF-A4x20 PWM, Premium Quiet Fan for Server, 4-Pin (40x20mm, Brown). You can order one from Amazon here: https://amzn.to/3ViyMaQ (Affiliate Link)
Noctua fans are very well known for their quietness, and are used extensively by PC builders/modders, and 3D printing hobbyists. I suspect almost any “quiet” fan with the same specs would still make a huge difference over the factory fan, but I went with the same fan recommended in the video. Just be sure it is a 12v, 4-pin PWM fan.
The video itself is a bit light on some details, so I thought I would add some of my own notes/comments…
Obviously you should disconnect the power before opening the switch up!
The case is held together with about a dozen tiny 3mm screws. They are all the same, which is kind-of refreshing. Just undo every screw you can find on the top, sides, and back. There is one above the plug housing that is easy to miss. You should then be able to easily slide the top case back about 1/4″ and then you can just lift it off. As noted in the video, there are no warranty stickers or other “security” mechanisms, again-refreshing.
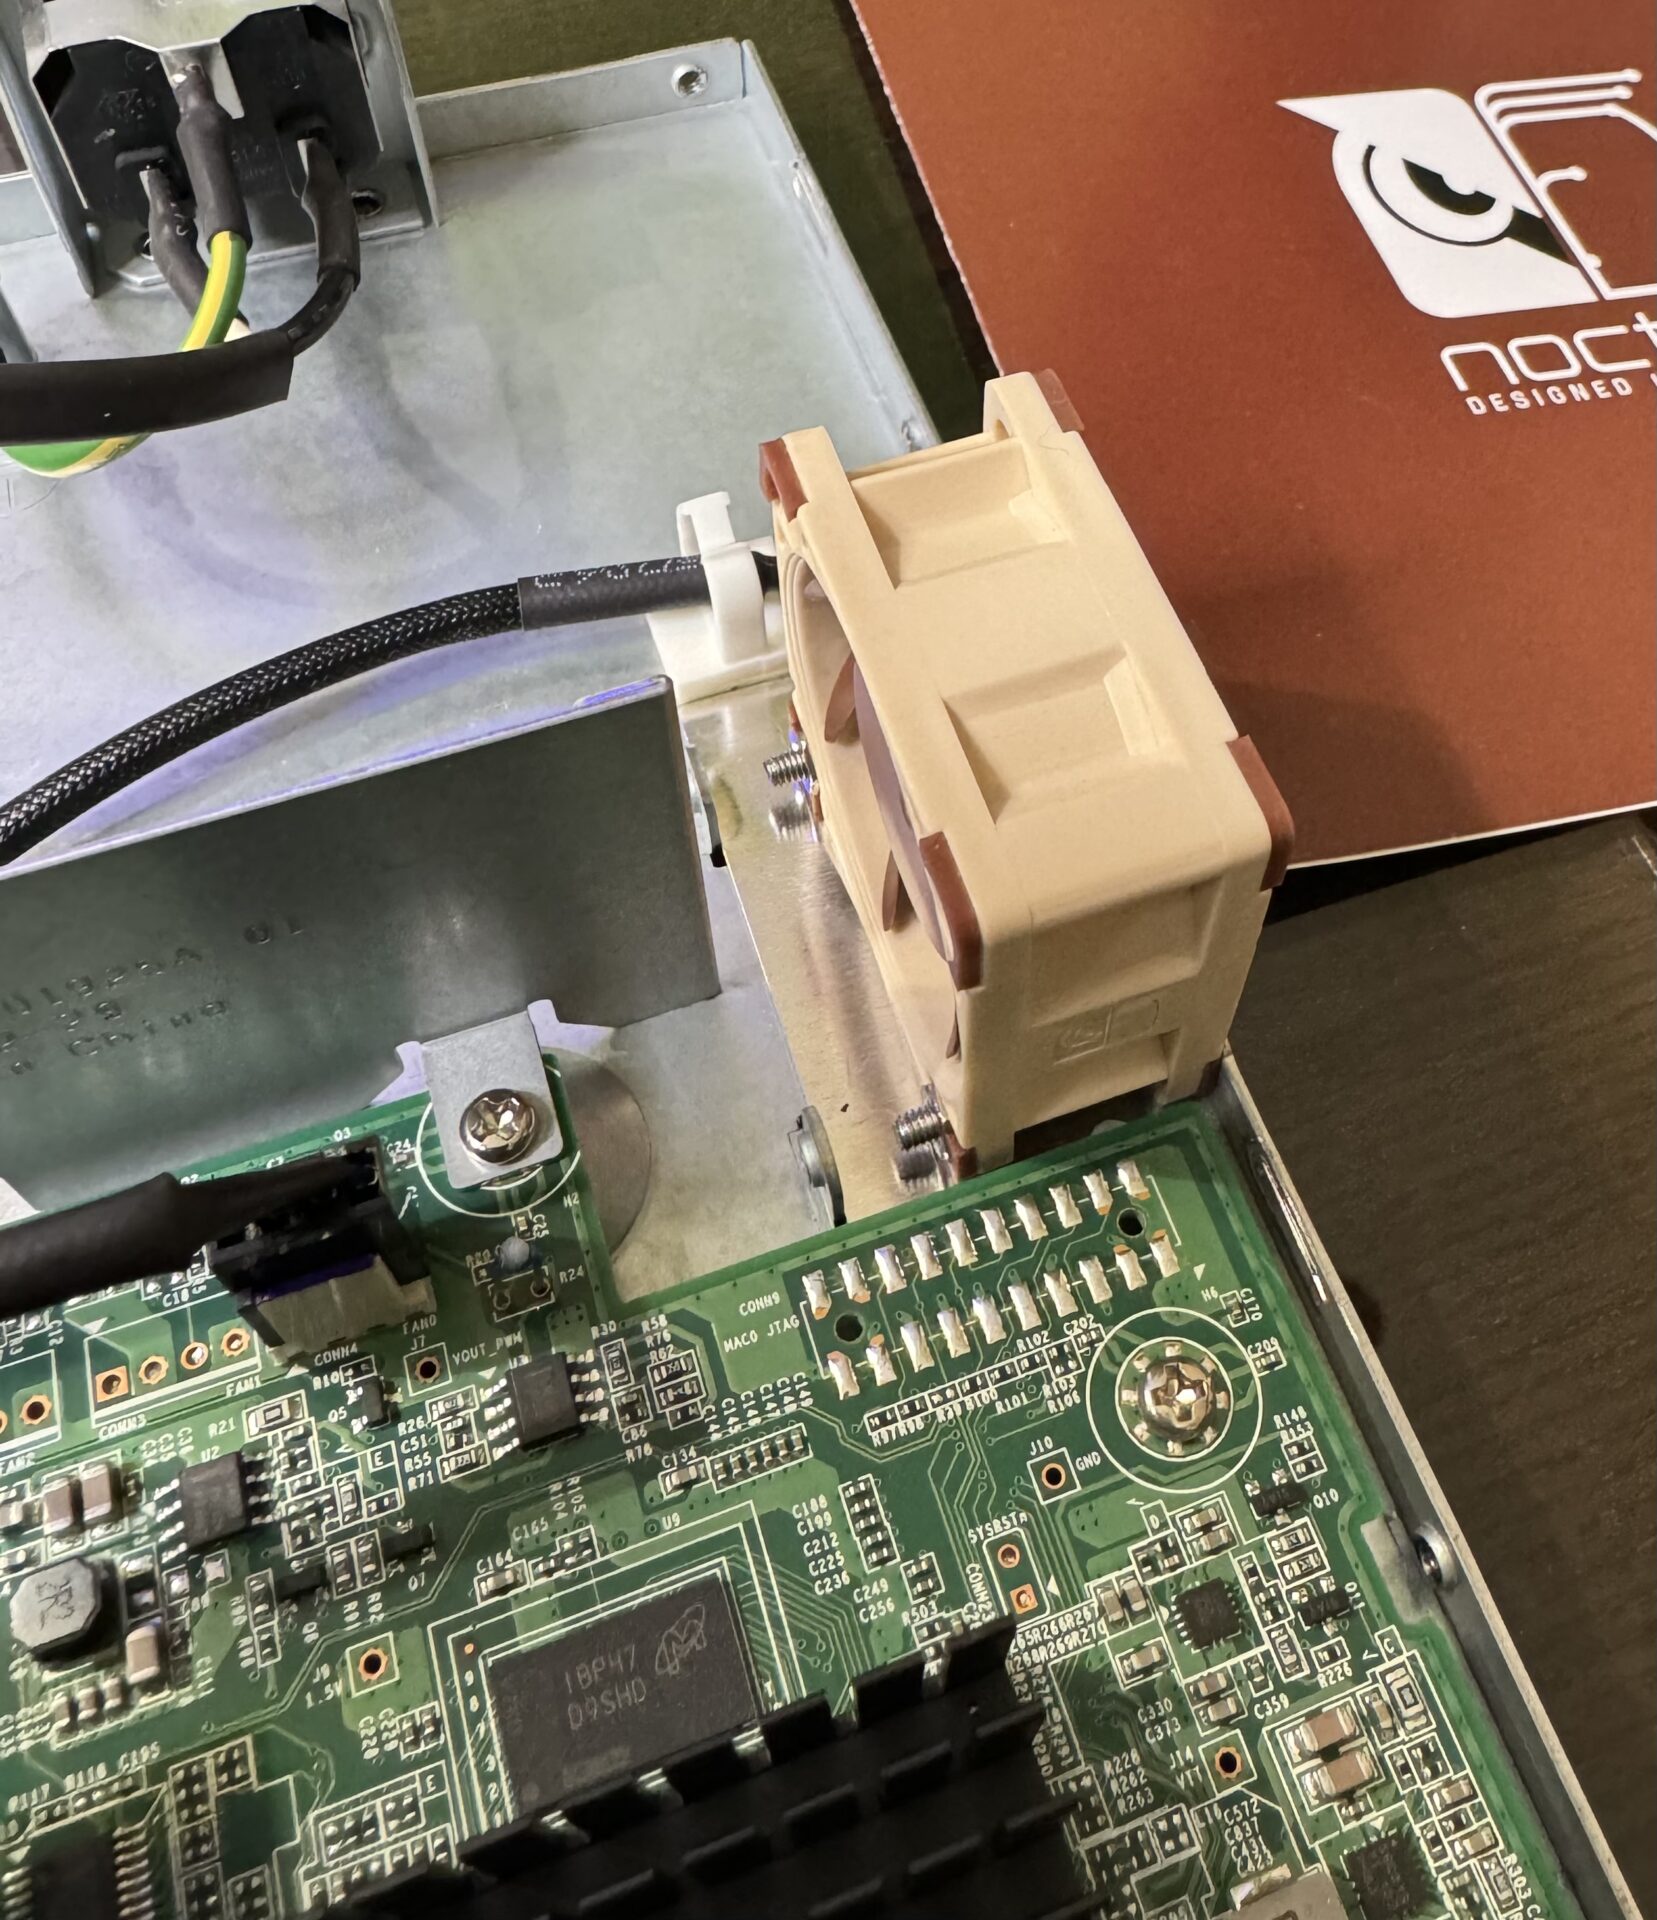
When removing the old fan, you will find that there is a metal baffle going across the case that traps the fan cable. It is easy to remove- just a screw on either end. Then, just unplug the old fan, remove the two long screws holding it, and remove it.
You need to clip one of the plastic ribs off on the Noctua’s connector with a close-cutter to be able to plug it in. Keep the outside rib in-place as it will help insure you plug it in the right way. Just look at the factory fan’s connector and the Noctua’s and you will see what to do. When in-doubt, the wires use the exact same PWM color code as the factory fan.
In the video, he used some kind of PCB standoffs to help keep the fan in-place, since it is quite a bit thinner than the factory fan. All of my standoffs are 2mm, so they wouldn’t work. I just used a couple of shorter 3mm screws and nuts to mount the fan securely to the outside edge of the case. You can see them in my picture.
I did not use the resistor cable that he mentions (that comes with the Noctua fan). I just plugged the fan directly into the mainboard and routed the cable under the baffle, the same way the factory one was. While I’m sure the resistor cable quiets the fan down even more, I still wanted good airflow through the case. The fan is still almost inaudible, and is much quieter than my other network devices with fans now. I might actually start replacing all of the fans!
The upgrade took all of 15 minutes, and most of that time was spent trying to find two screws that I dropped.(!) This upgrade is very-very well worth it. HP’s Aruba IO hardware is outstanding, and really this is the only thing “wrong” with what is otherwise an excellent piece of hardware. Of course, I am saving the factory fan in case I ever sell the switch or it needs service, but I doubt that will be a problem. HP builds solid hardware, just in this case- the fan is a bit too solid, er, industrial.
This is what the completed upgrade looks like:
