K16 Mega Tree Controller Rebuild
Important Notice
This site is no-longer being maintained, and the content and links found here may be irrelevant and outdated. It is online for archival purposes only.
This year we were going to expand our Mega Tree to 150px x 32, but fell back to 75px x 32 for, reasons. In any case- I need to use all 16 pixel ports for the tree now, with two strands per port. In preparation for doubling the vertical resolution in the future, and to better manage things this year, I decided to expand the power capacity of the K16 control box, which is a large Harbor Freight Apache Case.

I had to stack two power supplies where each one was before, so I 3D printed two sets of mounts similar to these:
https://inspirelightshows.com/product/meanwell-lrs-350-mounting-rack-stl/
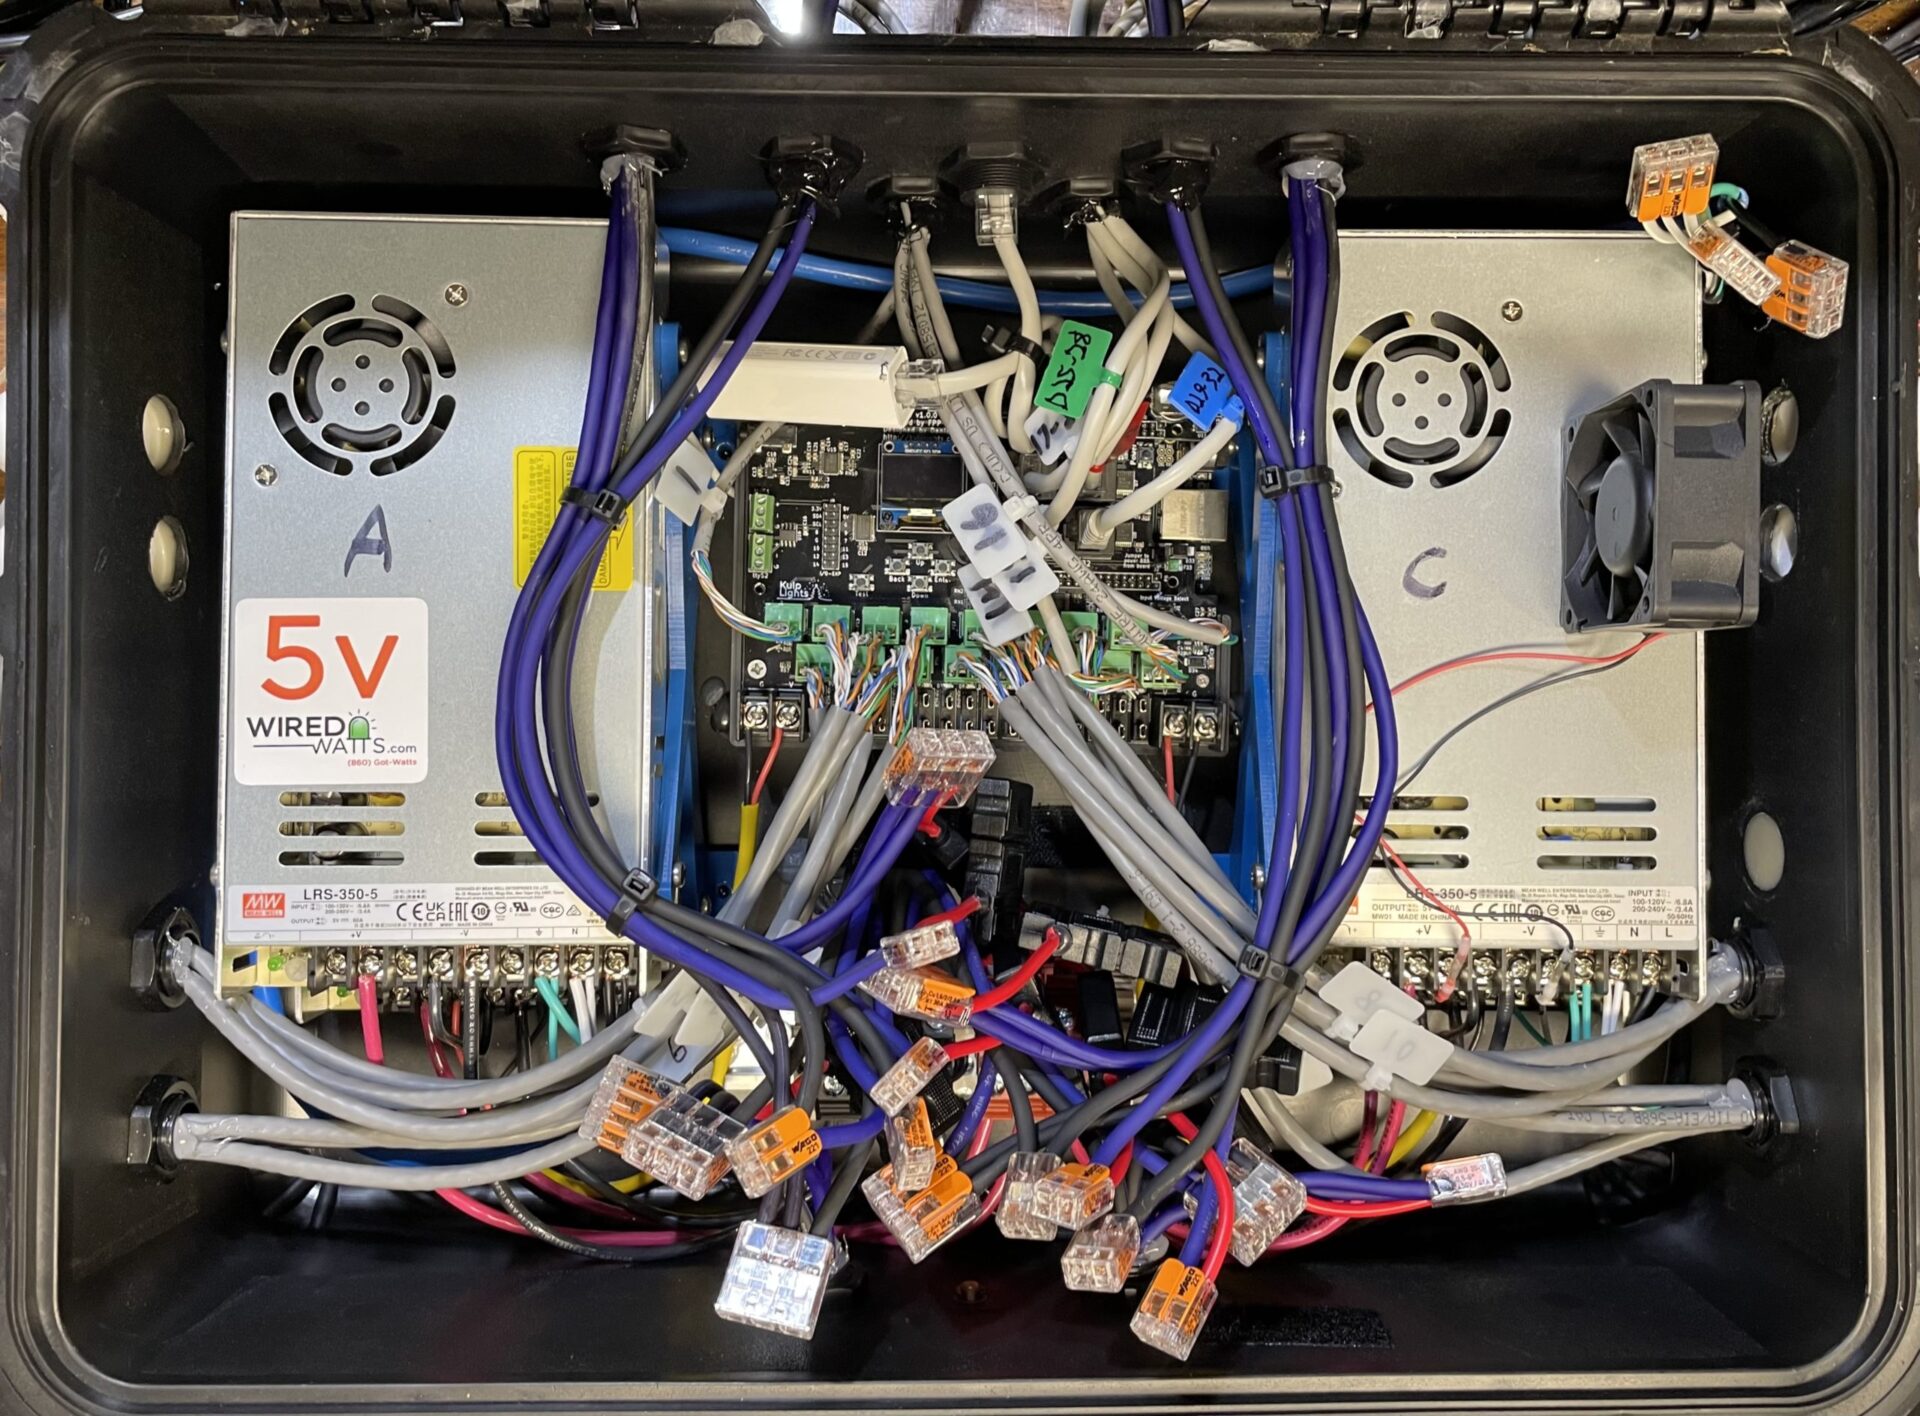
I used the existing hook and loop as well as epoxy on the mounting feet to place the stacked PSUs in the same locations they were in before. Most of the pixel data lines and power injection cables from previous years are literally glued in, so I had to work around them. Because of the feet on the mounts and the extra width, I ended up with less room in the center than before. The K16 controller just barely fits now and there is no room to connect the network jack. Fortunately I had an old Apple USB Ethernet adapter, which works just fine for this. It is connected to the BBB’s USB port, underneath the board. The mount had just barely enough room for it.
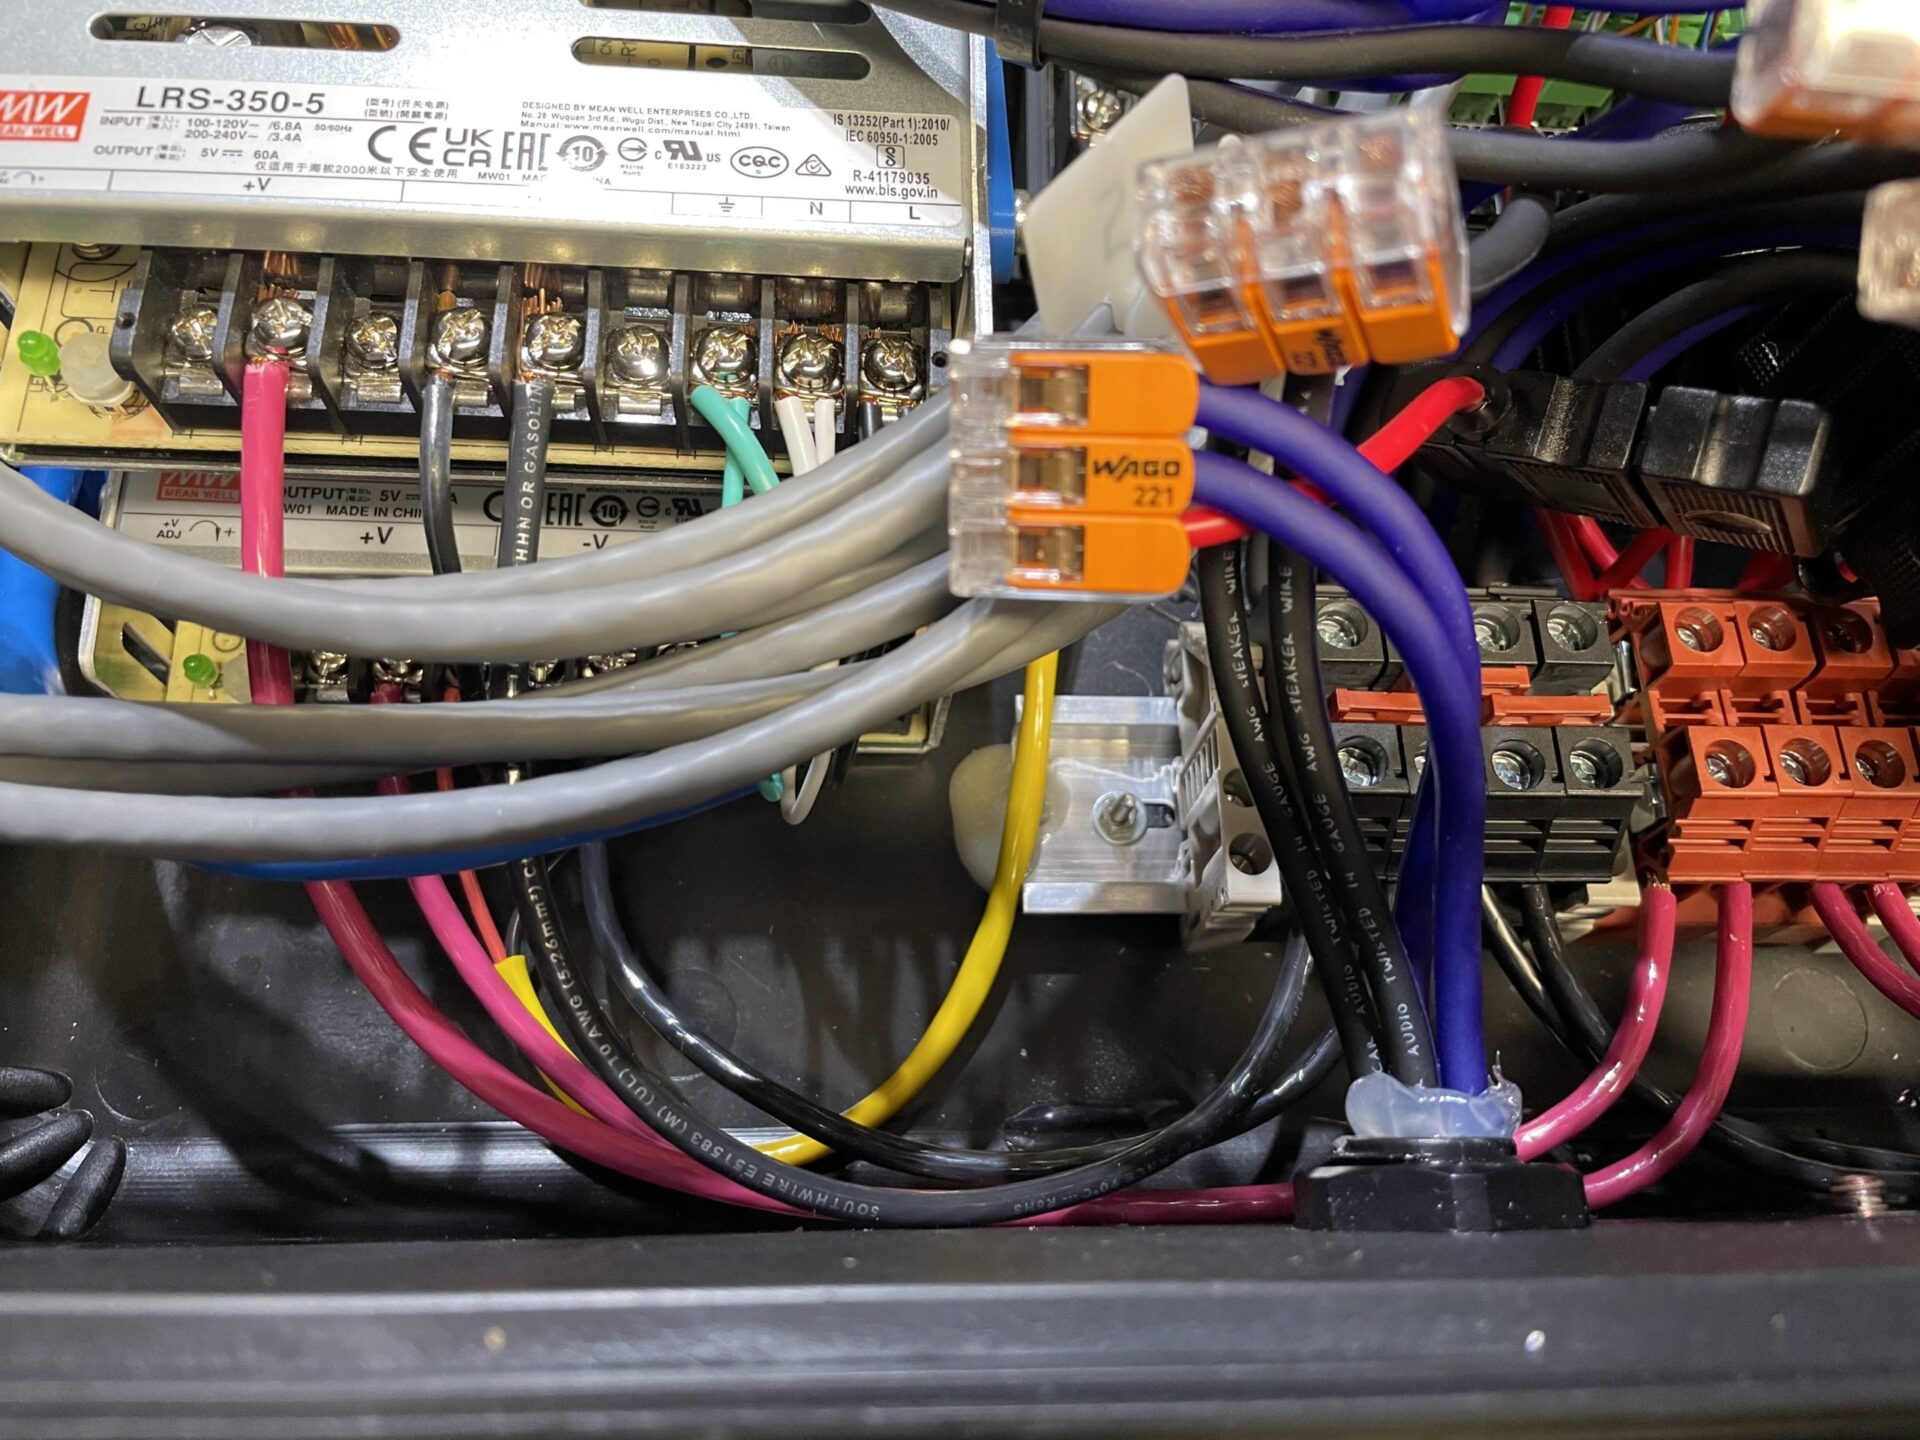
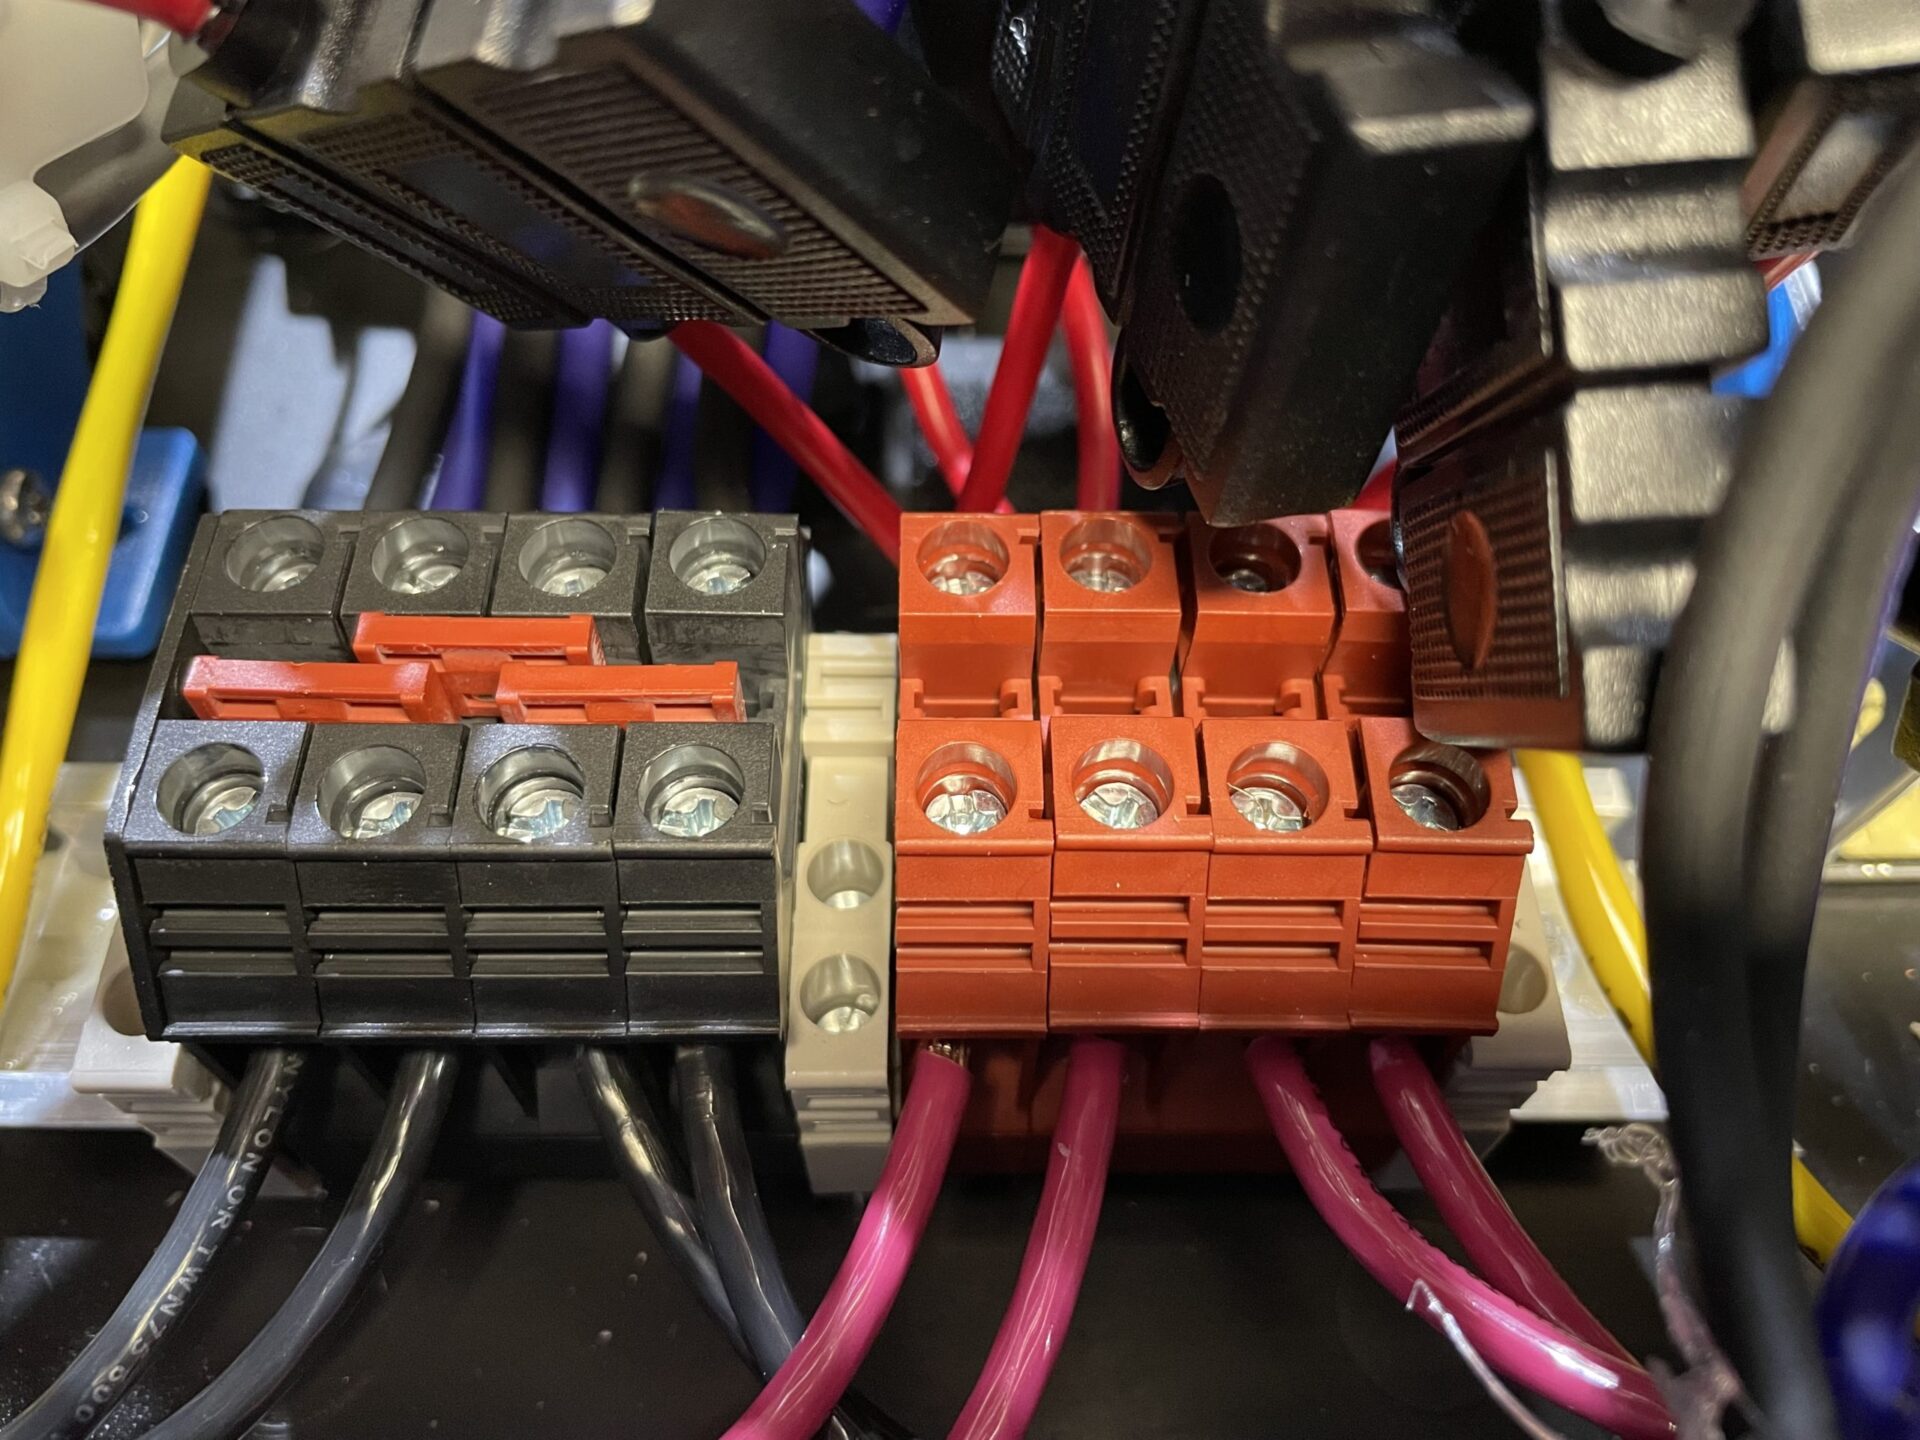
I also got rid of the cheap screw terminal bocks I was using, and installed some beefy 60A DIN-mount distribution blocks instead. They are connected to the PSUs using 10 AWG stranded THNN cable. The negative blocks are connected together, and I also have them tied together between the stacked PSUs. It’s very important to bond all of the negative terminals as the data signaling used by pixels is Data to Ground/Negative.
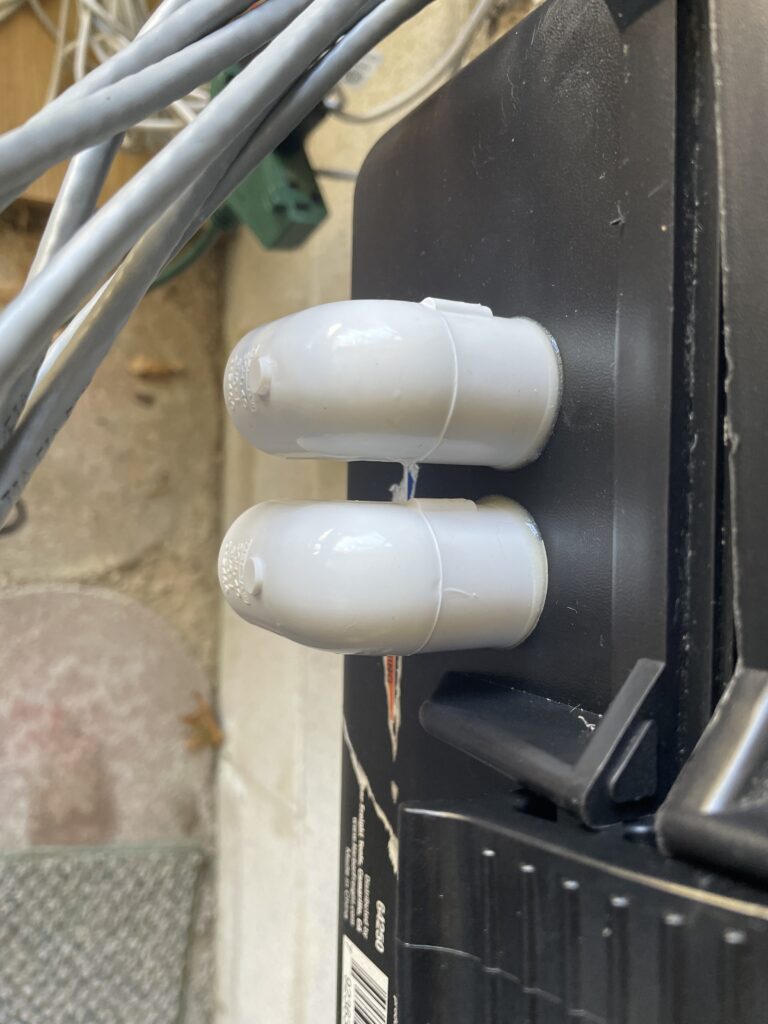
I also had several large holes that were now blocked by the higher PSU assemblies. I decided to get creative! I wanted some kind of ventilation with the extra PSUs and decided to use what I had on-hand for vents- I just covered four of the holes (2 on each side) with PVC elbows! I attached them with plastic epoxy right over the holes in the case. They look funny, but they work. I glued some window screen over the holes inside to hopefully keep any critters or bugs out. I might spray-paint them, but the case lives under a tarp anyway so nobody will see them.
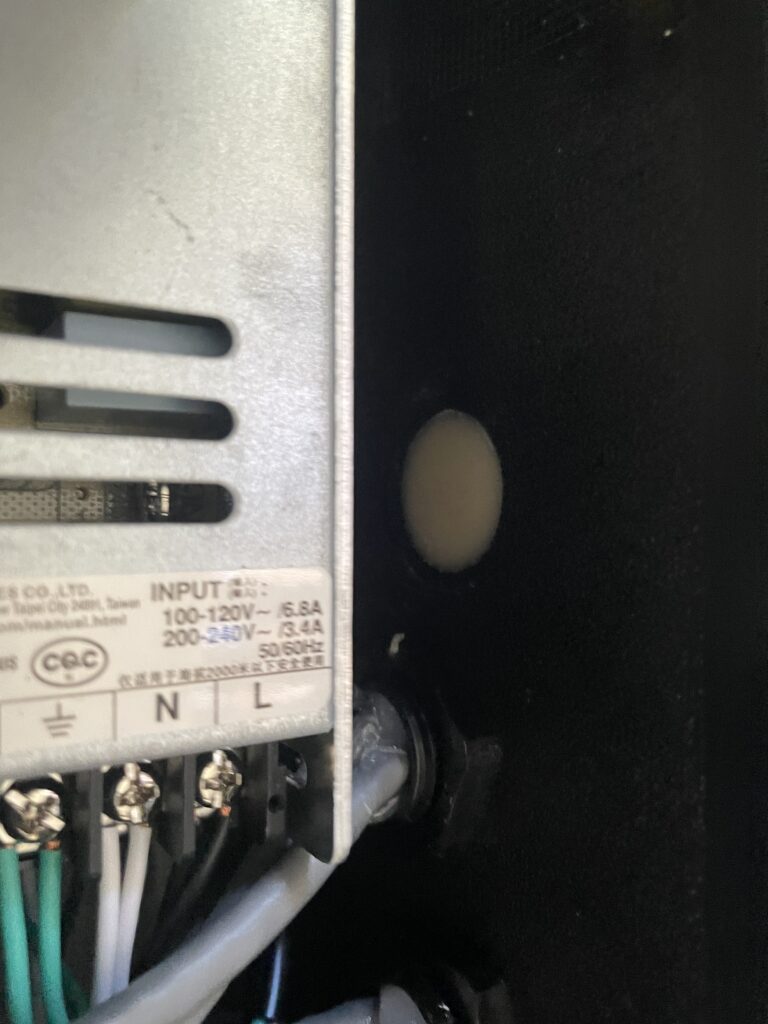
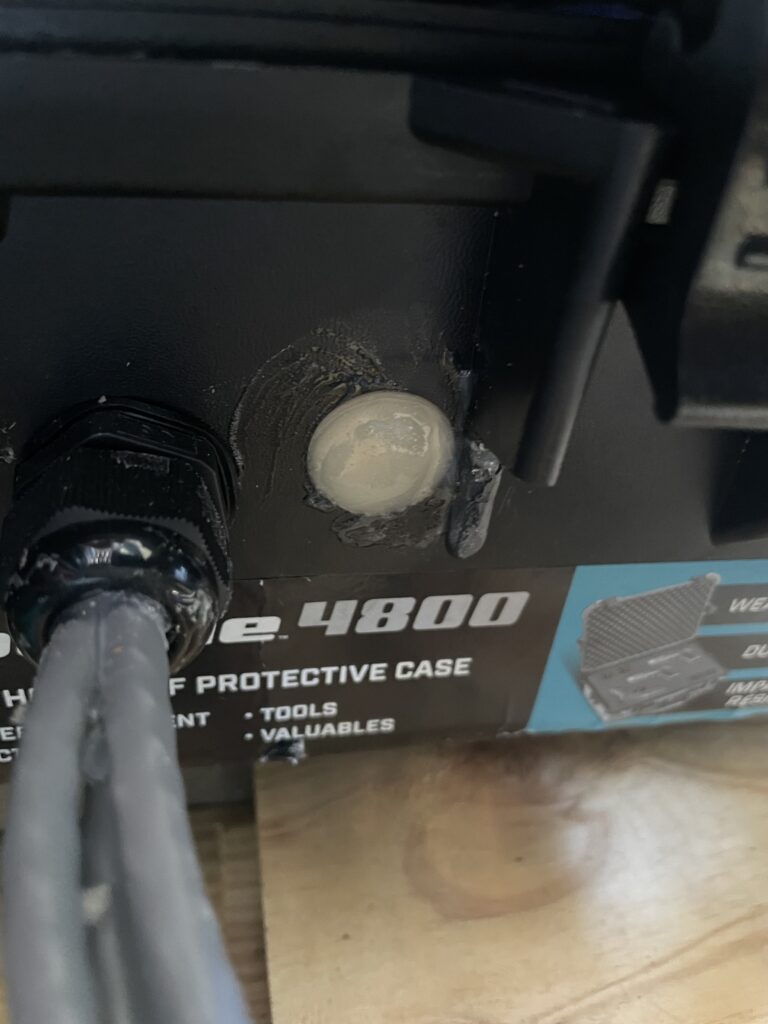
I still had another hole to fill in somehow. The easiest way, which looks pretty good too, is to just tape over one side and then fill them in with epoxy. Once set, the tape comes off and leaves a nice flush plug. I’ve used this on several other boxes now to salvage them for re-use.
Here is what the completed controller box looks like. It’s messy mostly because of the in-line fuses that I used. There wasn’t enough room to put fuse blocks in the middle, and I was working with what I had. I’m not sure how much heat the extra PSUs will put out once it is in operation. Hopefully my PVC elbow vents will help. I had an extra 5v fan that I just stuck on top of one of the PSUs to circulate air. It creates enough of a pressure differential to pull air in from the vents on the left and exhaust it out the right.
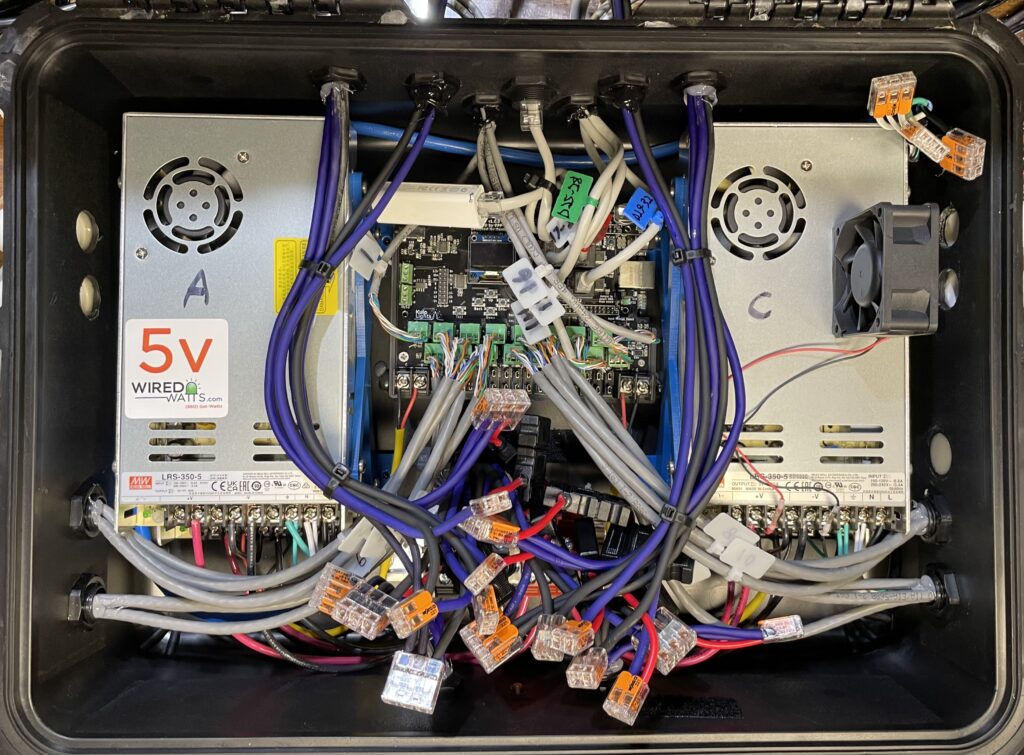
The 16 pixel ports will each run two strands of the Mega Tree, and I have power injection at the top and bottom of each. Each PSU is handling 8 strands, and will be able to handle any tree expansion in the future. The differential ports will be running other elements of the show around the tree. Eagle eyed pixel enthusiasts may have noticed that I pulled all of the fuses out of the K16 controller. To avoid any possibility of crossing the positive lines between power supplies on the tree, I’m only running ground and date on the data lines. All power runs through power injection. It’s just a safer way of doing it, and is similar to how differential runs work as far as power goes. The pixel ports on the controller don’t have enough power capacity for this anyway. In the future I might just put the K16 on it’s only little PSU so it can be powered independently. For now it is still powered from the two bottom PSUs.
Not shown in this picture- I also added an LED through the top of the case, connected to PSU A since it was handy. This gives me a power indicator. It’s just a 5mm white LED with a 640-ohm current limiting resistor.
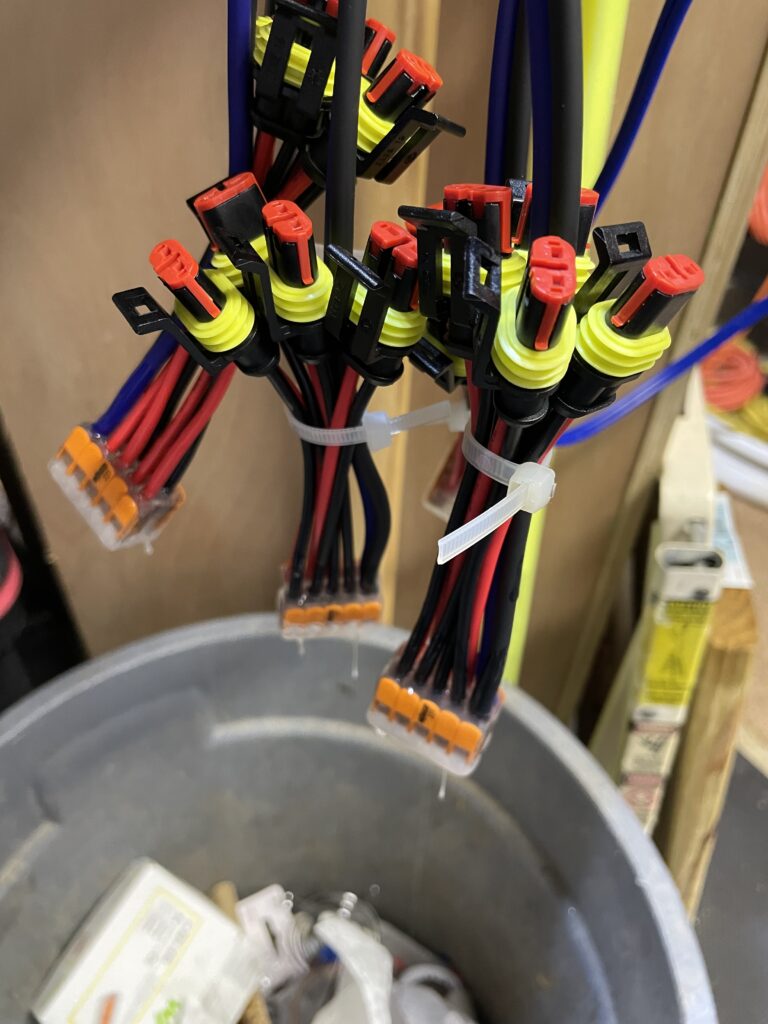
I’m re-using most of the WAGO power busses I made last year, and built some more for the additional Mega Tree strands. More on these here.