

WLED Deck Light Controller
Important Notice
This site is no-longer being maintained, and the content and links found here may be irrelevant and outdated. It is online for archival purposes only.
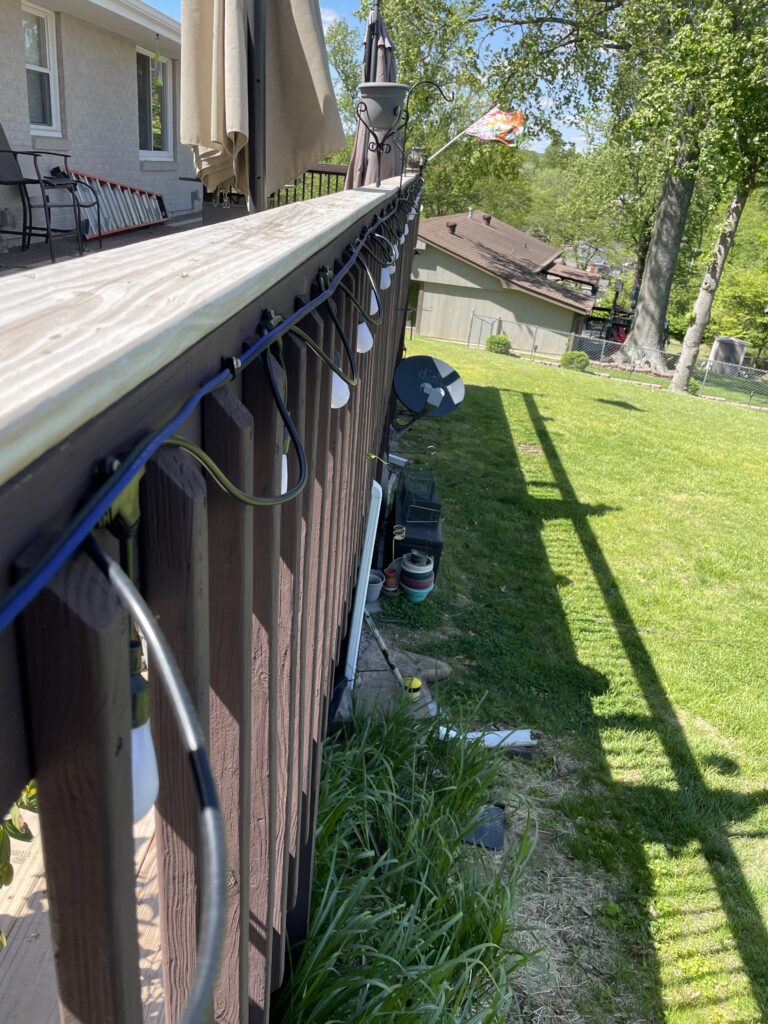
For the last 5+ years we’ve had colorful cafe-style lights along our back deck rail. These were proprietary lights made by a company called Enbrighten. Problem is- they kept failing after 2-3 years. We replaced all of them, and they eventually failed again. They were expensive too, for what they were. To replace them again in 2023 it would have cost about $240.
I decided to go a different route after the last failure. I found some WS2811 Cafe Lights on Amazon…
(All Amazon links that follow are affiliate links.)
These lights are frequently out of stock, and these are the only ones I’ve been able to find as of this writing. Please keep checking back if there are none available. You may try searching for “WS2811 cafe lights” (or “market lights” as they are also called) and check their specs, there may be alternatives now. If they aren’t WS2811, and just have a remote control, they won’t work for a project like this.
The cheapest and easiest way to drive them is using WLED, which is outstanding firmware that will run on most NodeMCU and similar hardware.

The biggest issue I have with NodeMCUs is most only support WIFI networking, which I’ve found to be very-very unreliable for projects like this, especially since WIFI reception isn’t the best in our back yard. Our house has a lot of concrete, brick, and plaster, which isn’t very helpful for WIFI coverage. Fortunately there is a newer option:
In the last few years, Wireless Tag and others have come out with ESP32 NodeMCUs that support Ethernet! So WIFI is no longer the limiting factor it used to be for a static (non-mobile) installation.
I needed a few other things to make it all work…
The first is a 5v voltage regulator, which is needed because the LEDs are 12v. The second is a logic-level converter, which converts 3.3v logic used by the ESP32 to the 5v logic WS2811 uses. In most cases you don’t actually need this for very-short data runs, but I’ve found it makes things a lot more reliable. Third, I needed a relay to control the power to the LEDs. I don’t want the LEDs to be powered all the time, and WLED supports a relay to control power to the lights. Finally, I needed an outdoor-rated PSU for the final install. I used an old Mean Well 12v PSU for initial assembly and testing.
WLED has several install methods, which I won’t cover here. It’s simply a matter of flashing the ESP32-ETH with the appropriate version of WLED. There is a specific one for Ethernet-enabled hardware. One wrinkle- the Wireless Tag ESP32-ETH does NOT have a micro-USB interface for flashing like most WIFI NodeMCUs, so it is necessary to use a USB-to-TTL adapter like this:
There is a great tutorial for connecting it up here: https://wled.discourse.group/t/wt32-eth01-lan-wifi-flash-tutorial/2786
After flashing the ESP32-ETH, it was time to hook up everything else. Here is a schematic of that:
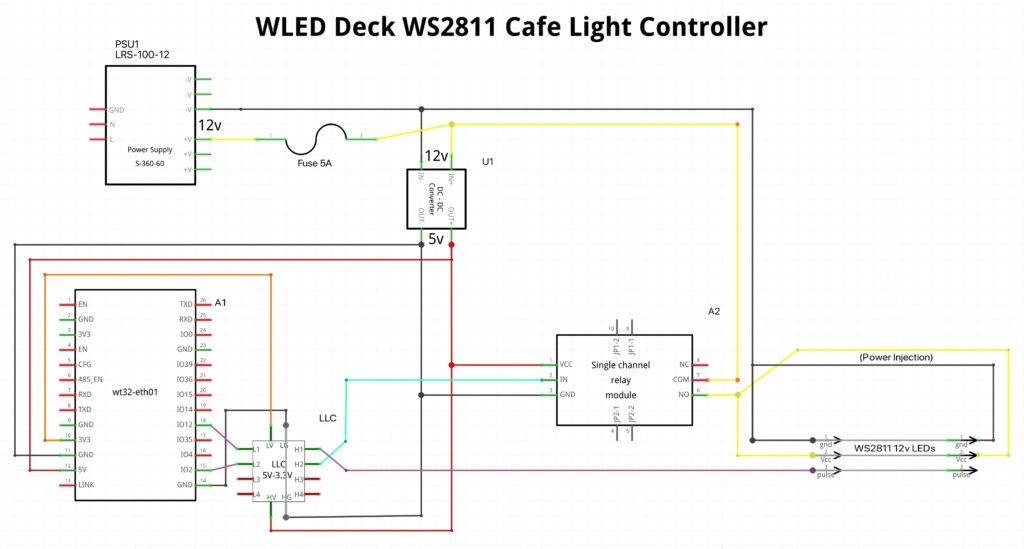
In a nutshell:
12v power is passed to the relay, which then connects it to the LEDs. (+12v is indicated in yellow above.)
12v is also passed to the power regulator, which converts it to 5v to power the WS32-ETH. (+5v is indicated in red above.)
WLED’s relay output is configured to use GPIO 12. I’m feeding that through one channel of the logic level converter to control the relay.
WLED’s pixel/LED output is configured to use GPIO 2. This goes through another channel of the logic level converter and is connected to D-IN of the first LED.
As with all things WS2811- all of the ground/commons are connected together.
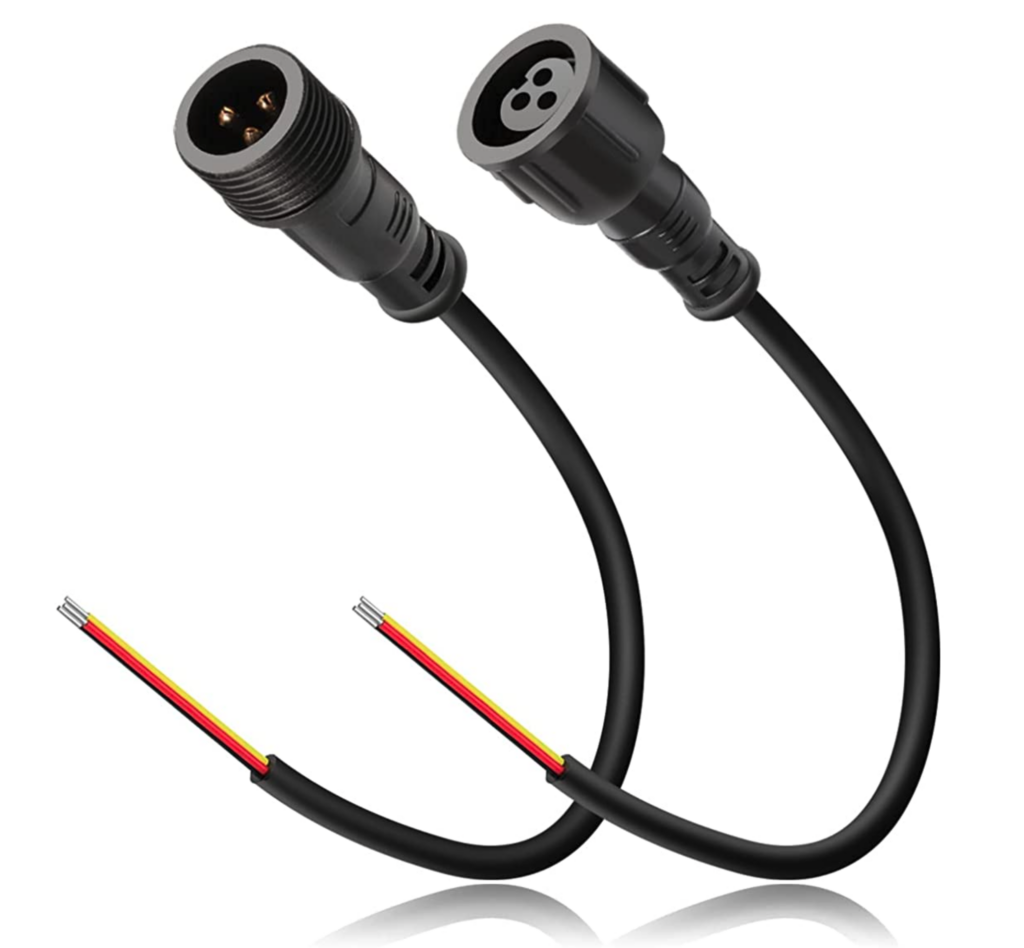
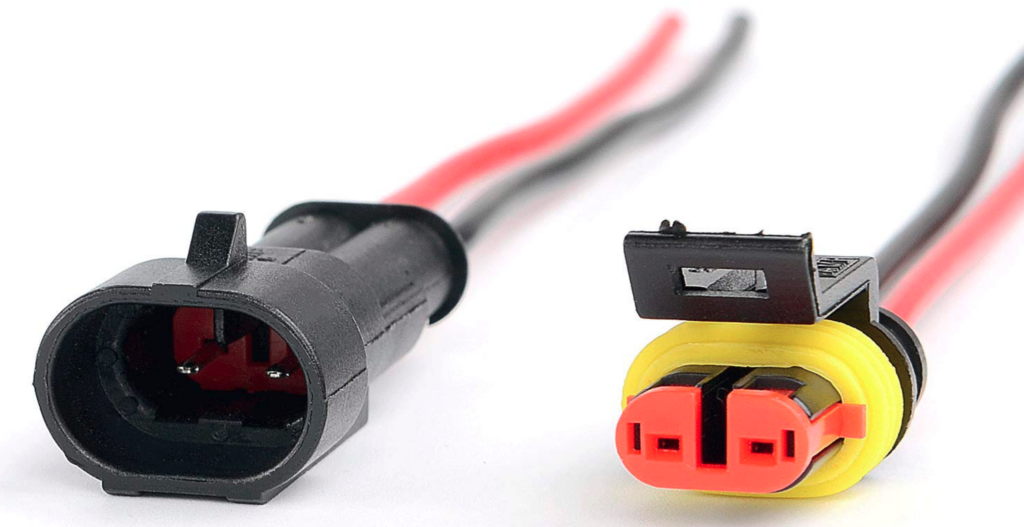
After bench testing everything, I crammed it into watertight plastic junction box. I used cable glands to install xConnect and automotive/marine-style power connectors into the box. The LEDs use xConnect fittings, and I needed 12v power in, and power out for power injection. The manufacturer recommends power-injection if more than two strands of LEDs are used, and since this install needed three strands- I ran 14Ga silicone insulated wire from the controller to the far end of the strings. These were all things I had “in-stock” as I use all of these things for our holiday light shows.
This is what the final assembly looks like. It’s ugly, but gets the job done:
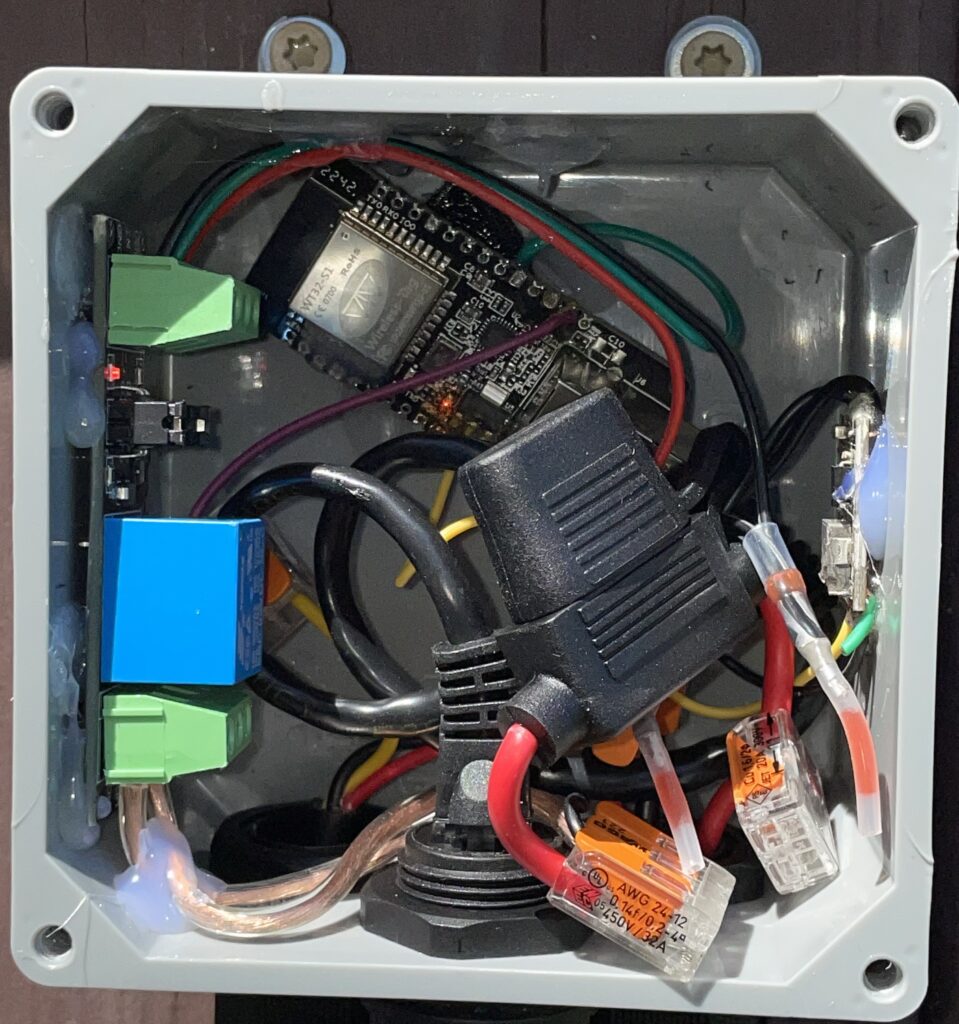
I used high-temp hot-melt glue to fasten the components to the inside of the box. On the left side is the power relay. Right side is the power regulator. In back is the ESP32-ETH. You can’t see it because of the fuse holder, but the logic-level converter is fastened in back below the ESP32. All of the wires will pretty-much hold everything where it is if the hot-melt gives out in the Summer heat. On the bottom are, in order, xConnect Out, RJ45 Ethernet gland, and power connectors.
This is what the completed install looks like:
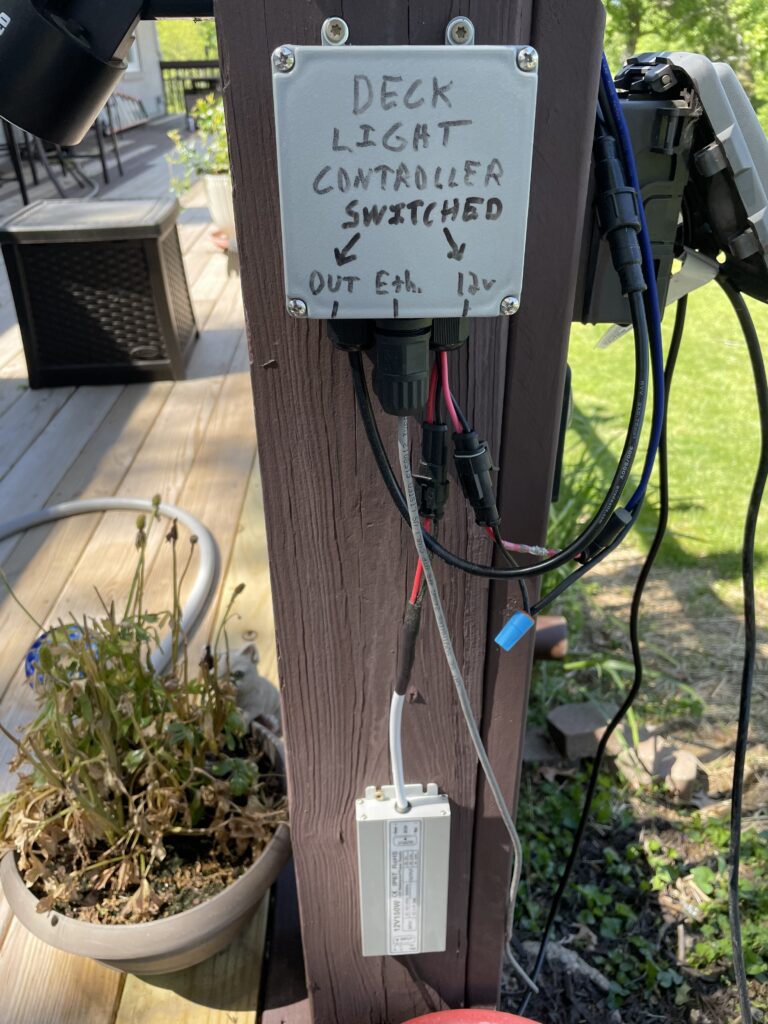
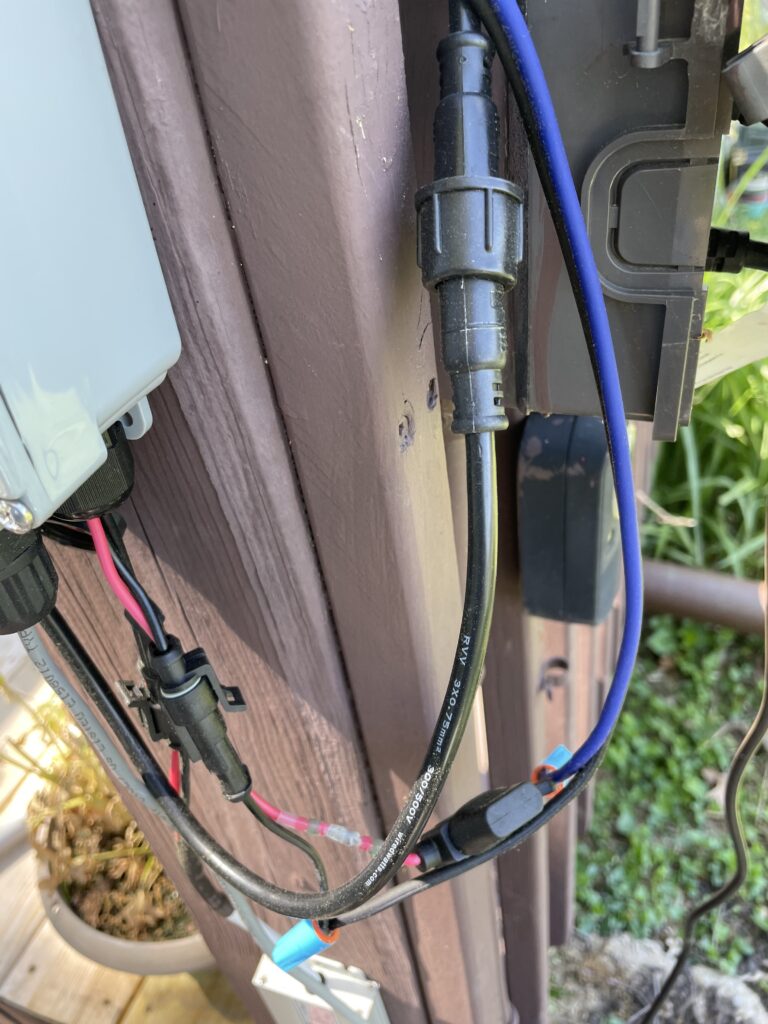
I fused the power injection run just for additional safety. I’m sure there is probably a prettier way of doing all of this, but it works! I’m probably going to remove the text I wrote on the box, and may even paint it the next time we re-stain the deck. I debated looming or otherwise covering the wires, but doing so would trap water, ice, and snow which isn’t good. If it proves to be reliable after this Summer, I might move everything to a more-secluded spot under the deck.
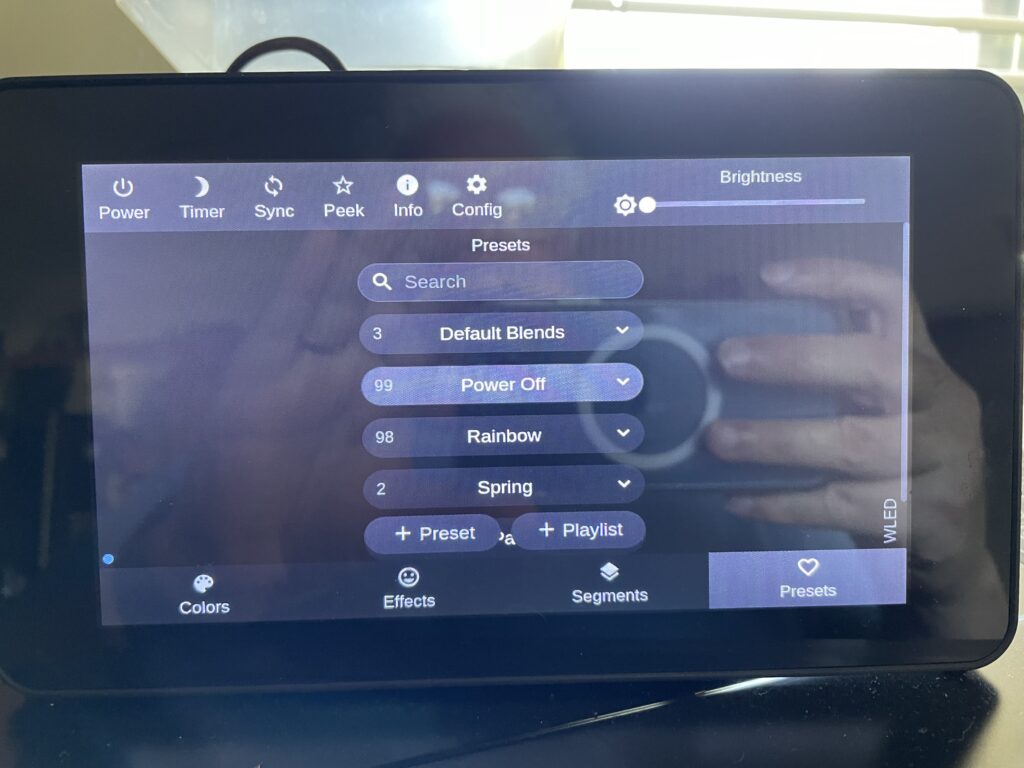
Using WLED via their IOS app, or via their Web interface, we can display a wide-variety of colorful moving or static patterns with the lights. Because WLED can also accept E1.31 data streams, we can optionally sync the lights with our holiday light displays via our master FPP controller. I’ve added them to our layout in xLights, and they are connected to the rest of our dedicated Ethernet show network. We are using the touchscreen controller I built for our light show to access WLED during the off-season:
This was a fun “little” build that lets us continue to display festive lights on our deck rail year-round, giving us a lot more control over them than we had before. The whole thing cost less to implement than the cost of just one of the proprietary light strings we used to use. I hope we get many years out of this install, and I hope either Alling (Paul Zhang) or someone else sells similar WS2811 cafe lights in the near-future. If you are looking for a similar, but not quite as attractive, option- search for Pixabulbs, which is what I was originally going to use for this project.
Update, May 2022:
Unfortunately, similar to the pixels we use in our light show, this Chinese stuff suffers from lax quality control. We’ve been running these lights for about 2 months now, and have had 3 pixel failures. Fortunately it is easy to disassemble each bulb to get to the LED board inside. In all three cases- poor solder connections caused either data or power to fail downstream. Re-soldering the connections fixed the problem! Most are perfectly fine, but it seems like some percentage (?) of bulbs were soldered by a rank amateur (or at least someone who solders a lot worse than I do).
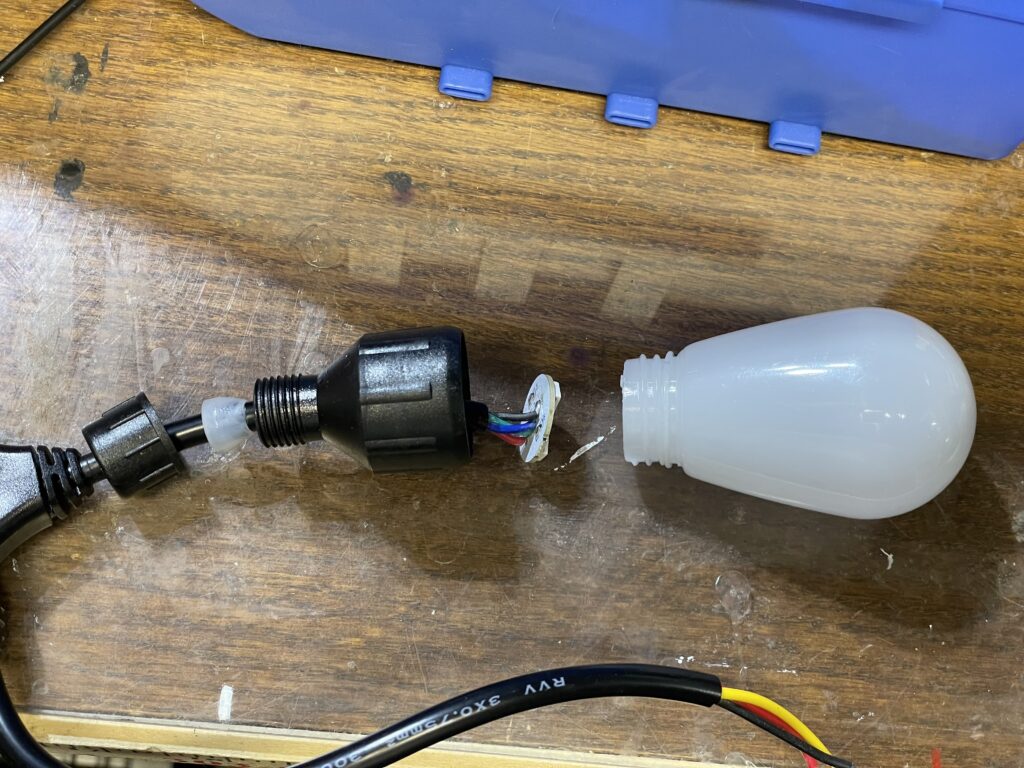
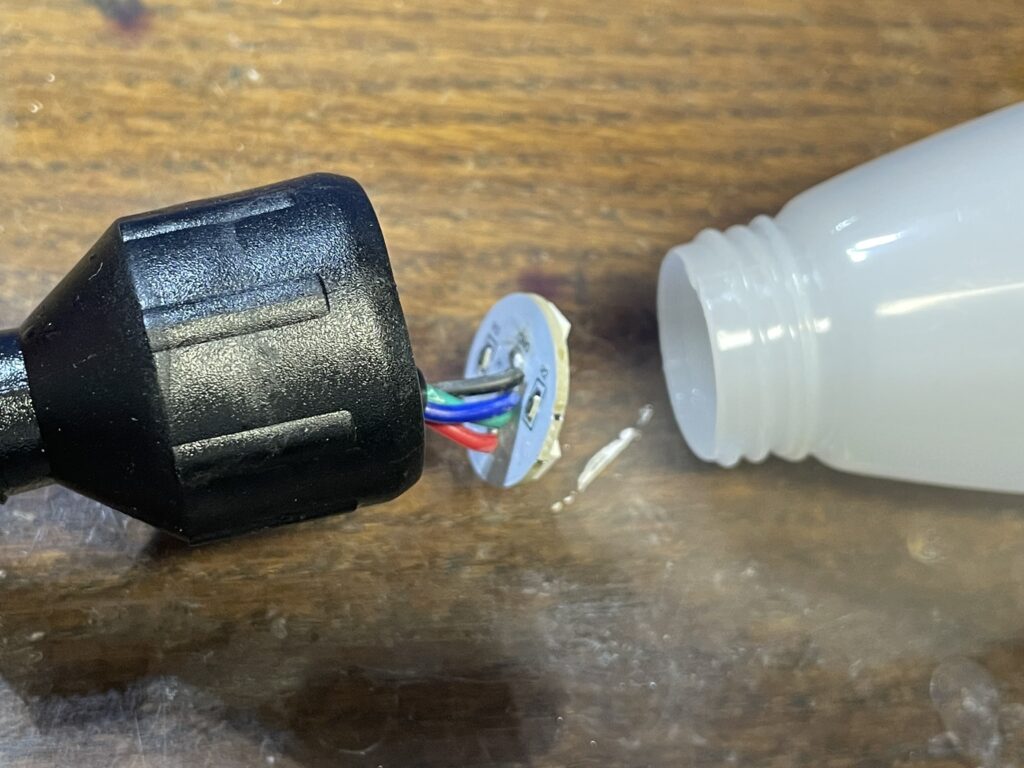
While I’m showing a disassembled bulb on the workbench, I was actually able to re-solder them on the deck using a butane soldering iron. Fingers crossed there won’t be more.