
New-ish Tune-To Sign
Last year, my wife said we really needed a Tune-To sign on the north side of our yard next to the oak tree, because folks watching the show from down the street there couldn’t see our main “Info Sign” above our carport. I quickly built a small sign, outlined here.
For 2023, after getting some P5 panels to experiment with, I decided to upgrade our Info Sign to P5s for twice the resolution, making it a lot more readable. That project is here. A couple of the P10 panels in the original sign had failed pixels in them, so the timing seemed right.
I had several “retired” P10 panels from other projects, along with the controller and mounting parts from the old P10 sign, which I was disassembling anyway. I decided to piece together a new, larger, Tune To sign to put up next to the oak tree.
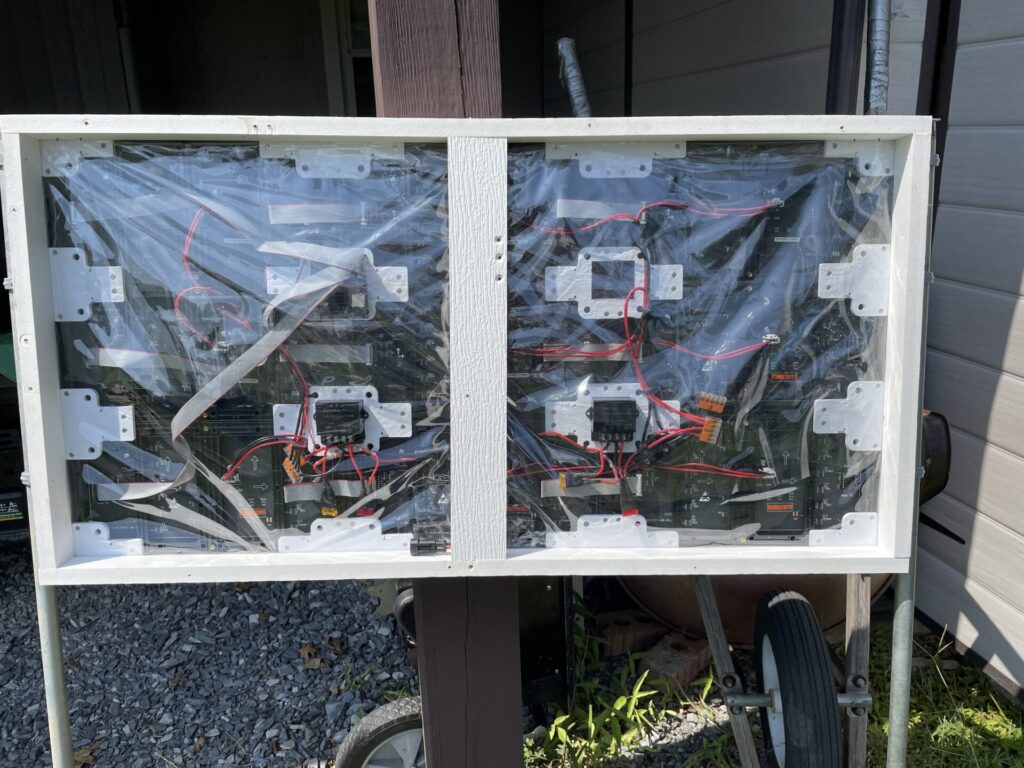
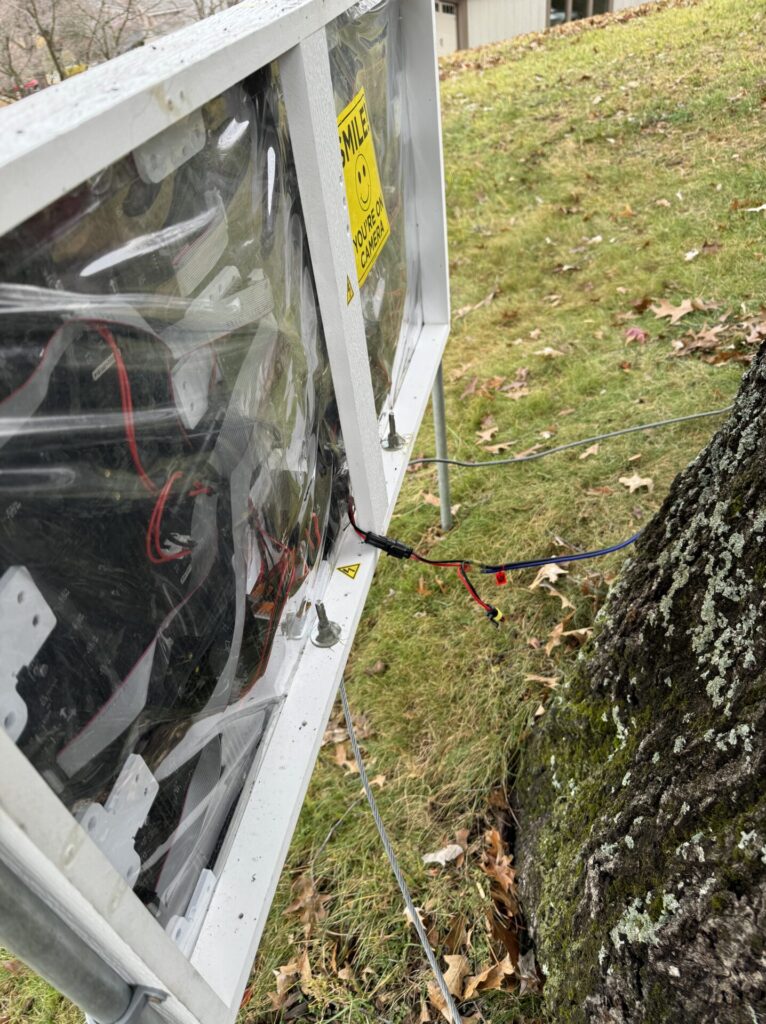
I had all the parts I needed except for some inside mounting plates, which I 3D printed. I decided to use a 3×3 grid of panels, 9 total, which gives me a nice 2:1 HD-ish size ratio, even thought the P10s are far from HD. I’m feeding the sign 12v power, dropping it to 5v for the panels and controller using high-current buck converters, which you can see mounted to the two bottom 4-way corner brackets in the picture below. I split the load on the two buck converters up so one of them runs 6 panels, and the other runs 3 panels plus the controller. I’m using a Kulp PocketScroller to run the sign, mounted on the upper left bracket. I decided to use 3 channels on the PocketScroller, one for each of the three rows of panels.
I re-used the notched PVC “boards” that originally framed the old P10 Info Sign. Assembling them with glue and screws in a similar fashion as before. I just filled in the extra screw holes from the old sign with silicone calk.
The sign panels and electronics themselves are wrapped in clear vinyl, similar to how I wrapped our P5 Info Sign. It’s very inexpensive, and has worked well for other sign panels, like our column matrixes, which are on their 3rd year. It’s significantly cheaper than other methods of protecting the panels. It may not look as good in the daytime, but disappears at night.
The only things I couldn’t figure out initially are how to actually mount/hold it, and how to provide some security for it. I also debated for a long time whether to use Wi-Fi or wired networking for it. I’ve had a LOT of issues with Wi-Fi and our display, and almost everything runs over wired Ethernet because of it.
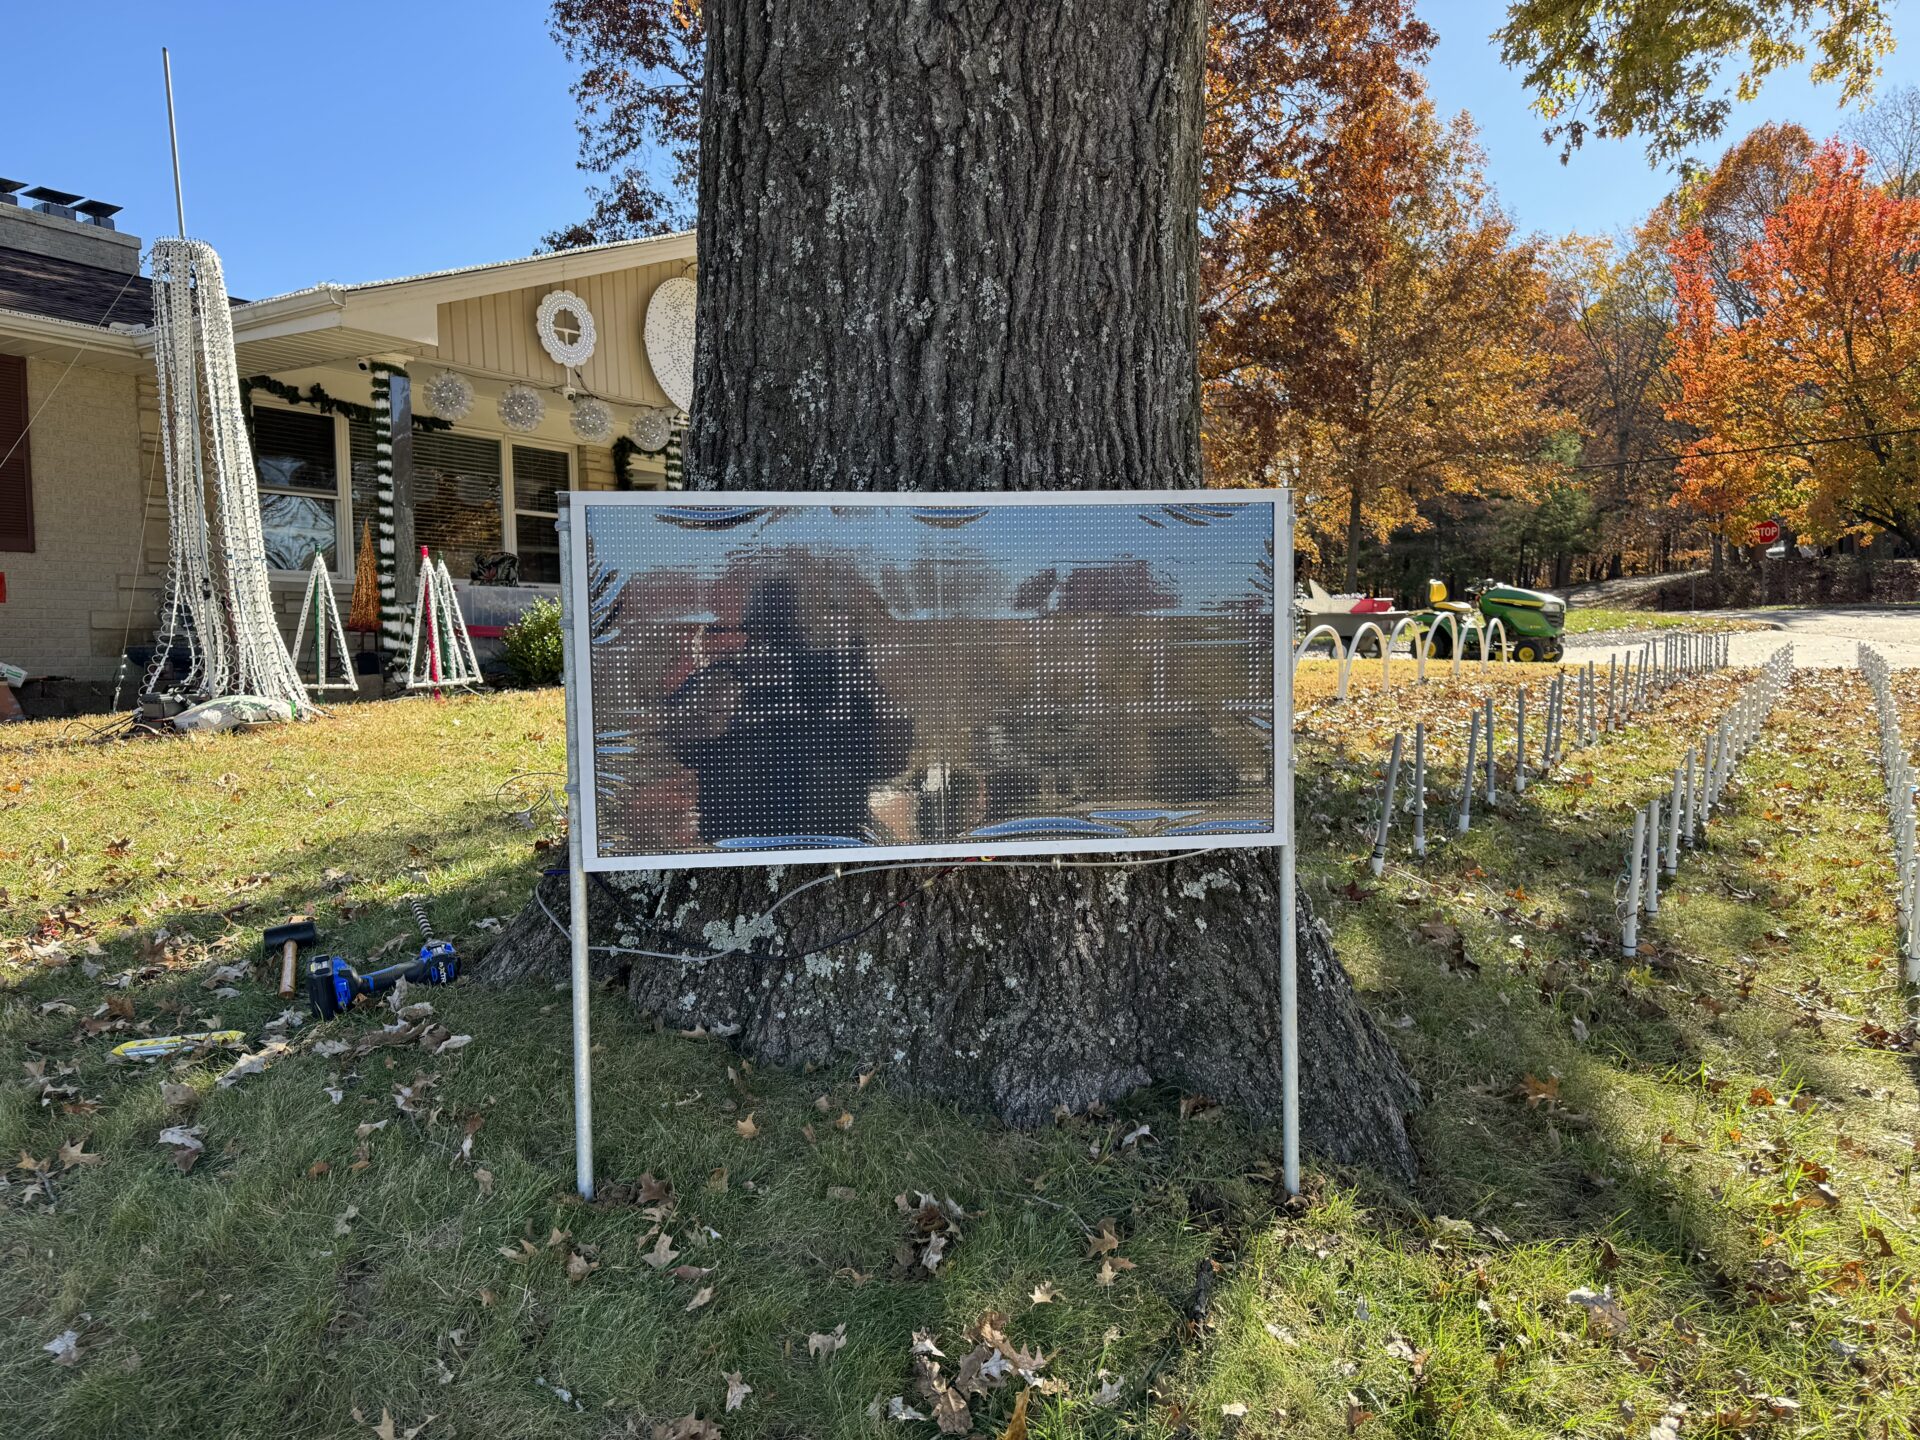
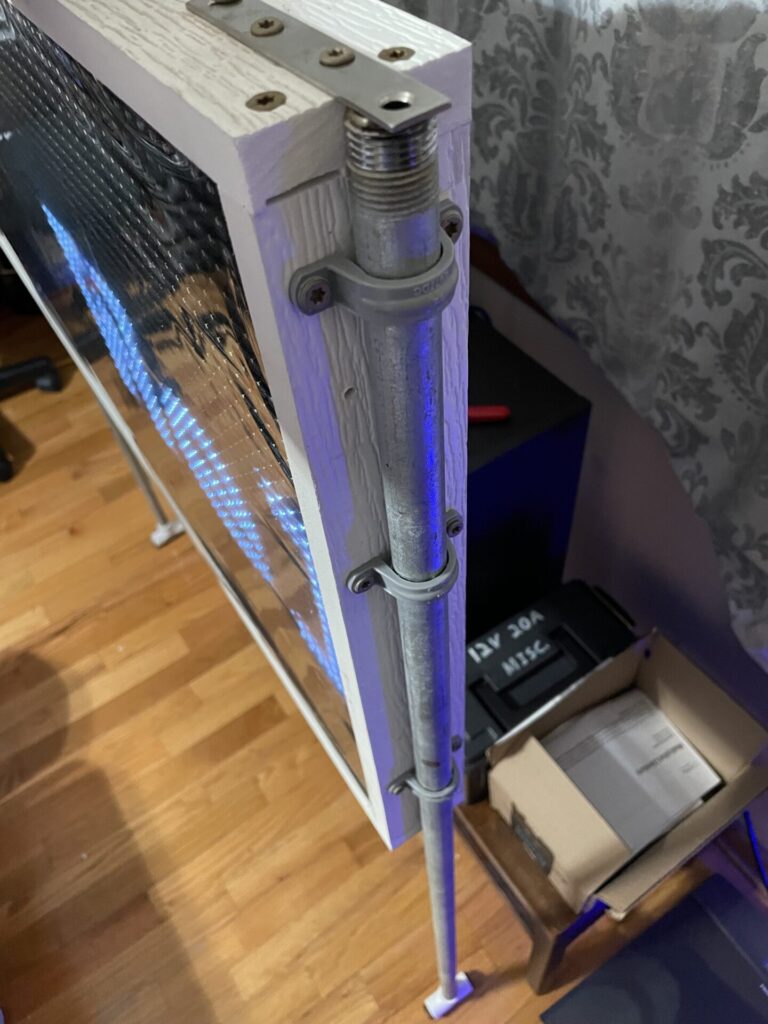
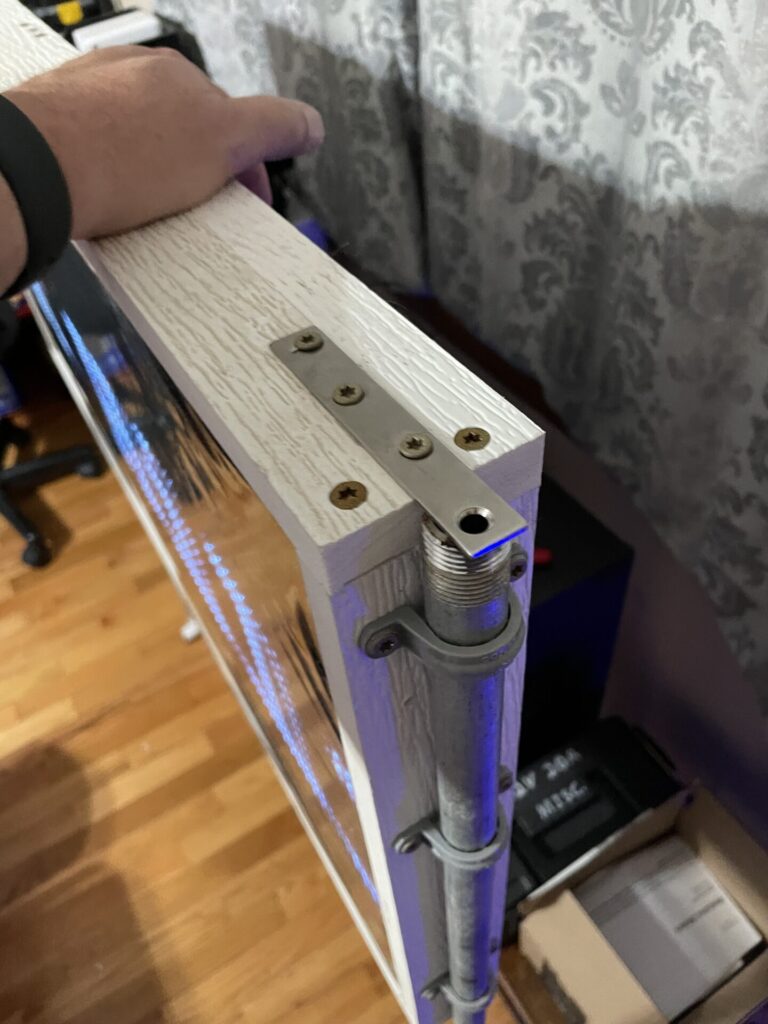
For mounting, I decided to use a couple of 4′ long 1/2″ galvanized pipes that I had on-hand after re-building our Maxi (Mid) Tree using 3/4″ pipe. I used 1/2″ conduit/plumbing mounts, with some flat metal brackets to prevent the sign from sliding down. It’s not fancy, but it works! One of my goals this year was to re-use as much as possible, and all of these were leftovers from other projects. I drilled holes in the yard and pounded the legs in, while leveling the sign.
For security, I decided to just use a cable, similar to what I’ve done for some other elements. It’s not high-security, but it “keeps honest people honest”. Besides the sign being completely useless to someone who doesn’t know how to make it work or have the infrastructure in-place to drive it. The cable runs through two eye bolts on the bottom of the sign that are screwed and epoxied into the frame, and is fastened around the oak tree.
I did decide to keep it Wi-Fi for this year. I extended the show Wi-Fi network into the front yard and at least for this sign- it’s been working fine. Similar to the new Info sign, it’s been incorporated into most of the sequences, and I’m using pixel overlay models and custom scripts to display show and song information on it.
I’m really happy with the final result, especially since it was almost all up-cycled. Assuming it makes it through this season, the only change I think I will make is painting it green or red, so it looks a bit more Christmas-y. I want to see how the vinyl (tablecloth) holds up to the weather too, and may eventually replace it on the front with an acrylic panel.

One update. The sign is powered by a “stock” 12v PSU, similar to what powers several other elements in our show. After the sign locked up a few times during some particularly bright sequences, I determined the voltage was a bit low. It was actually right at 12v, but dropped a bit on the brighter sequences. As I’ve noted before- these panels can use a lot of power, and the Beagle Bone (Pocket Beagle) single-board computer that runs the Pocket Scroller is VERY voltage sensitive. The 5v buck converters are made for 12-24v input, so all I did was adjust the PSU so the output at the sign connector is 12.8v. That did the trick!