Projector Enclosure (2022)
I salvaged an Optoma EH300 projector that was damaged with a cracked case, and an exploded lamp assembly. It took a while and several bandaids to get all of the broken glass out of it, and then some super glue and a new lamp assembly and it is almost as good as new. Fortunately most of the damage was cosmetic and the internal electronics and optics weren’t damaged.
I wanted to use it to upgrade our virtual matrix/video display setup this year. Our old one used a really-cheap LED-based projector that wasn’t very bright and was definitely not high-definition. I figured I would make something similar to our old enclosure, which was made out of a wood storage box with a clear (plexi) side.
I decided to make it out of 1/2″ “PVC Board” which I found at Menards, and is likely available at most home centers. It’s similar to wood and can be cut and drilled with standard woodworking tools. It’s PVC- so is completely weather and waterproof.
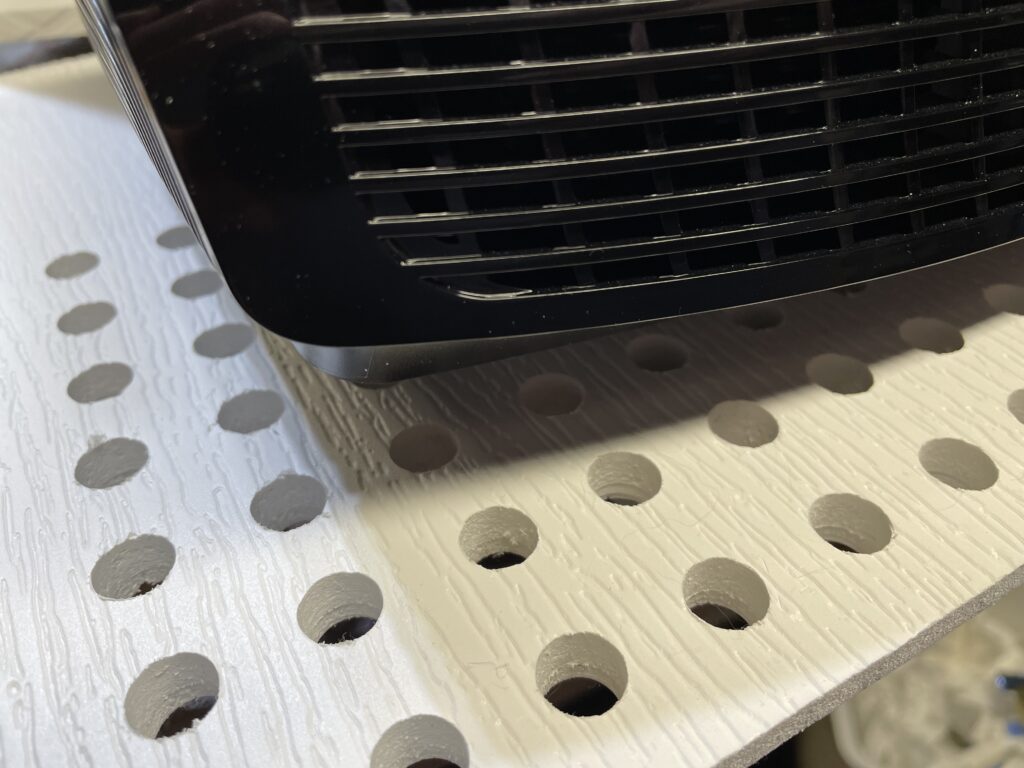
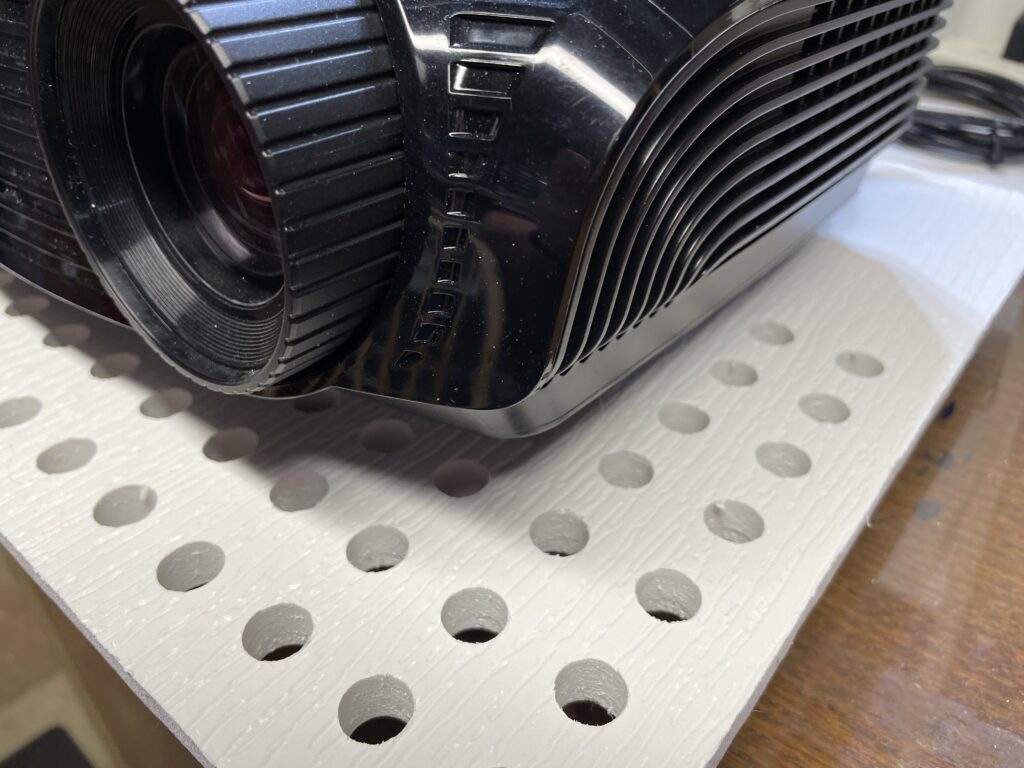
First I cut out a base that’s about 3″ wider on all sides than the projector itself. I drilled a bunch of holes in a grid through it to provide ventilation. This is similar to what I did for the earlier 2021 model.
After making the base, I made a box out of the same material that would overlap it, with about 1/8″ gap all around. This will keep water off the base itself. It’s about 4″ higher than the projector as-well. I just cut the box top about 2″ wider and longer than the bottom, along with side panels to fit under it. I notched the front of the top and sides on a table saw so I could slide a piece of plexi in. I glued them together with plastic/model cement. I pre-drilled and added a couple of long deck screws through each panel joint for a bit of extra support. Once the glue joints were secure, I slid a piece of plexi into the notches in the front and glued and sealed it with clear silicone. I glued some scrap strips inside the box that will rest on the base to hold it up.
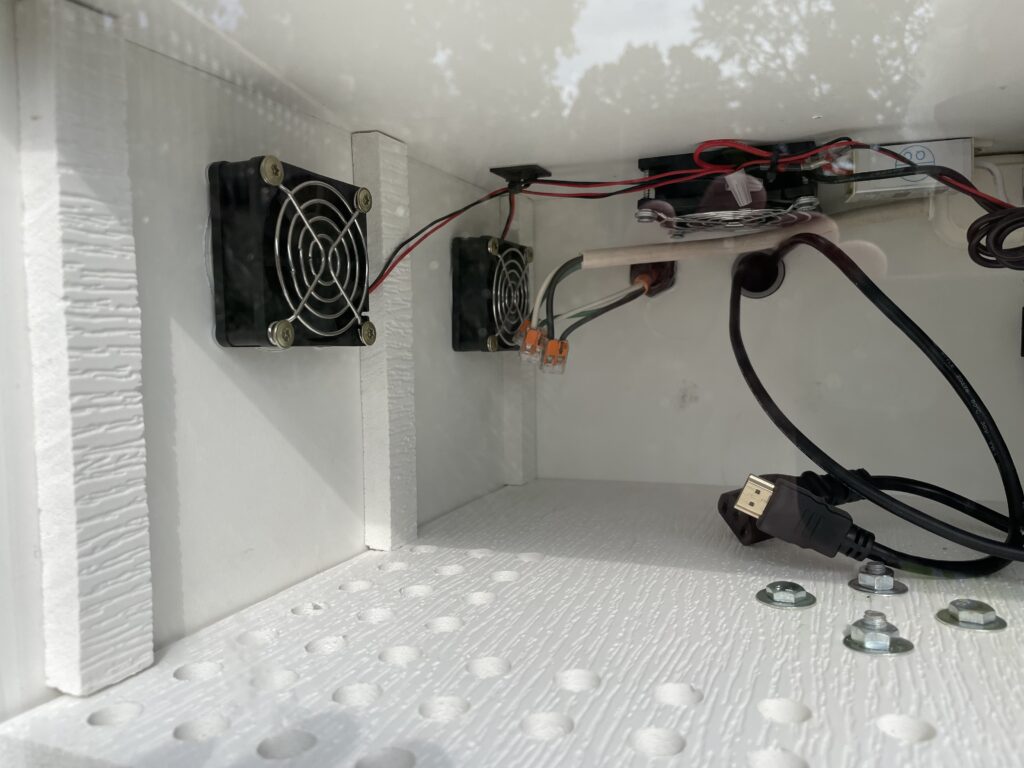
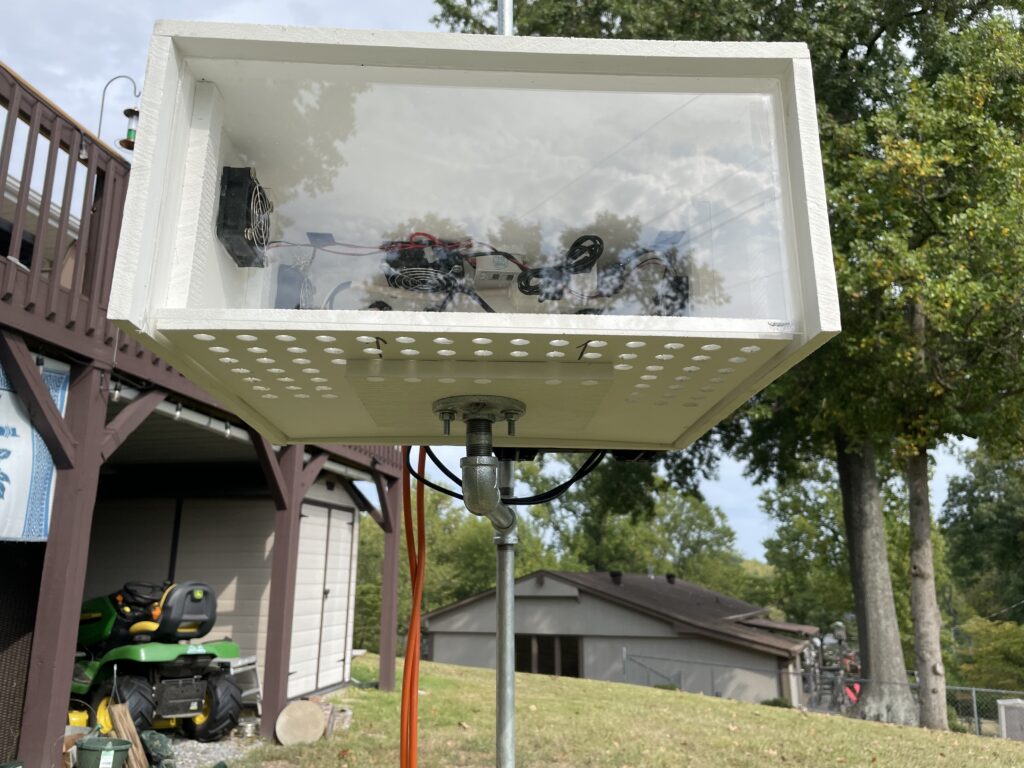
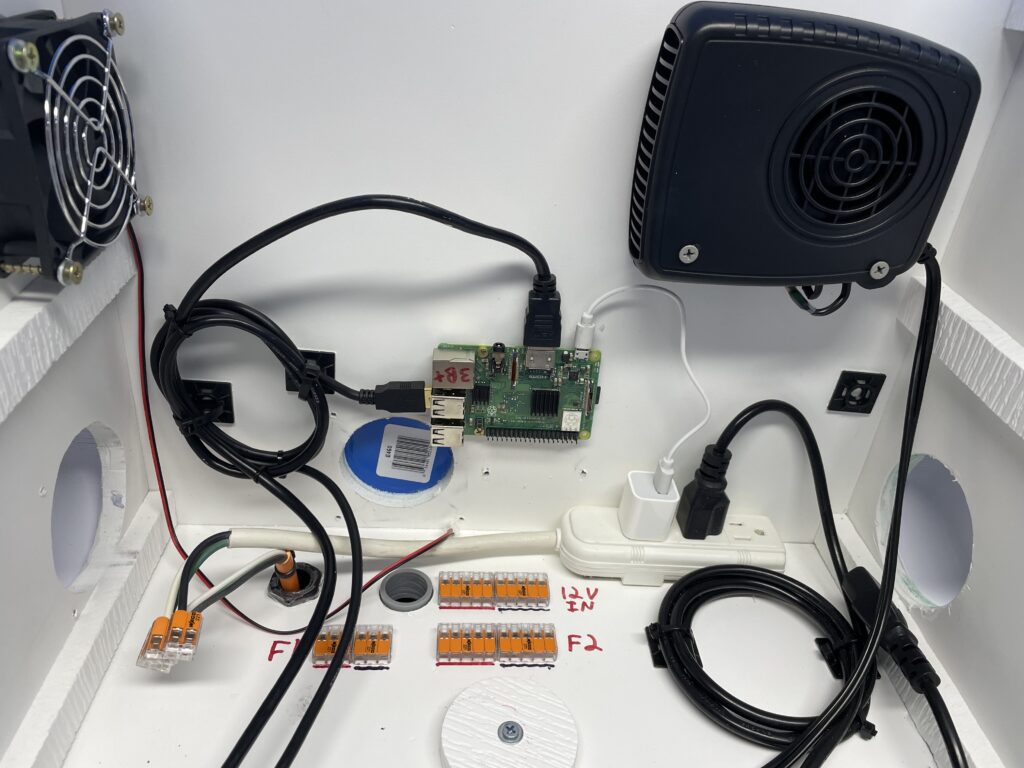
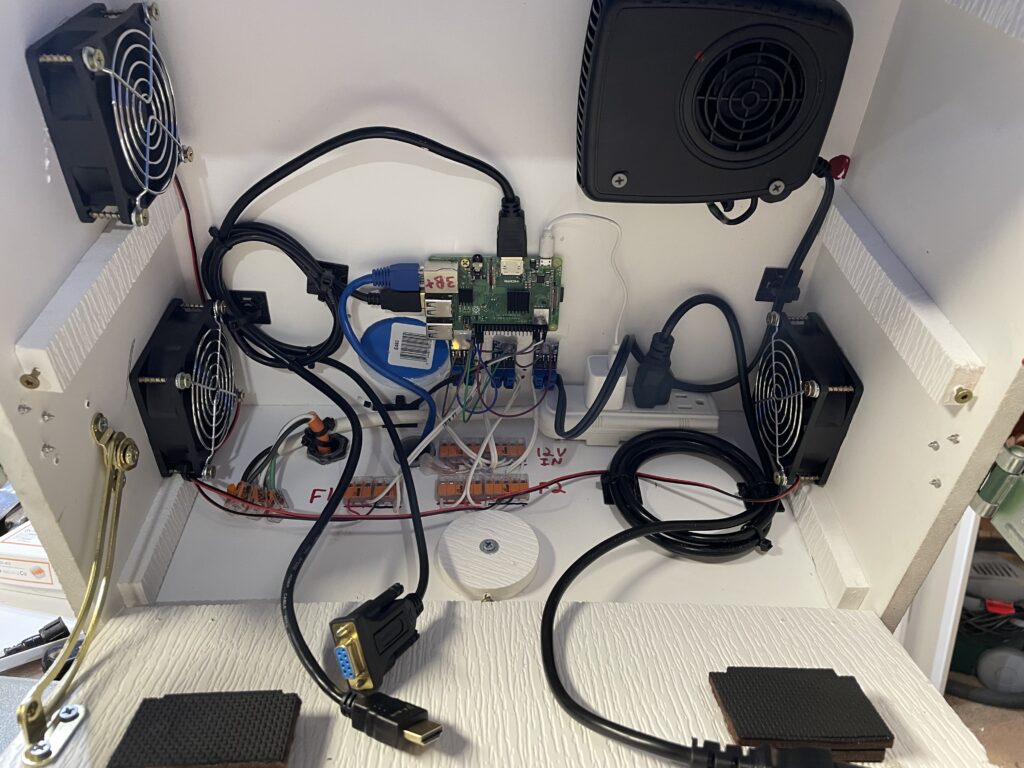
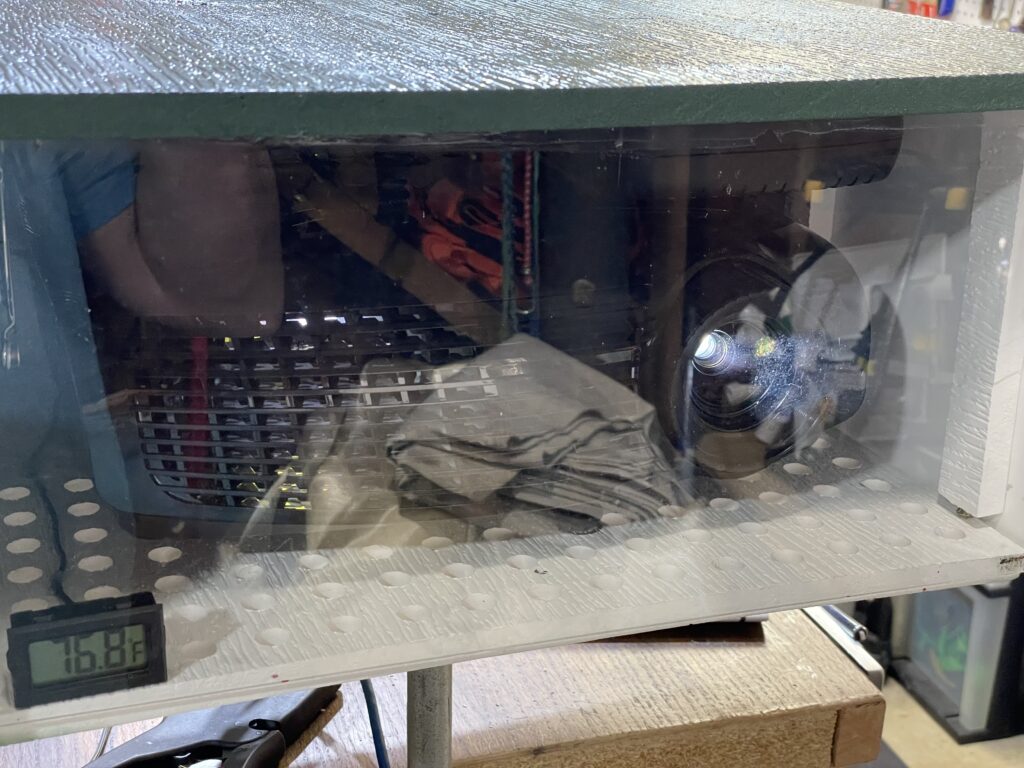
Here is what the inside of the initial box looked like after I added the Raspberry Pi (for video playback), fans, and power…
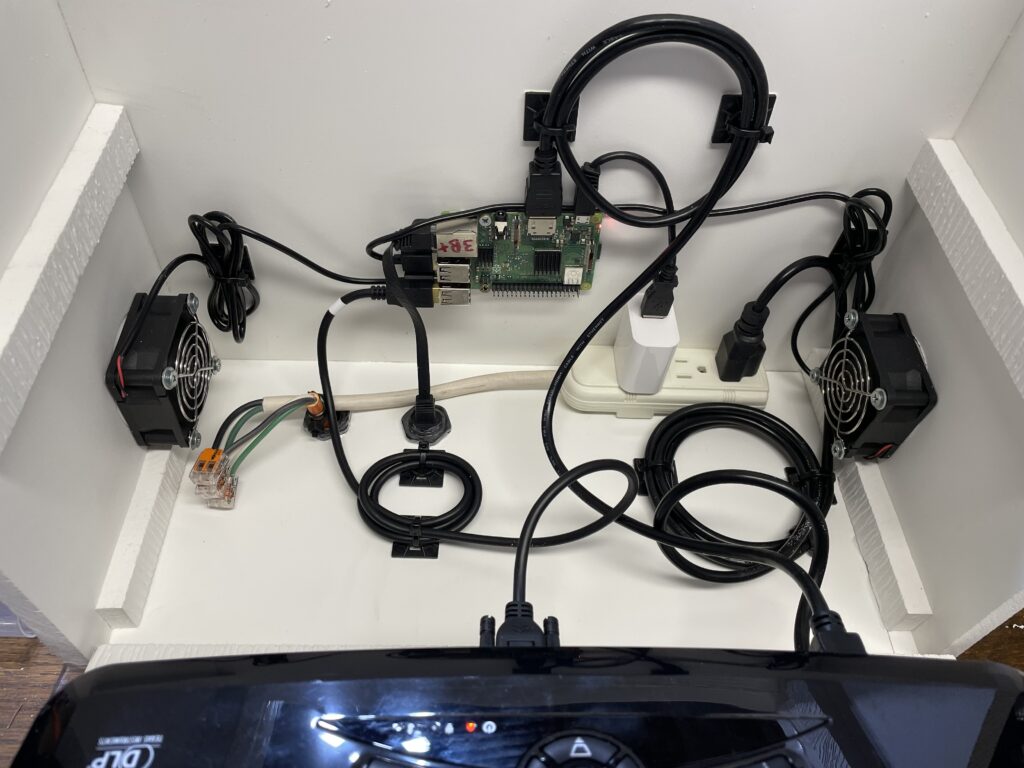
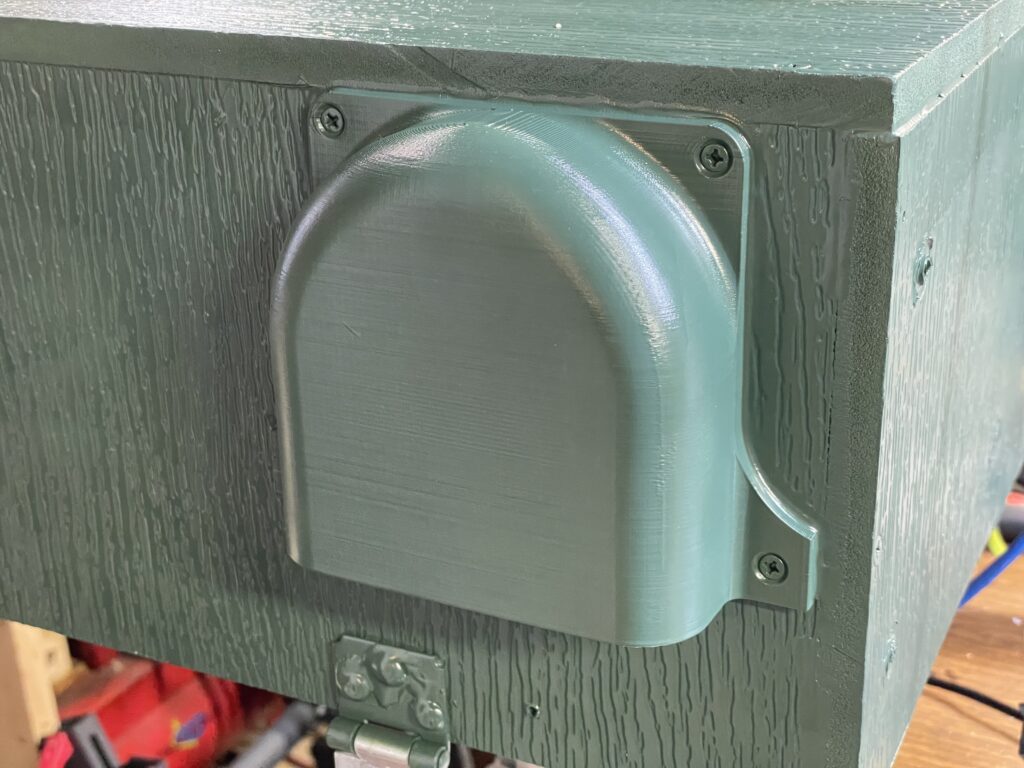
Note that I’m using a USB-to-Serial cable so I can control the projector using the projector plugin for FPP. In this initial version I’m using a small USB adapter to run the RPi and the 5v cooling fans. The fans exhaust out of Bud vents, drawing air in through the holes in the base. Here are the vents I used:
(Affiliate Link)
So here is where I say: This didn’t work.
The projector isn’t LED and uses a high-pressure incandescent lamp, which puts out huge amounts of heat. With this setup, the enclosure quickly reached 120℉ and I was afraid the projector would overheat or fail badly. It was also pushing the Raspberry Pi’s CPU to its limits. So, back to the drawing board…
I added a 3rd side vent near the output of the projector’s cooling fan. I also upgraded all three fans to 12v ones with a higher throughput, and added a small 12v PSU for them…
This helped, but the temperature was still hovering around 100℉, which wasn’t ideal. I wasn’t as concerned about the projector failing, but the CPU temperature of the Raspberry Pi was getting alarmingly high, so I made even more changes (Rev. 3)…
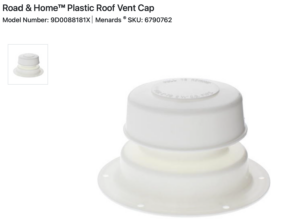
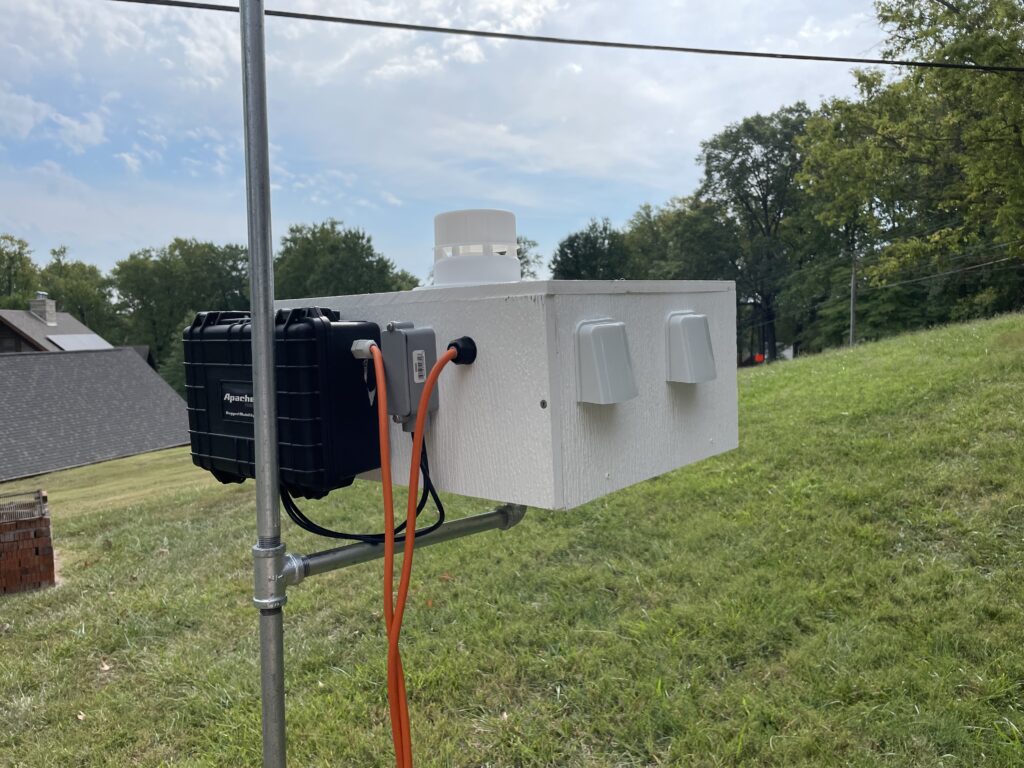
I decided to add a vent to the top, and found an RV “pipe cap” at Menards that seemed to fit the bill.
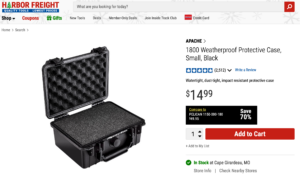
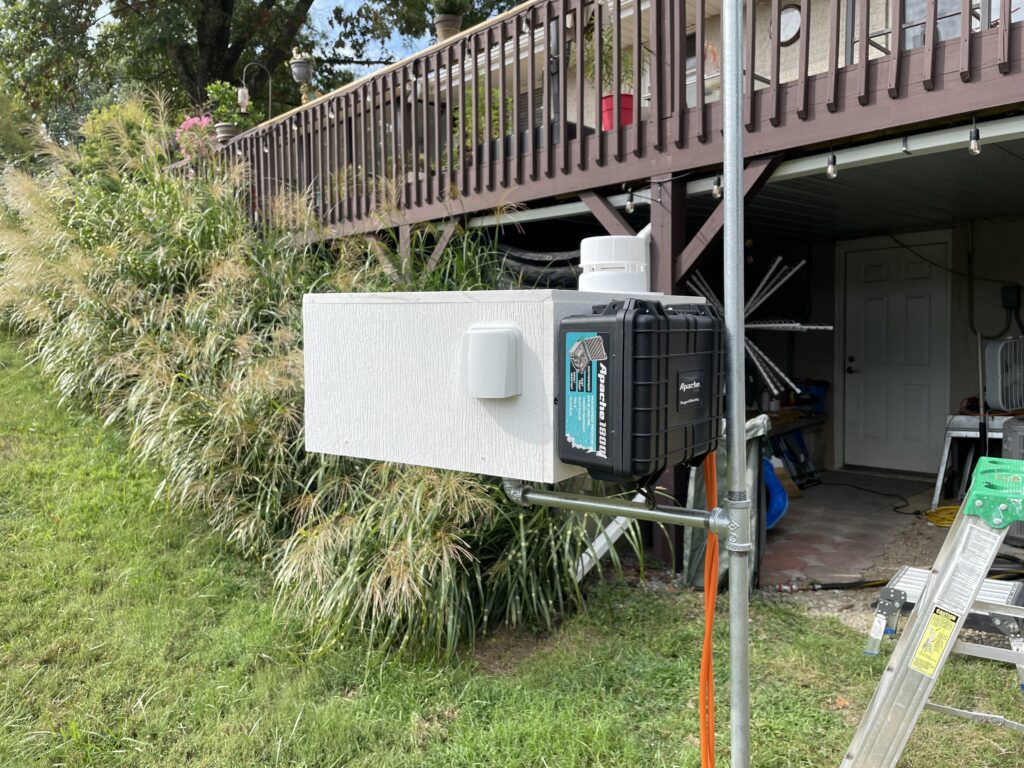
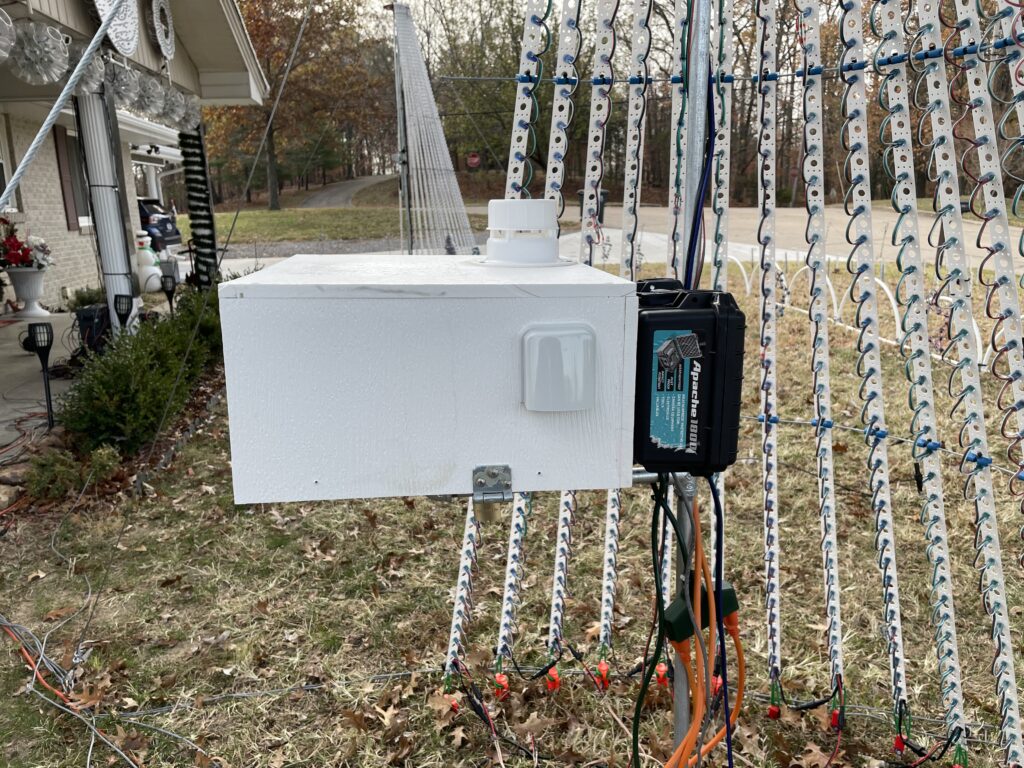
I added it, along with another 12v cooling fan, to the top of the box. I also decided to move the Raspberry Pi controller outside of the box, so there is more room inside for air circulation, and less danger of the Pi overheating. I put it in a small “Apache” waterproof box, along with its own small 5v PSU:
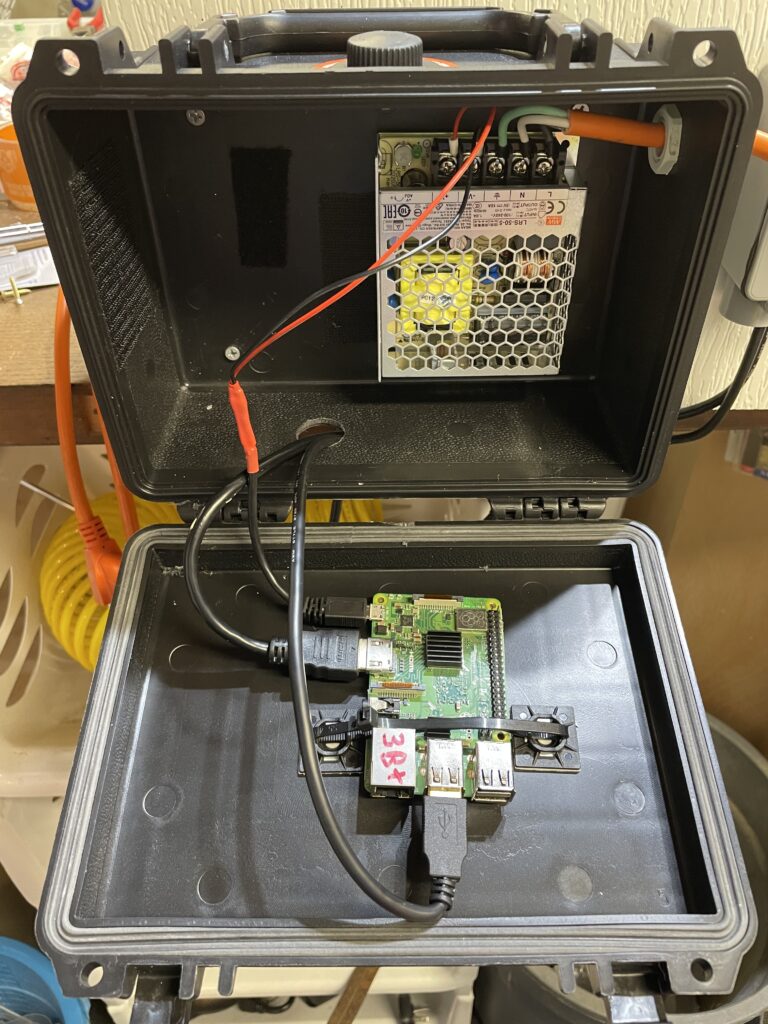
These little Apache cases from Harbor Freight are great for things like this. Unfortunately they are too small for the larger Mean Well PSUs we use, or they would also be perfect for differential receiver and PSU boxes.
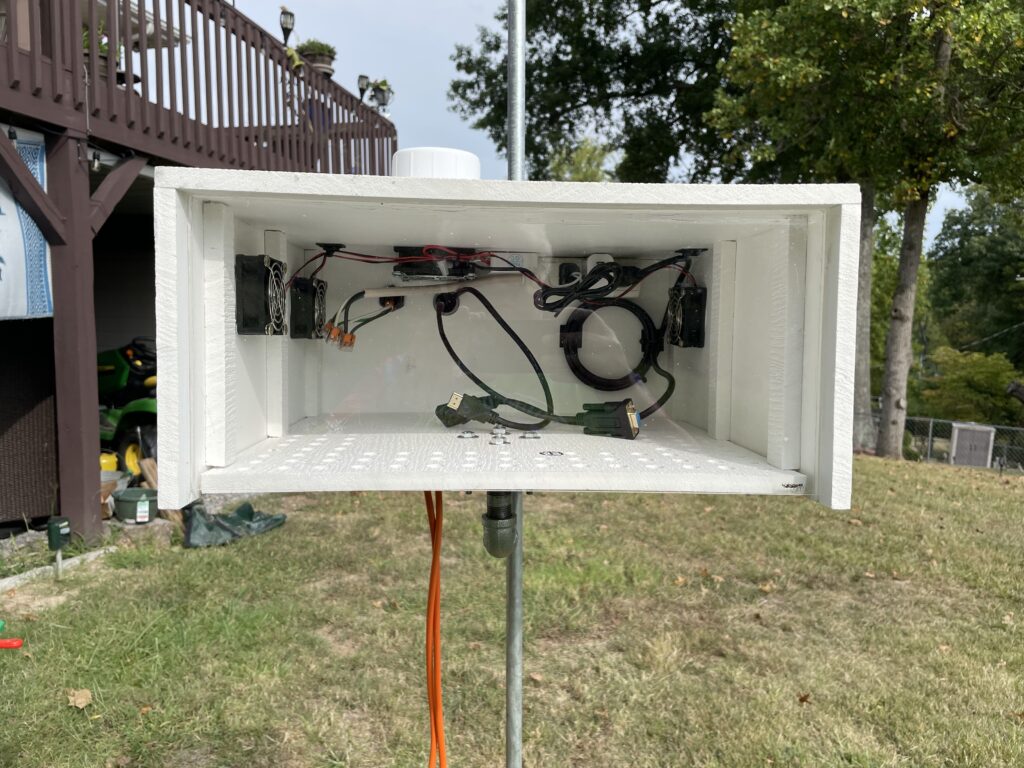
The HDMI and serial cable wires just pass out through a hole in the bottom (side) of the Apache case, and enter the main enclosure through a 90-degree PVC electrical conduit fitting (working with what I had in my junk pile) that was just glued to the back. The controller box is just screwed into the back of the enclosure. With this setup, at an outside temperature of 70℉, the internal temperature doesn’t go over 90℉. Of course in the cold winter months it will stay much cooler.
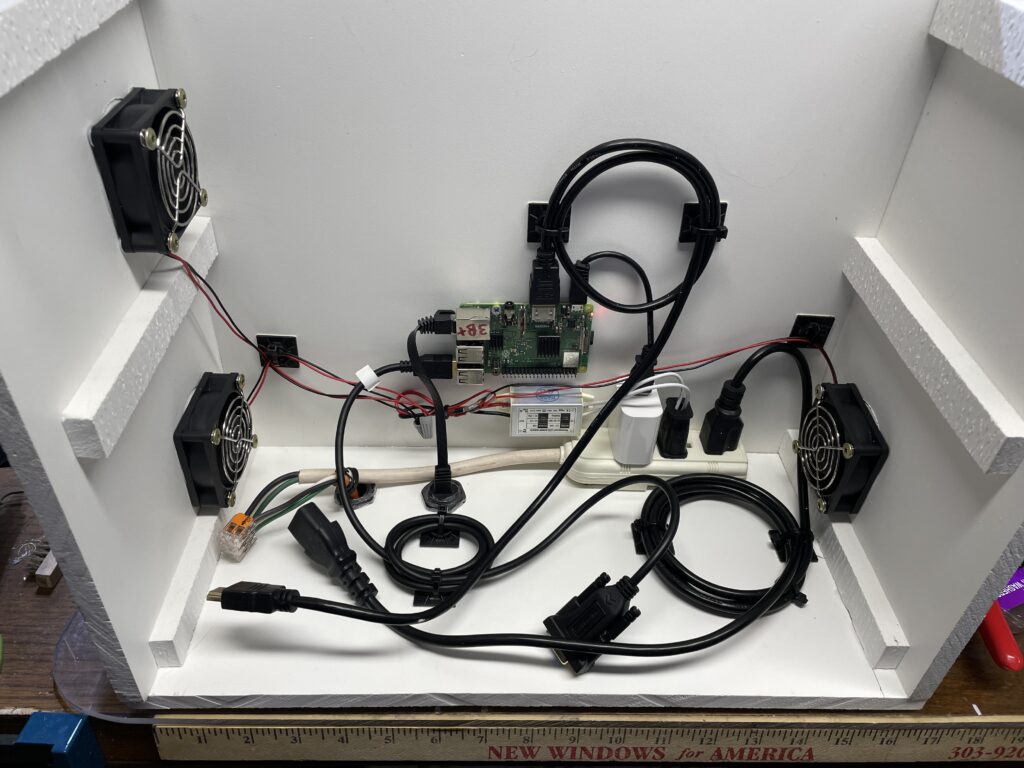
So, this is what the inside looks like now:

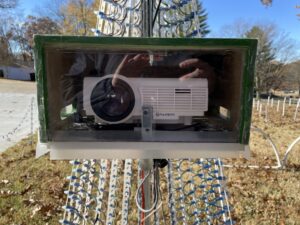
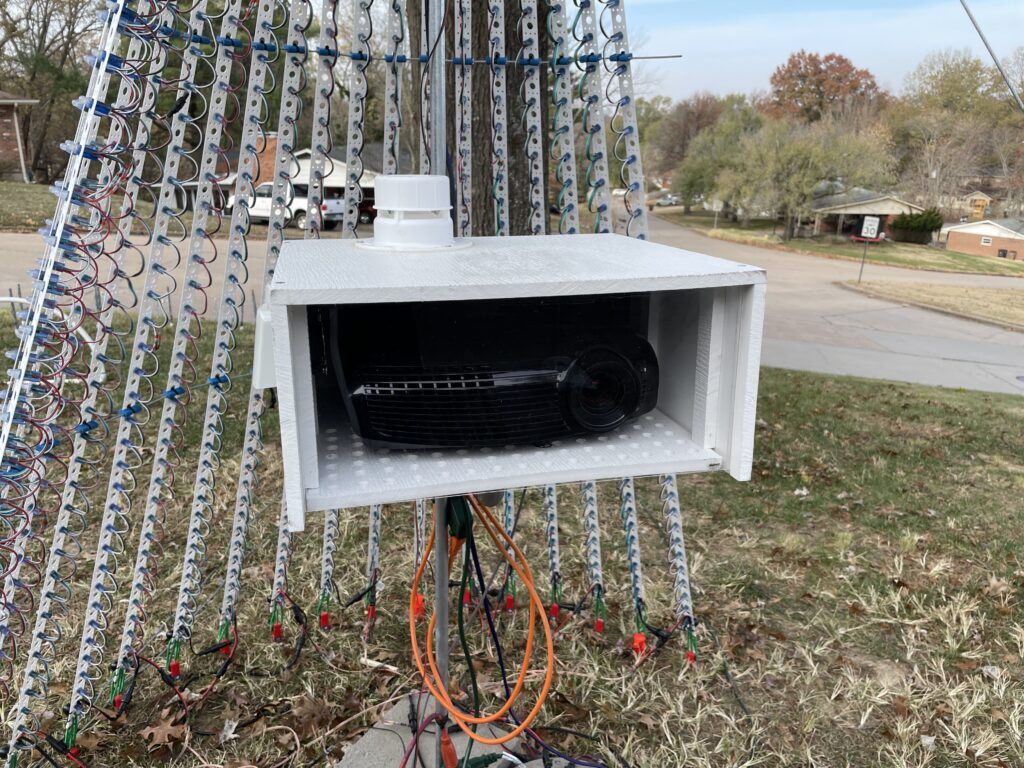
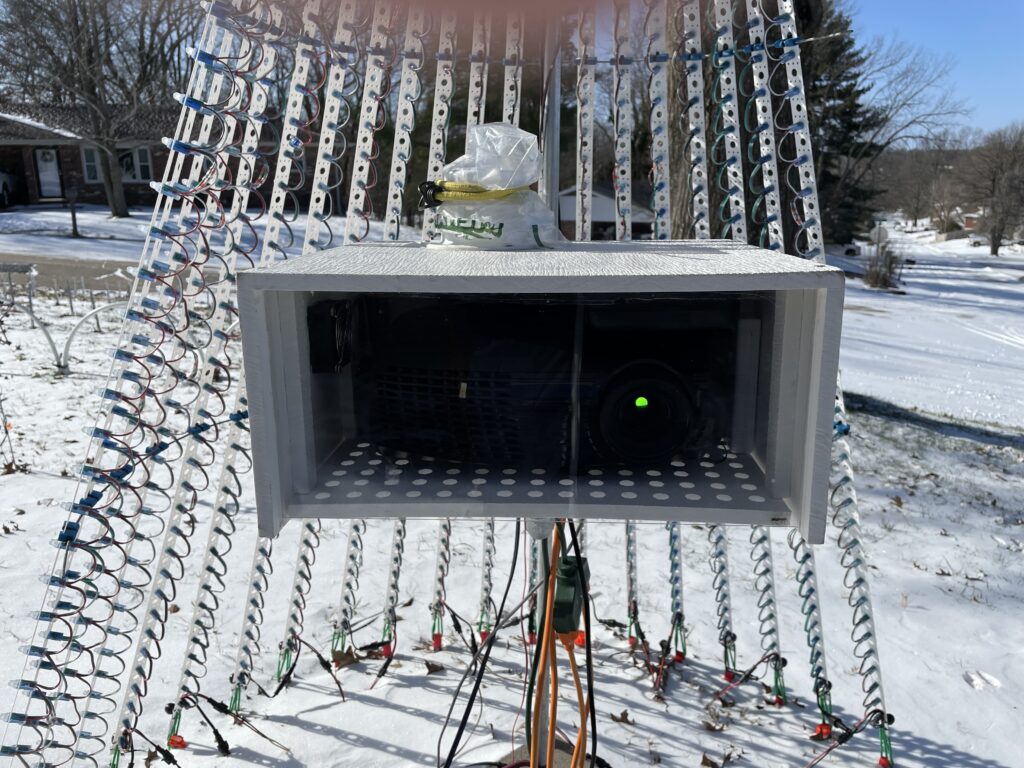
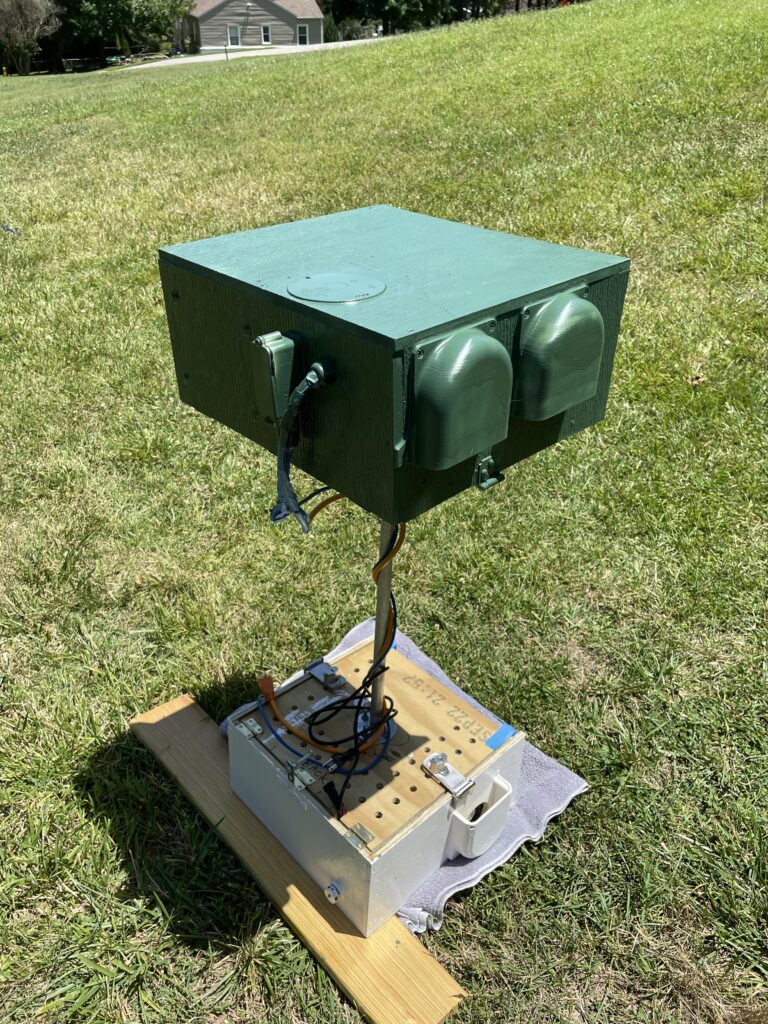
Here it is from all sides. I used a small square of the PVC board glued to the bottom to provide a sturdier base for me to connect it to a flange, which was then added to our “Maxi” Tree. Again, this is very similar to what we did before in 2021. It’s not “pretty”, but isn’t really seen at night when the show is running. I might (still) paint it green or red so it’s a bit more “festive” during the daytime.
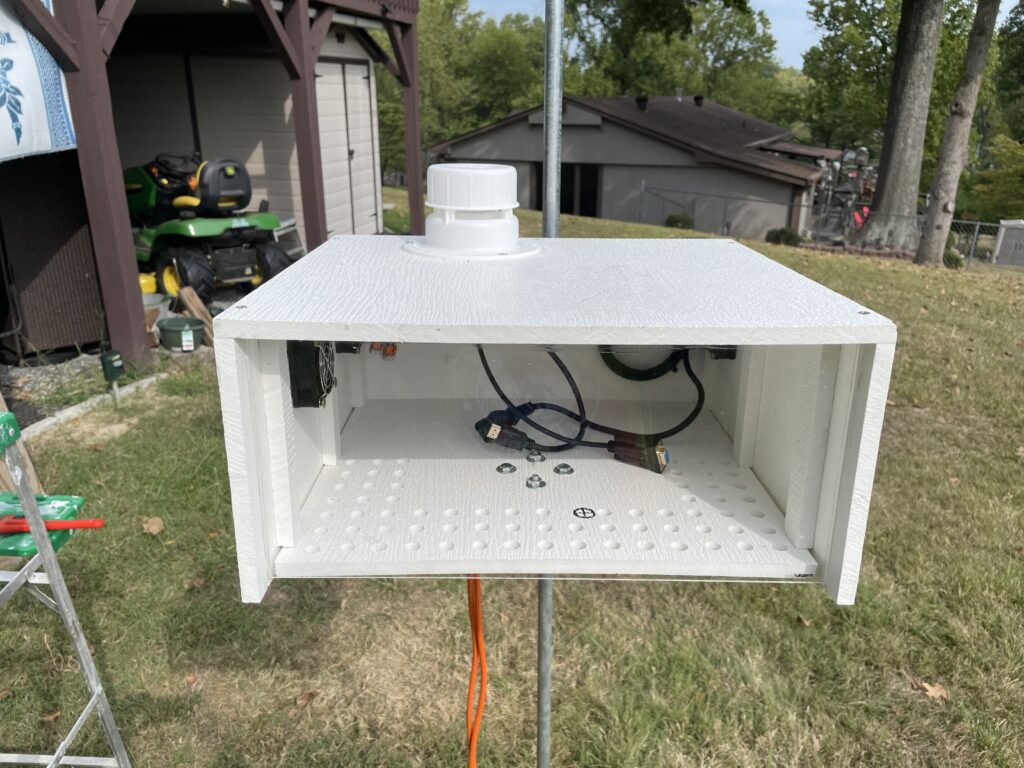
As a final step- I added some padlock hasps to keep the top secured to the bottom, so the top doesn’t blow off and it is less-likely to “walk away”. Here it is, ready to go, installed in our “Maxi” Tree:
I tested it during a few bad rainstorms and no water got into the enclosure. Being a bit paranoid though, since the top vent is right over the control buttons for the projector, I put a clear adhesive sheet of plastic over the top of the projector. It isn’t blocking any vent holes, but will protect it if any water does come in from the top. I don’t need access to the controls anyway.
The Raspberry Pi runs FPP with the “Projector Control” plugin. It sends commands to power the projector on and off through a USB to Serial adapter. I simply run the provided scripts remotely via my Show Runner FPP to power the projector on and off.

One big thing that is important with projectors like this- they need time to warm up AND cool off. I turn it on 15 minutes before it needs to be used, and make sure to turn it off and let it cool down before killing the show power. This is easy to do in FPP’s scheduler.
If you have a projector that doesn’t have a serial or network interface, you may be able to use this earlier project that I made for the old Vankyo LED projector we used previously. If you don’t use a Vankyo, but can find the appropriate remote codes for your projector, you can modify the code accordingly.
Update, Dec. 23, 2022 – Arctic Weather
Much of the US (and North America) got hit with a “once in a generation” arctic bomb cyclone on Dec. 21-22nd. Temperatures dropped in many areas 40℉ in hours, and most of the US had sub-zero temperatures, snow, and high winds. We had high winds (25-33mph sustained, 50mph gusts), and the night of the 22nd our temperature dropped to -6℉. Our projector has an operating temperature range of 40-100℉! I was very concerned about thermal shock shattering the lamp and the projector getting seriously damaged if I tried to run it at those sub-zero temperatures, so I had to make some emergency modifications.
First, I need to know what the temperature actually is in the enclosure. When I was testing it indoors earlier in the year- I just used a digital oven thermometer, but that wasn’t practical while the projector was outdoors. So, I got one of these:
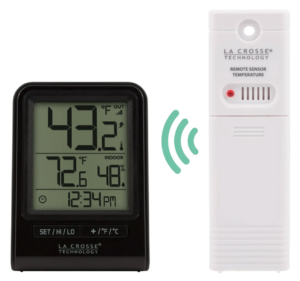
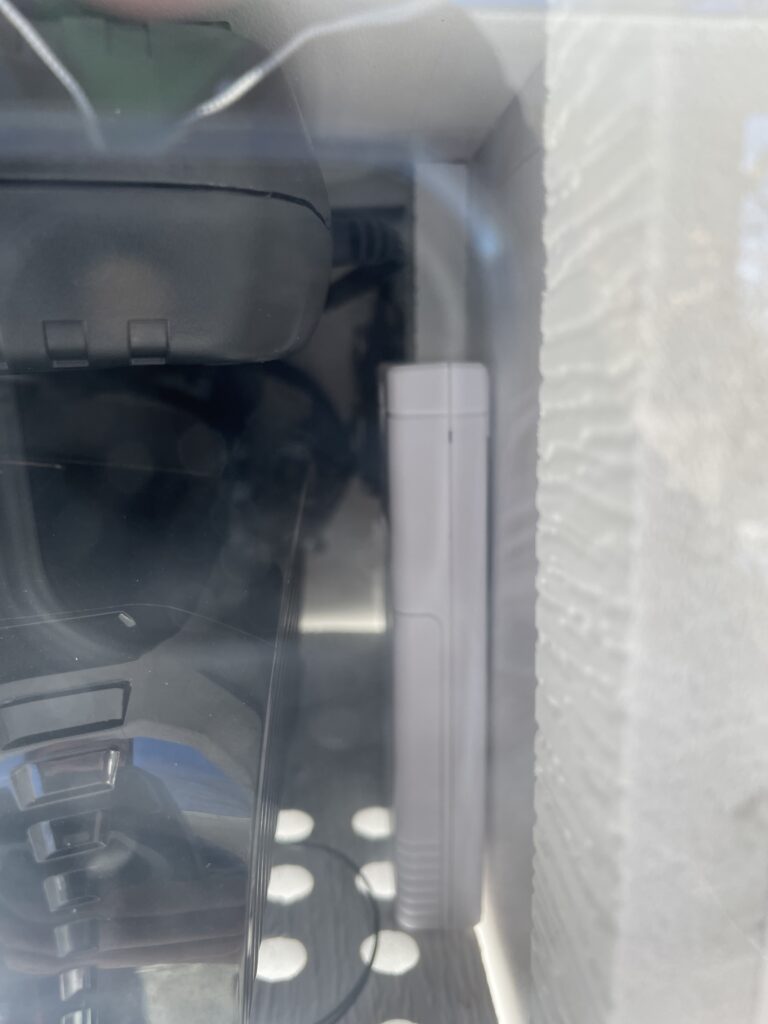
I found it at Menards for $15, but many stores and online retailers have them under a variety of part numbers. I mostly needed something with a remote radio sensor so I could monitor the temperature from inside the house. I mounted the sensor using alien tape in an open area on the right side of the enclosure. It’s on the “intake” side, so I figured at least I would know what the temperature was of the air the projector was sucking in.
Next up, I needed to kill the enclosures cooling fans. While they were very-necessary early in the season with temps in the 50-60s, they definitely aren’t needed when they are near zero. I didn’t want to just cut the leads since it’s actually going to get close to 60 again next week.(!) I added a couple of switches to the bottom of the Apache controller case (so they are somewhat protected from the weather) and wired up the top fan to one, and the three side fans to the other. Now I can turn them on and off easily as-needed. For next year, I will wire them to relays driven by a couple of the Raspberry Pi’s GPIOs, so they will be remote as-well.
Because of the high winds and temperatures, I also blocked the right (average north windward) side vent with a wad of plastic wrap, and covered the top vent with a bag. I left the south side vents open, and of course the whole bottom of the enclosure is one big vent. I was still concerned about the projector overheating if I blocked ALL of the vents, including the bottom.
Finally, I needed supplemental heat. I figured the projector can keep itself warm once the projector lamp is heated up, but turning it on below 20℉ seems like a recipe for disaster. My first thought was put a 100w bulb in the enclosure, but there isn’t enough room for one. I mounted one in a metal shaded lamp-holder underneath it as a test, but it didn’t generate enough heat to be useful. I tested some silicone heater mats, but the sizes of them I would need to be useful also wouldn’t fit. Heat tape/cable wasn’t practical and also didn’t put out enough heat. I even thought about using a hair dryer, but again- not enough room. Finally, I found this at a local auto parts store:
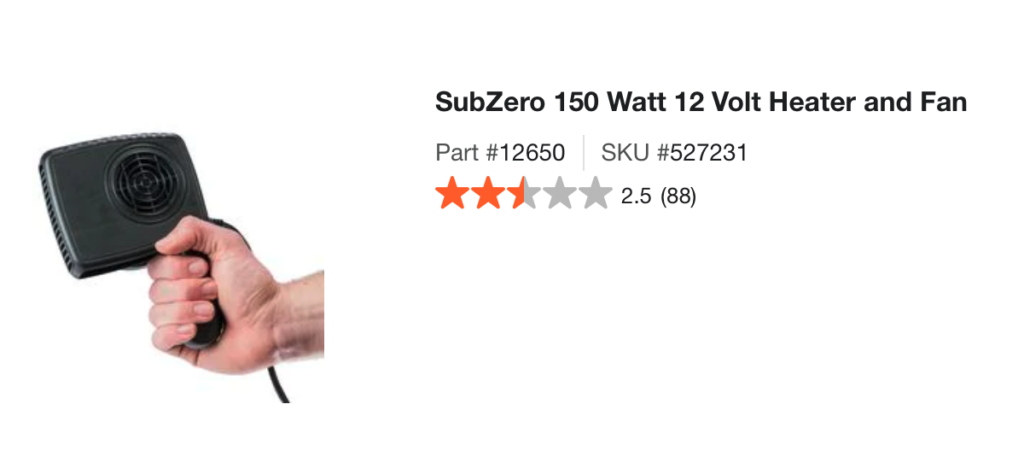
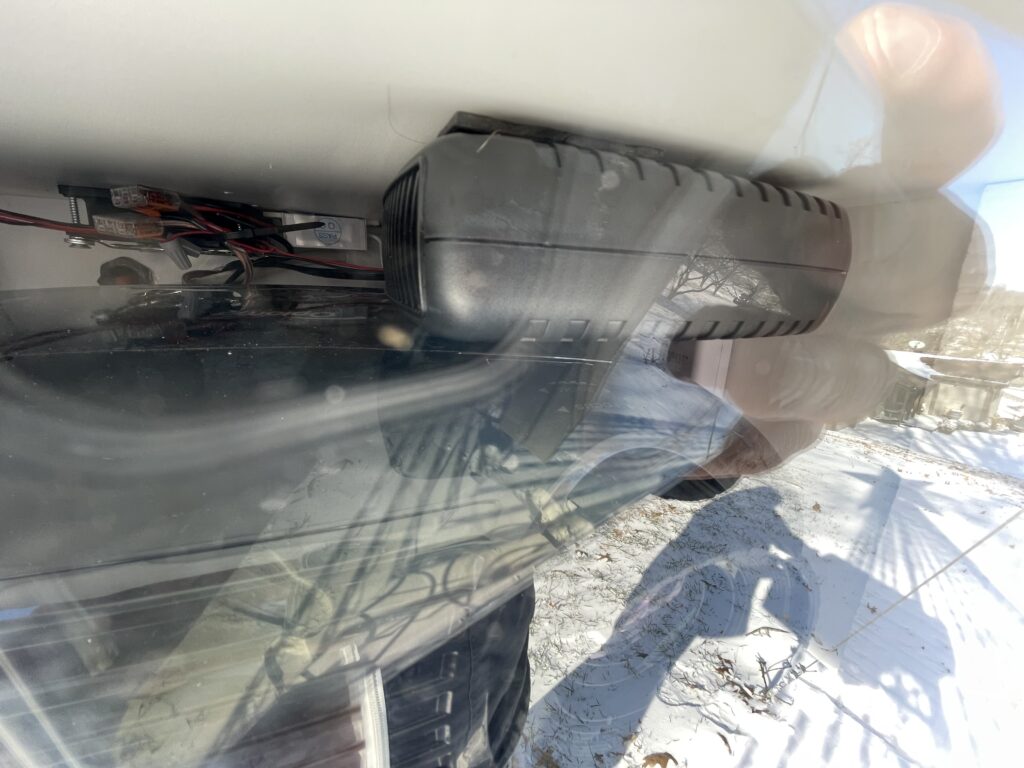
It is a portable defroster for cars/RVs. It can be handheld or comes with a dashboard mount. It was about $23 at a local AutoZone, but again- you can find them online and at many auto parts stores. It’s only about 1″ thick, so it can mount above the projector! I wanted to put screws through it to mount it since I didn’t trust tape/velcro, and the dashboard mount made it take up too much space, so I took it apart and removed the fold-out handle and switch, and hard wired it so the heat and fan are always on when it is powered up. It’s hollow at the bottom where the handle used to be, so I just drilled a couple of holes through the plastic, and mounted it inside the enclosure above the projector with a couple of screws.
This isn’t a great picture, but you can see the heater through the front in top of the enclosure. I did use some hook-and-loop tape on the front side, since the screws are just in the back.
It puts out about as much heat as a hair dryer, so enough to heat up a small space, but not enough to burn/melt anything. I wired it to a spare 12v PSU since it needs about 13A of power, and put the PSU on one of my FrankenPower relays so I can turn it on and off using FPP like everything else. All I do is turn it on for a half-hour before the projector. It will raise the inside temperature at least 20℉ degrees in that time, which is pretty good since the enclosure still has open vents. Once the projector starts up, I turn the heater off and the projector keeps the enclosure relatively warm. On the intake side (right), where the thermometer is, it goes up to about 30℉ above the outdoor temperature, and I figure the output (left) side is at least 20℉ warmer. It’s still a bit out of the operating range of the projector, at least to start, but so far it has worked well. As a bonus, the heat from the heater and the projector de-ices the plexi window, which was also coated in ice.
As I mentioned earlier, I’m planning to clean the whole thing up after the season is over, and will put relays on the fans so I can remote control them. I will probably still need to use plastic wrap/bags to block any unwanted vents if it gets this cold again. While I love automation, there isn’t enough room to put dampers on all of them. 😀 Ideally I can rig a thermistor or some other kind of temperature sensor to the Pi and have it automatically run whatever it needs. This weather is very unusual though, so I probably won’t take it that far. It’s easy enough to just disable the heater in FPP’s scheduler and flip a switch or two to turn the vent fans back on when it warms up again.
UPDATE (July, 2023)
After building a new enclosure for a new 2nd projector, and developing a thermostatic control system for heating and cooling, I retrofitted this enclosure for the new system. I removed the box on the back that was housing the RPi and switches for the fans and heater, moving the RPi back inside the main enclosure.
I found 80mm 12v cooling fans with a much higher capacity than what I used before. Just one of them can exhaust enough air to keep the projector cooled now. They are also moisture resistant, so should last longer in this environment.
I was able to eliminate the top vent, which I just covered with a plastic electrical box cover, glued and sealed tight.
These are a variation of the ones I used on the 2nd enclosure. They have a wider mounting pattern and are a bit easier to print.
Since the old smaller BUD vent covers were glued-on, I had to drill them out with a hole saw. It was ugly, but worked. After installing the new covers, fans and controls, I updated FPP on the RPi to use the thermostat.php script (linked on Github above).
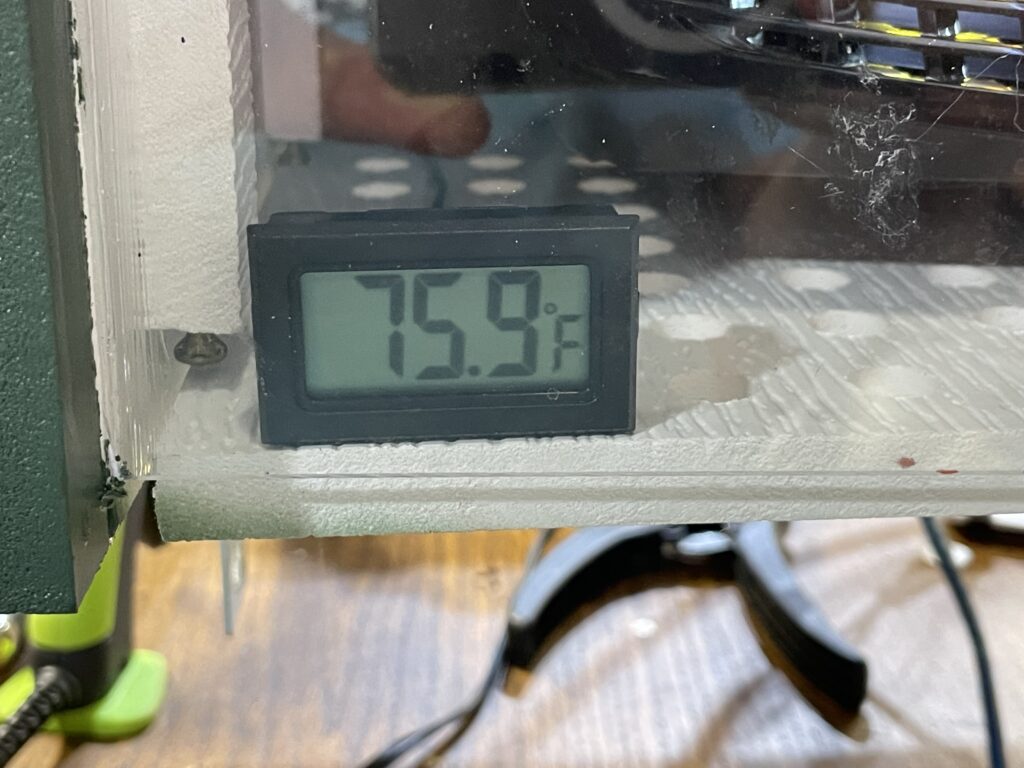
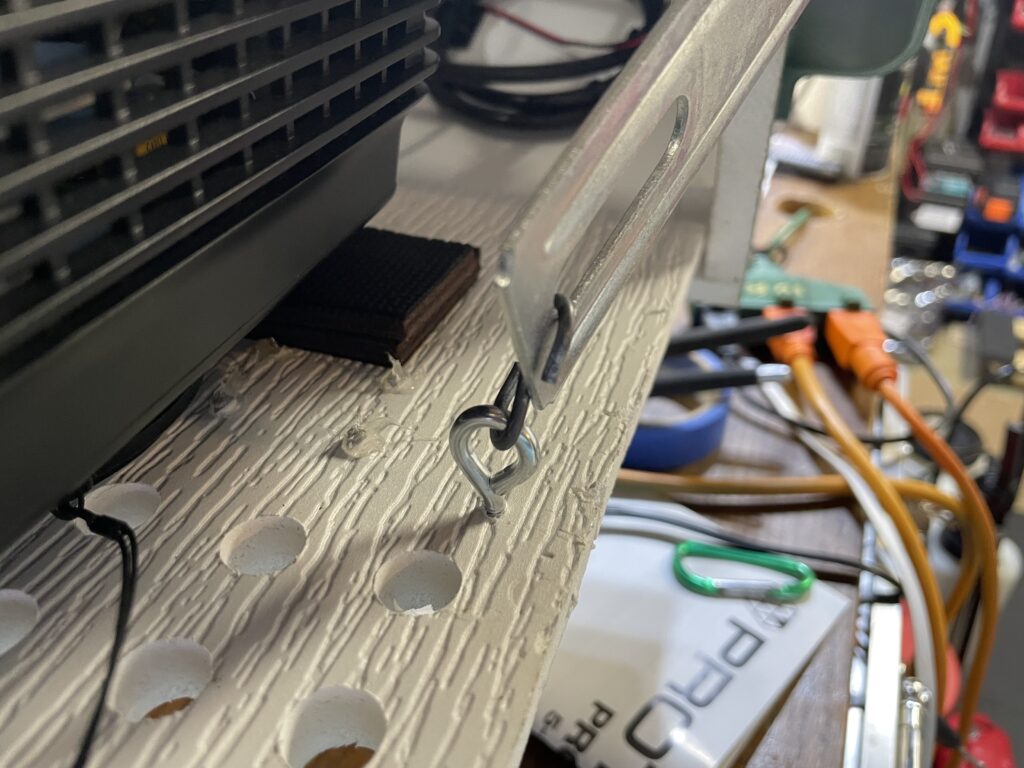
I cleaned it up, and added hinges on the back so it is easier to manage the cover in the field. I tried using a brass lid holder too, but there wasn’t enough room for it to operate properly with the cooling fans installed. I added a simple screw eye and S-hook so I can hook one of the padlock hasps to keep the cover open. I also removed the remote temperature sensor as it is no-longer needed. I did mount a small digital thermometer in front of it, just so I have a visual indication of the temperature when I look at the front of the box.
Here is a quick slideshow covering most of the work. I painted it green so it looks a bit nicer. The other enclosure is a bright red.

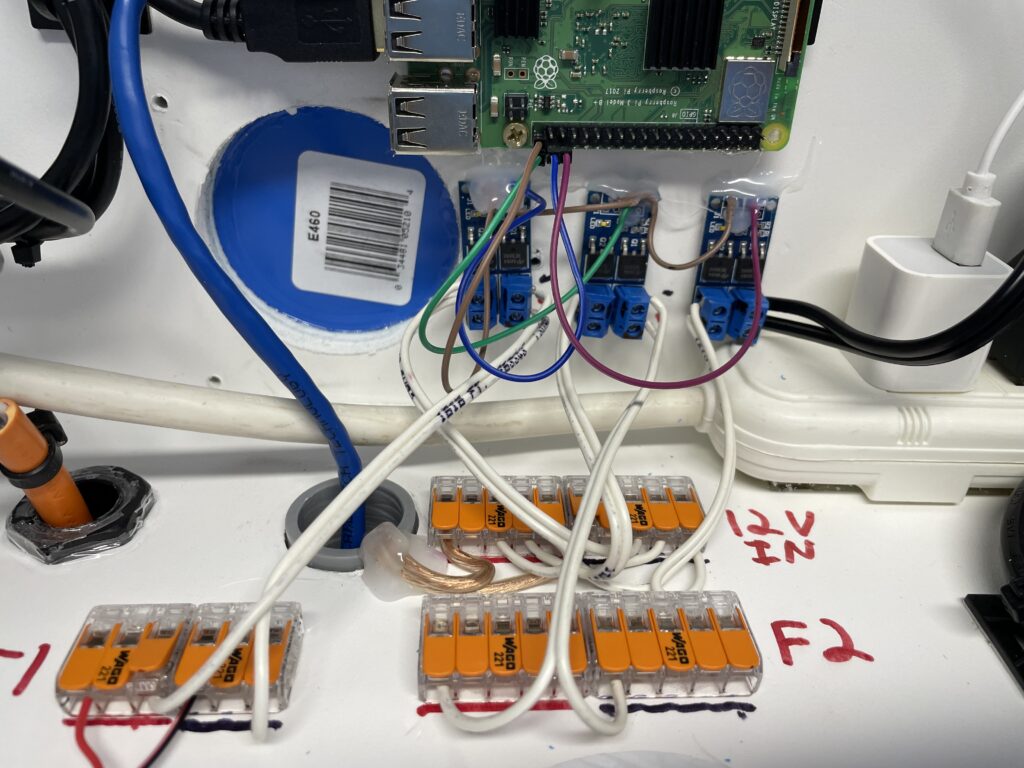
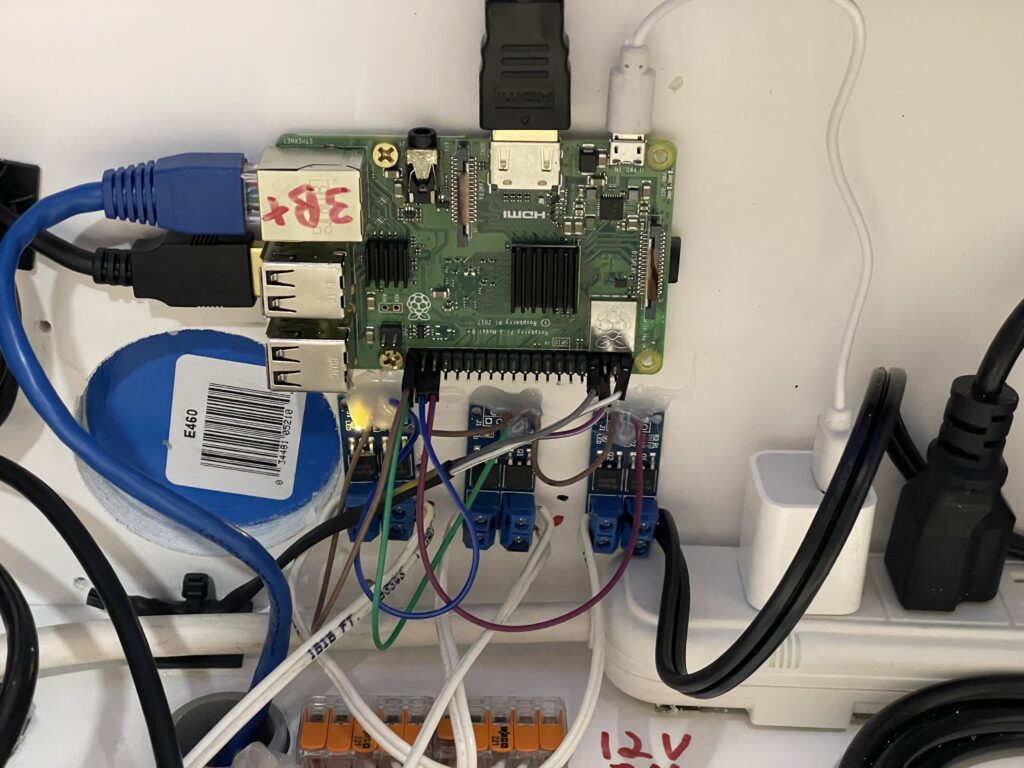
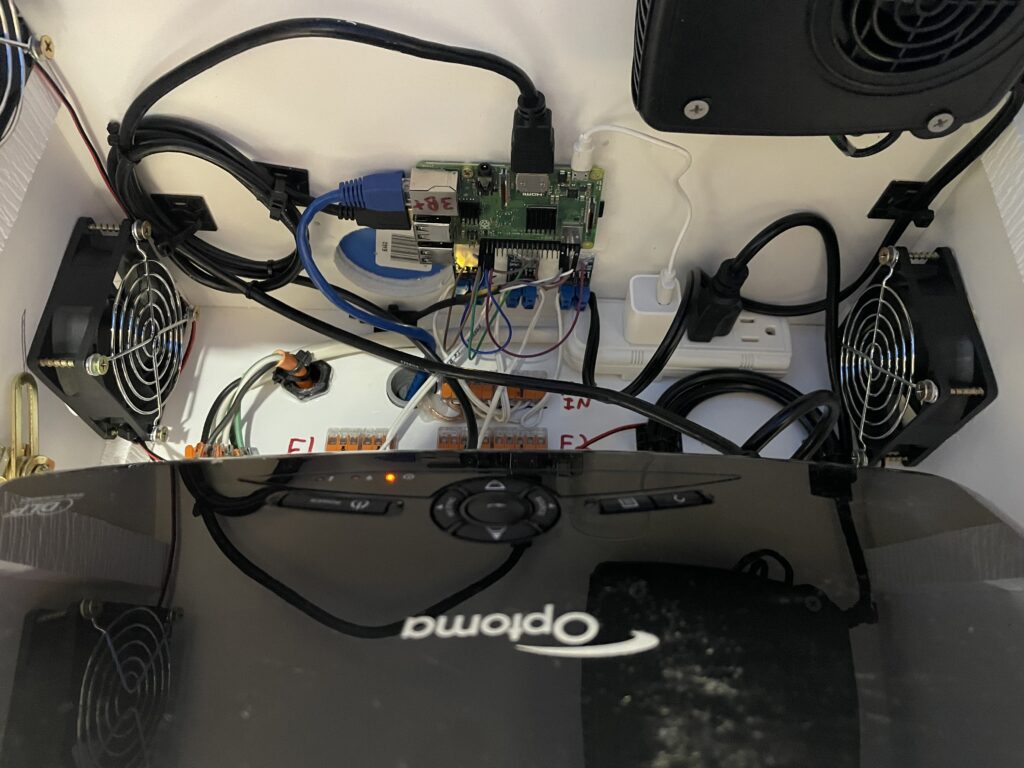
Started laying out parts. I put the RPi right back where it was before I moved it out of the box last year. Close-up showing RPi, SSRs, and Wago bus connections. Fully populated and ready for the projector. The brass cover holder on the left was removed, as it didn’t work properly. Close up of final RPi connections. Projector in-place. Just barely enough clearance in back for everything. 
Painted the outside. I used the other enclosure as a temporary base. Painted the outside. I used the other enclosure as a temporary base. Close up of vent. One could probably use dryer vents for this too. Small digital thermometer added. Simple way to keep the top from falling back too far. Testing the system with the projector installed.

It needs some paint touch-up in places, but otherwise it’s ready to install in the Maxi Tree this fall. It’s cousin will be freestanding behind the Mega Tree.
If I do these enclosures over again, I will make them larger with enough room in the back to put all the electronics on a DIN rail.
IMPORTANT SAFETY UPDATE:
As I noted in this project I found that the SSR (MOSFET) for the heater can’t handle the load, even though it is less than its rated capacity. It overheats quickly. It isn’t pictured, but I had to replace the scorched MOSFET in my newer enclosure and add a higher-current (25A) one to control the heater.
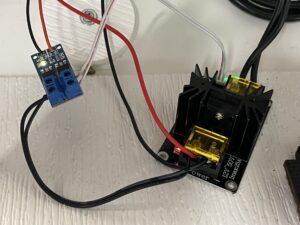
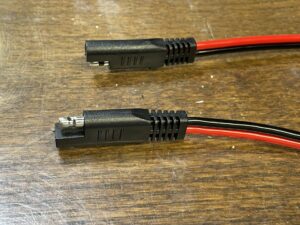
I also found the usual auto/ATV power connectors that I use for power injection and other 5v-12v projects were getting quite hot with the heater running. I didn’t notice this last year with the other enclosure, probably because it was below freezing outside. I replaced the 12v connectors for both of the enclosures with these 12 AWG heavy-duty “SAE” connectors, which are similar to trailer connectors: