
Second Projector Enclosure (2023)
I need to build a second projector enclosure as we are adding another “big screen” to our display this year. The first one is blocked by our front yard oak tree, so we wanted another on the other side of the house. It will be where we projected in 2020 and 2021, behind the Mega Tree.
Hoping to learn from my mistakes last year, mostly using underpowered cooling fans and not installing a heater until the temps were already below zero, I made some design changes. I also had to use plywood because the PVC board I’ve been using seems to have doubled in price since the last time I bought it. Construction is fairly simple:
- I measured the projector and added 2″ on either side and about 3 inches front to back and cut a top out of pressure treated plywood.behind it so there was enough room for everything. I should have made it 3″ wider on the sides, as it turned out to be a tight fit with the cooling fans.
- I cut the sides and a back about 2″ higher than the projector The sides are the full length front-to-back, and the back an inch smaller so it fits between the sides.
- I found some pieces of 1″x2″ lumber, and cut them 1/2″ shorter than the sides and back, as the bottom piece will go inside the box, overlapping by 1/2″. This keeps the weather out.
- I assembled the top, sides, and back using the pieces of 1″x2″ as bracing for the back.
- I used two more 1″x2″ pieces in the front, set back about 3/4″. I also put a piece across the top in front. This will support the box on top of the base, and gives me something to mount the plexi front too.
- Once assembled, I sanded it a bit and calked all of the gaps where the wood was joined. It definitely isn’t perfect, as I used a small circular saw to cut it out. I really should have used a table saw so my cuts were more even.
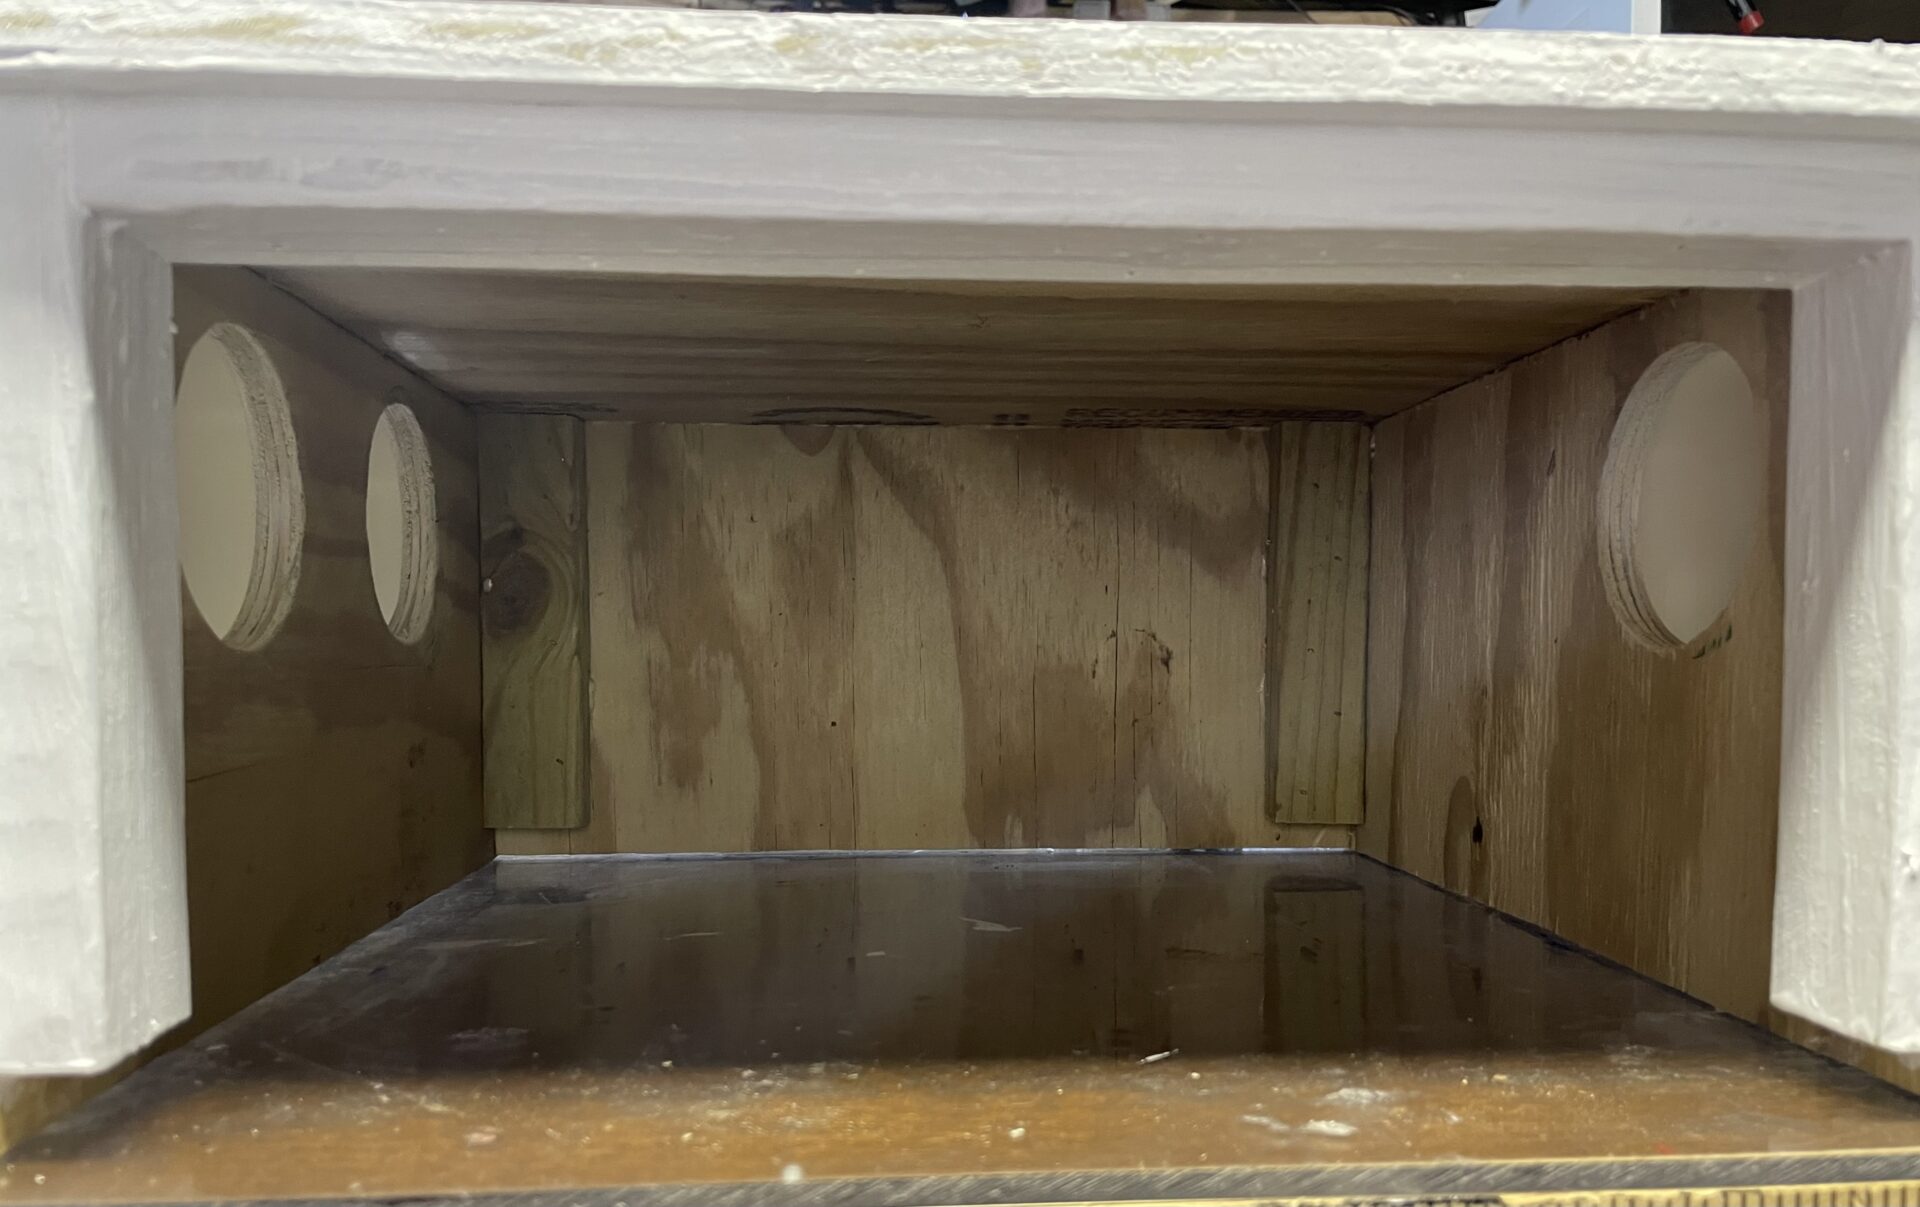
- I used a 3″ hole saw to make two vents on the left side (looking at the front), as that is where the exhaust from the projector’s fans is. I drilled on on the left side too for additional airflow. The all exhaust.
I also 3D printed some vent covers. I tried a few deferent styles and liked these the best. I printed them without supports, so the curved top and sided are a bit rough, but they are still waterproof and functional. I can’t find the original download, I think it was on thingiverse.com. I’ve uploaded the STL here. I sprayed them with some off-white plastic spray paint as a primer, and will be painting them the same white as the rest of the box.
I drilled 3″ holes because they almost perfectly match 80mm cooling fans. I bought these, which work GREAT! I’m going to replace the fans in the 1st enclosure with them, as well as print the same vent covers, and I should be able to get rid of the top vent. Each one seems to push as much air as the projector’s internal fans, and the two secondary fans almost never turn on, even at a room temperature of 75℉. Plus, being “moisture proof” can’t hurt for a box that sits outside in rain and snow for two months.
I also added a heater, similar to the one I added to the other enclosure last year. It’s a “portable defroster” that uses 12V DC, 150W . The fans are 12v too.
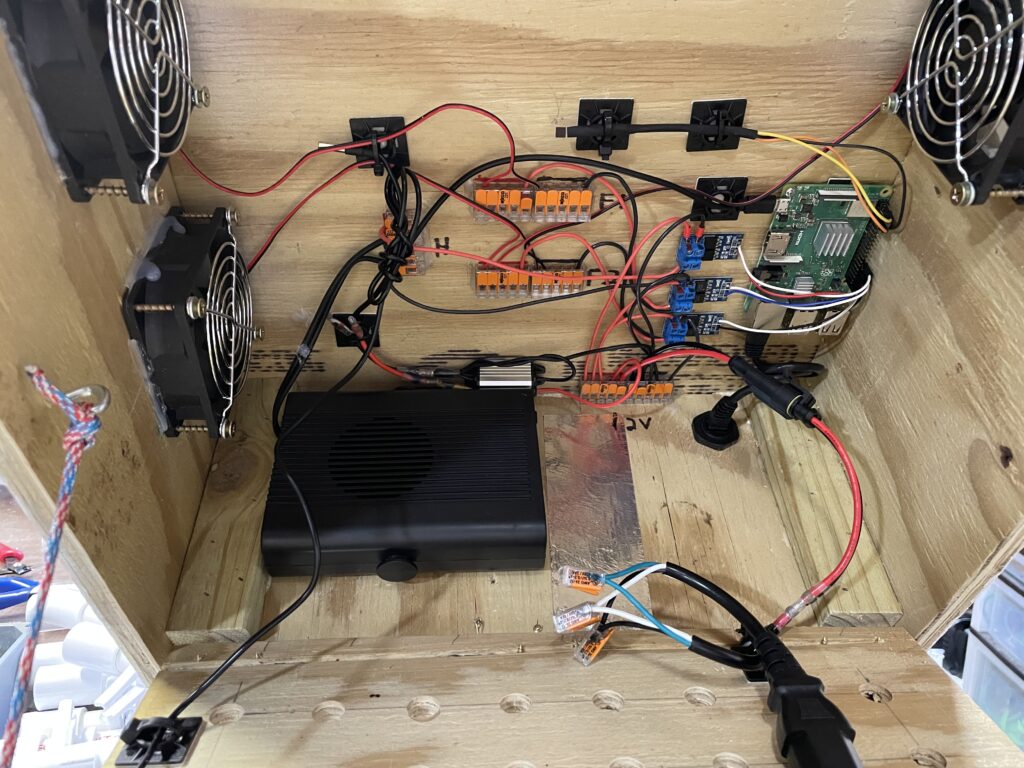
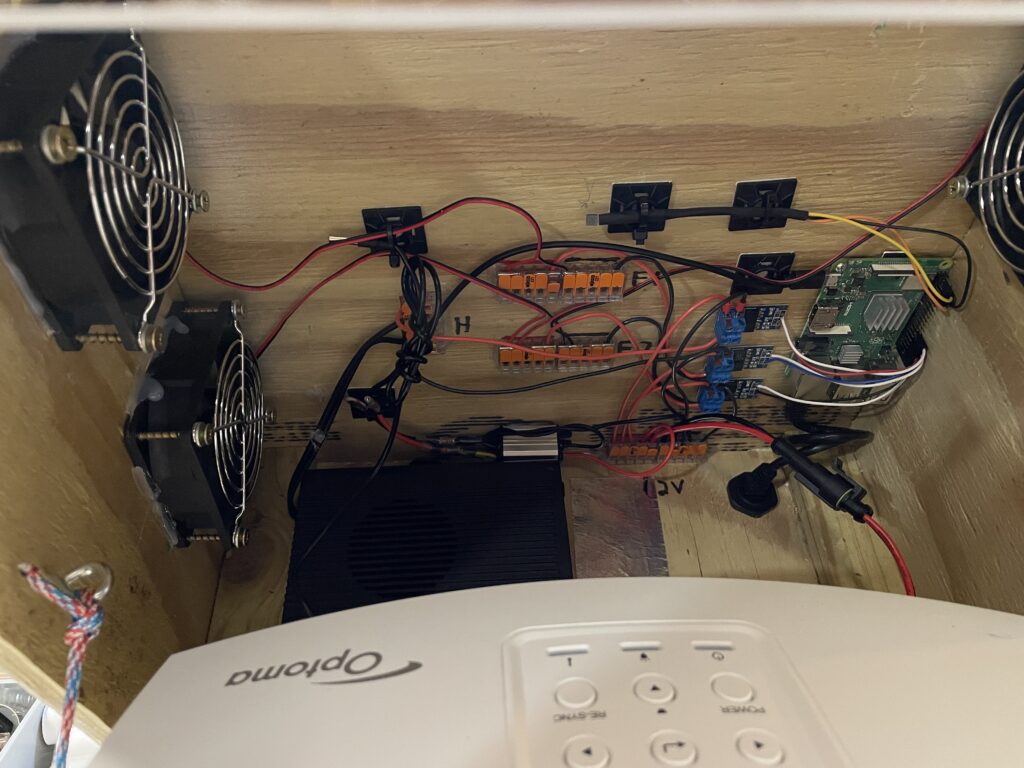
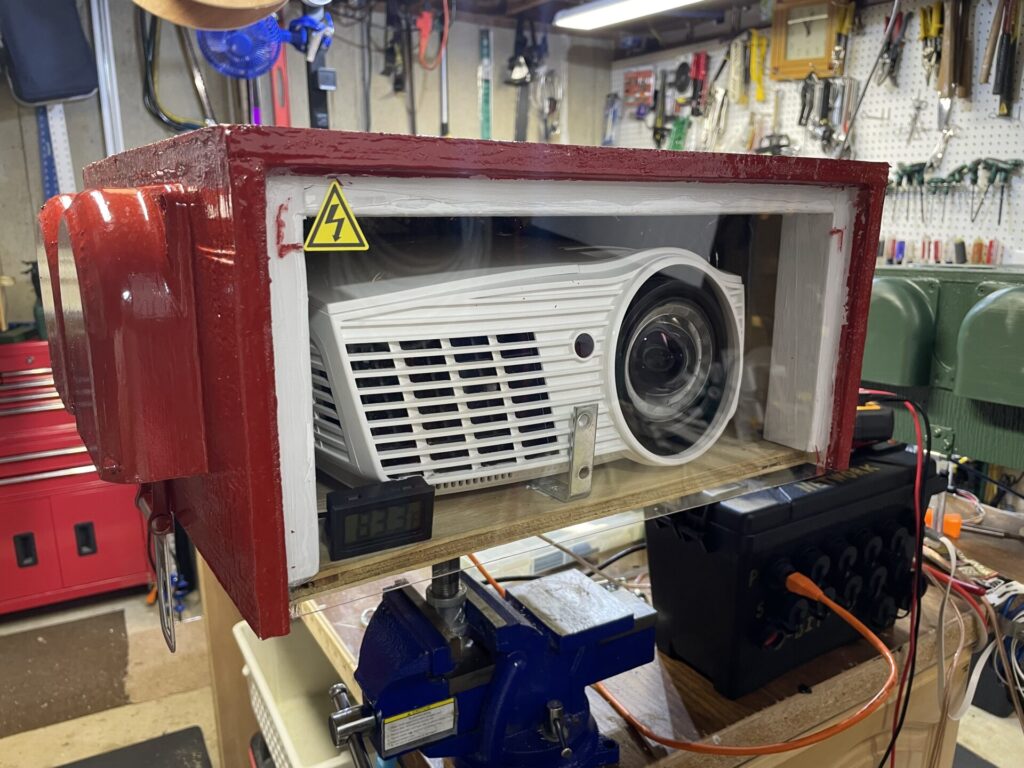
I mounted the heater to the back of the box using Alian Tape, and screwed the vent fans on top of the vent holes. I added thermostatic control script to the Raspberry Pi running FPP, so the fans and heater will be automatic. I mounted the SSRs and Raspberry Pi to the top-rear of the enclosure. With the larger cooling fans, I don’t need to mount it in another box outside the enclosure anymore. I used combination of Alien Tape, hot melt glue, silicone sealant, and zip-tie mounts to fasten everything inside the box. Here you can see the heater, fans, and the rest of the components.
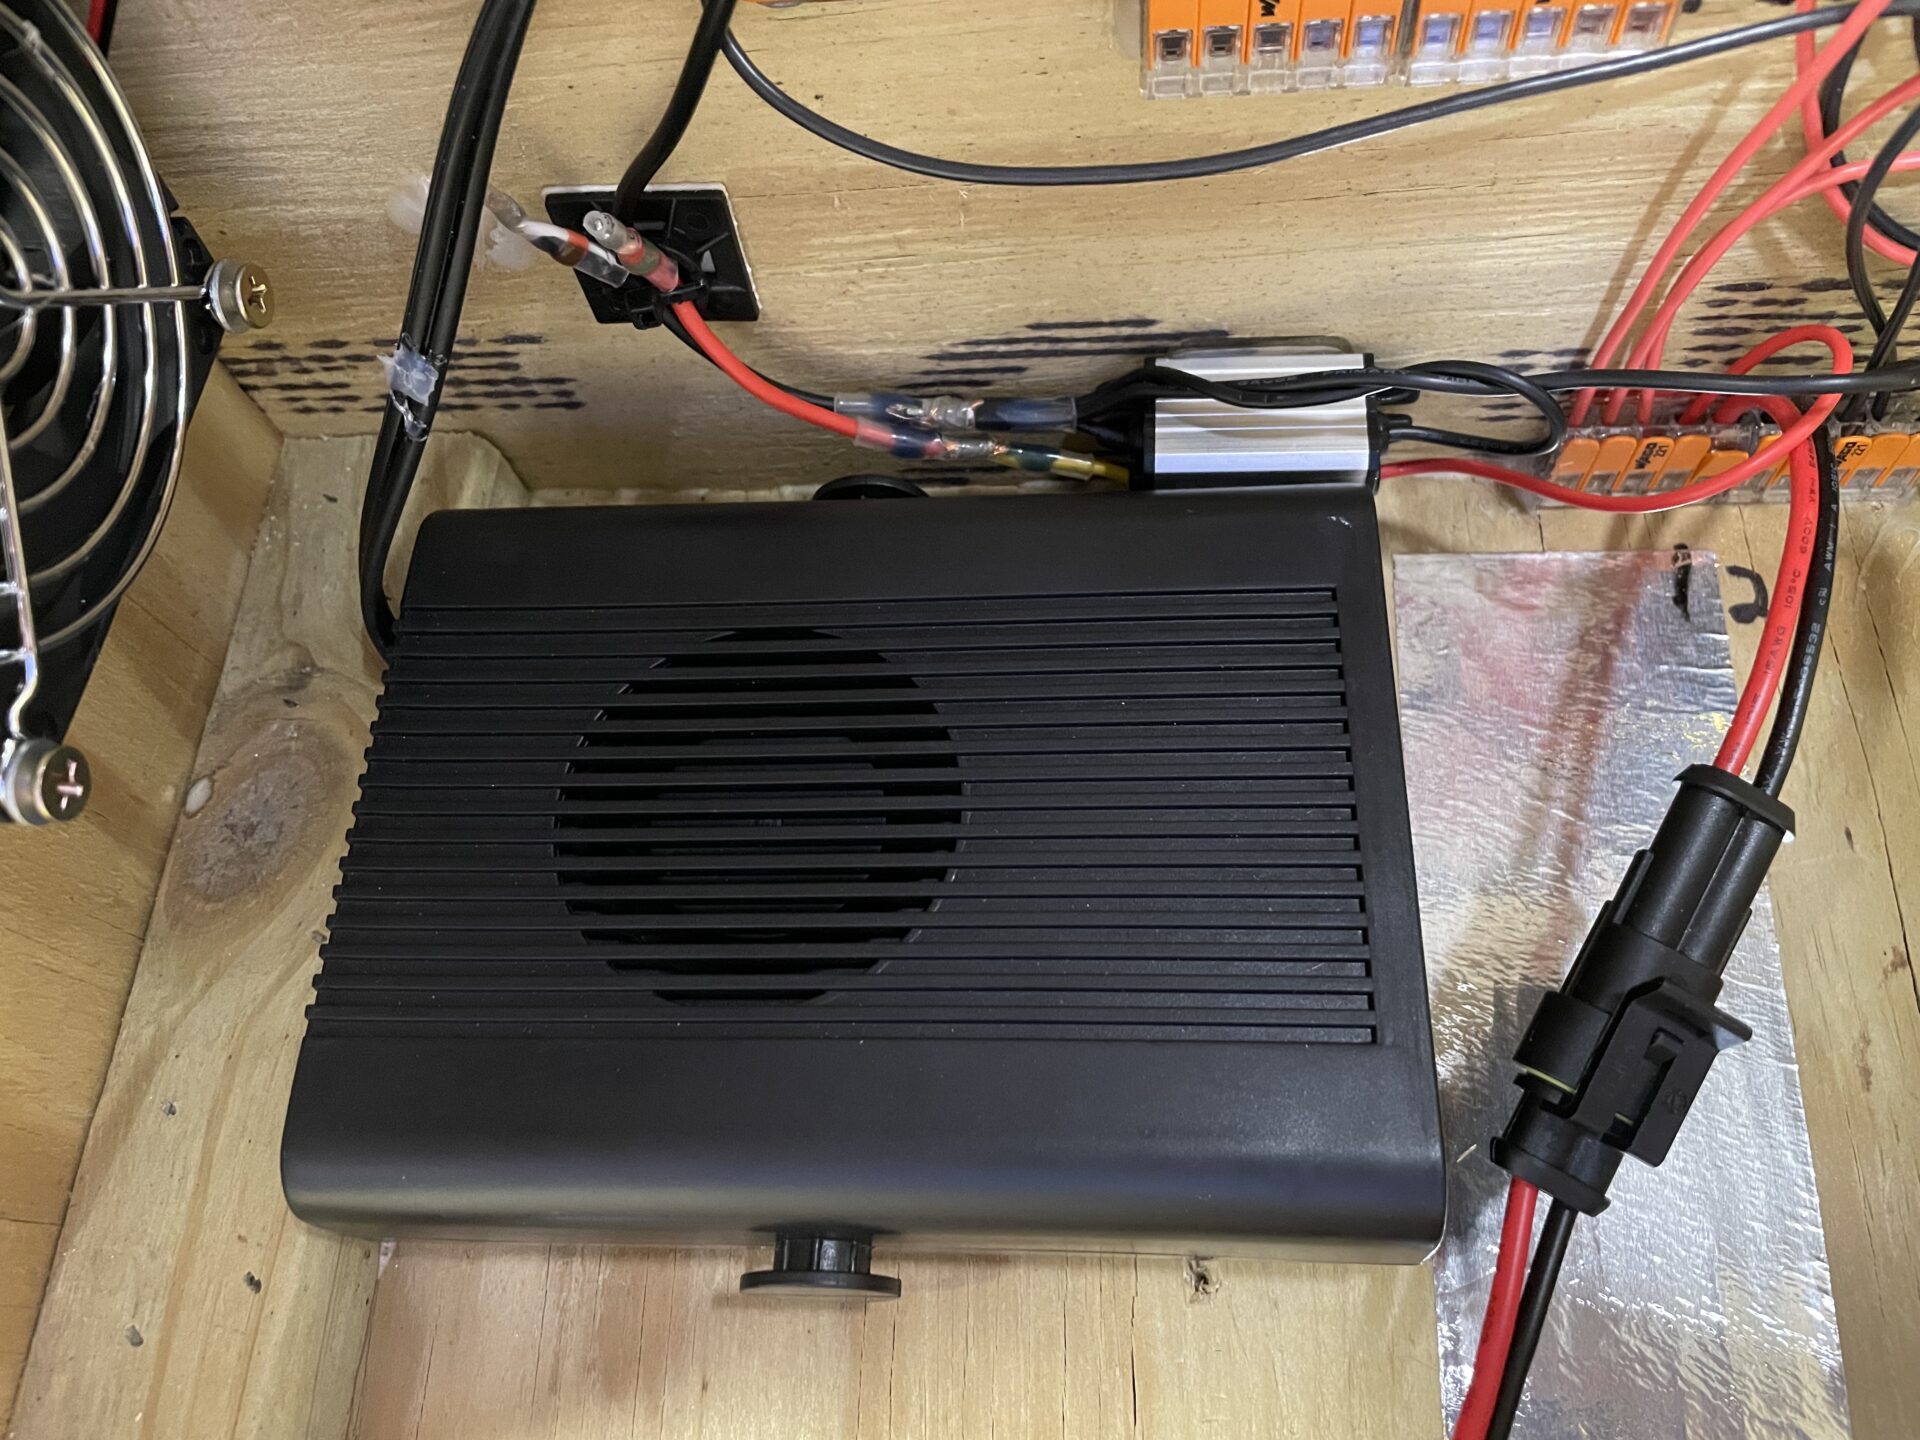
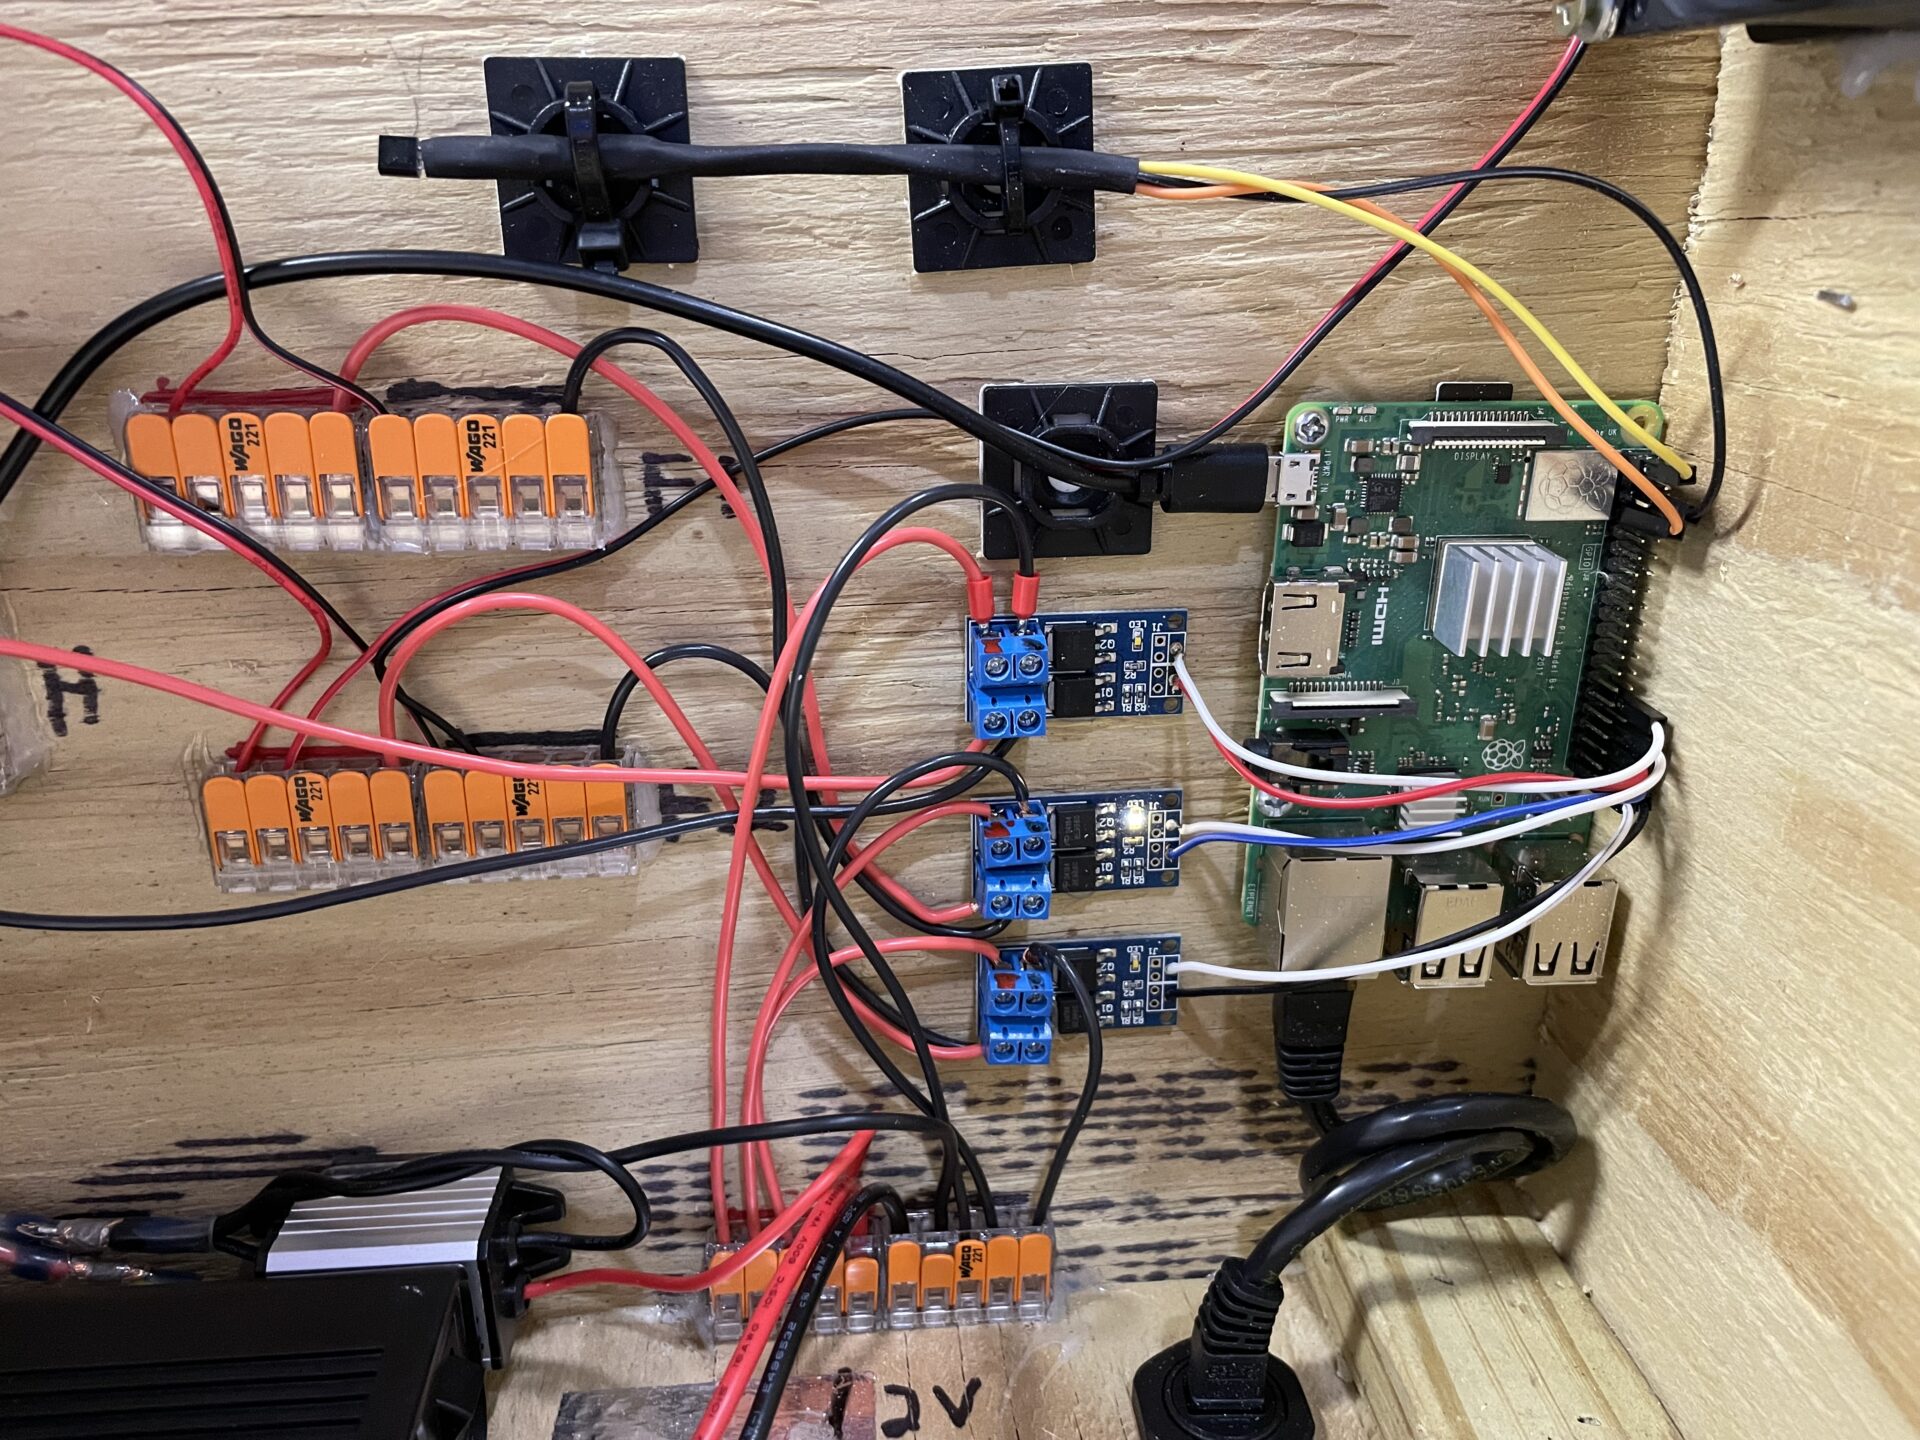
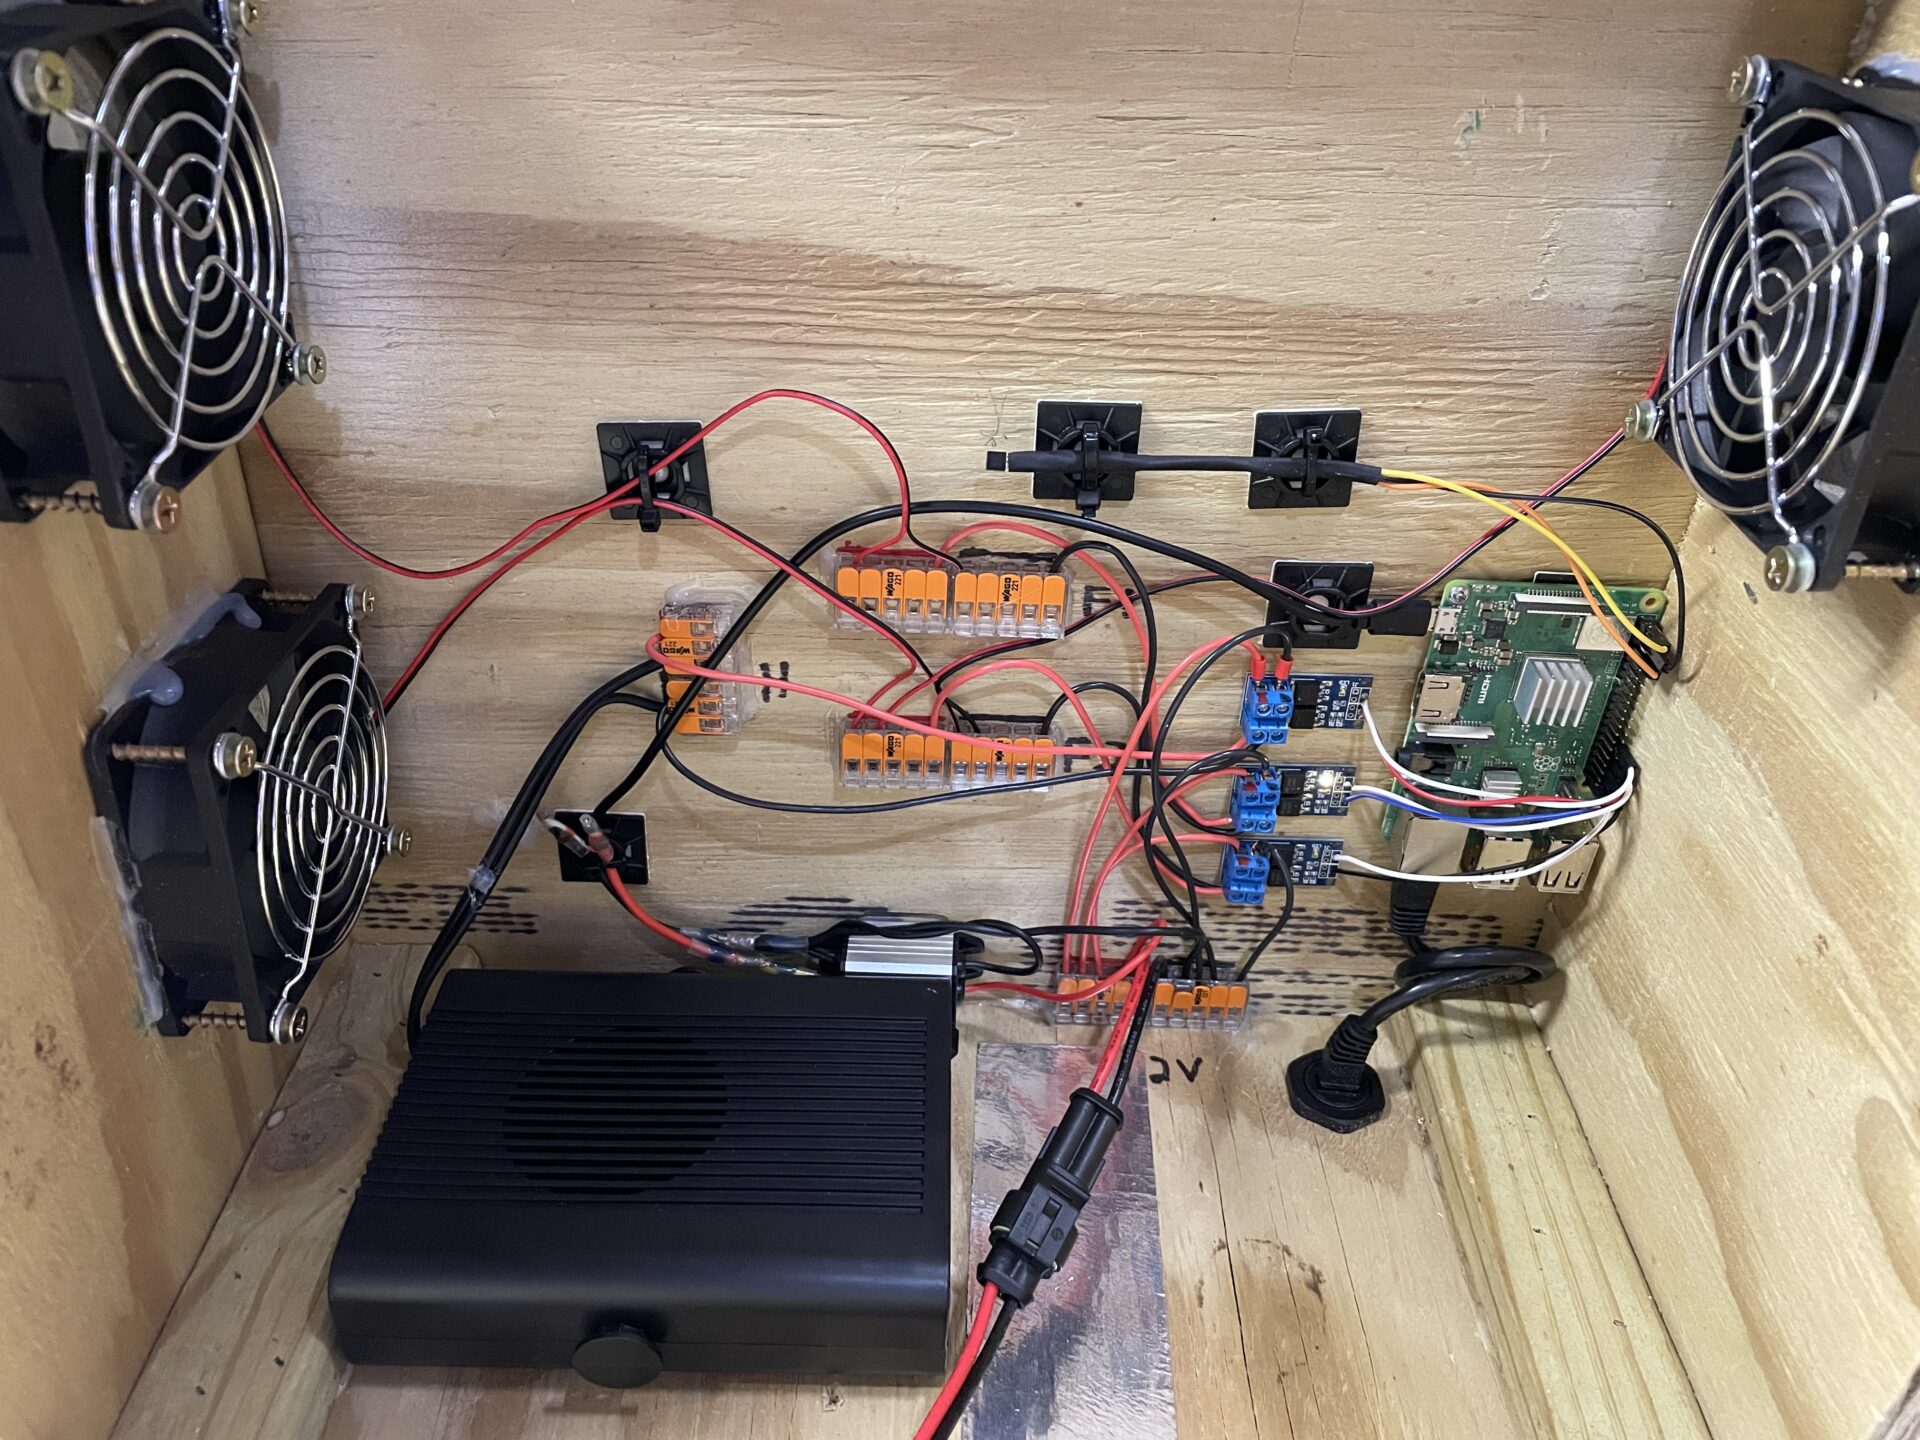
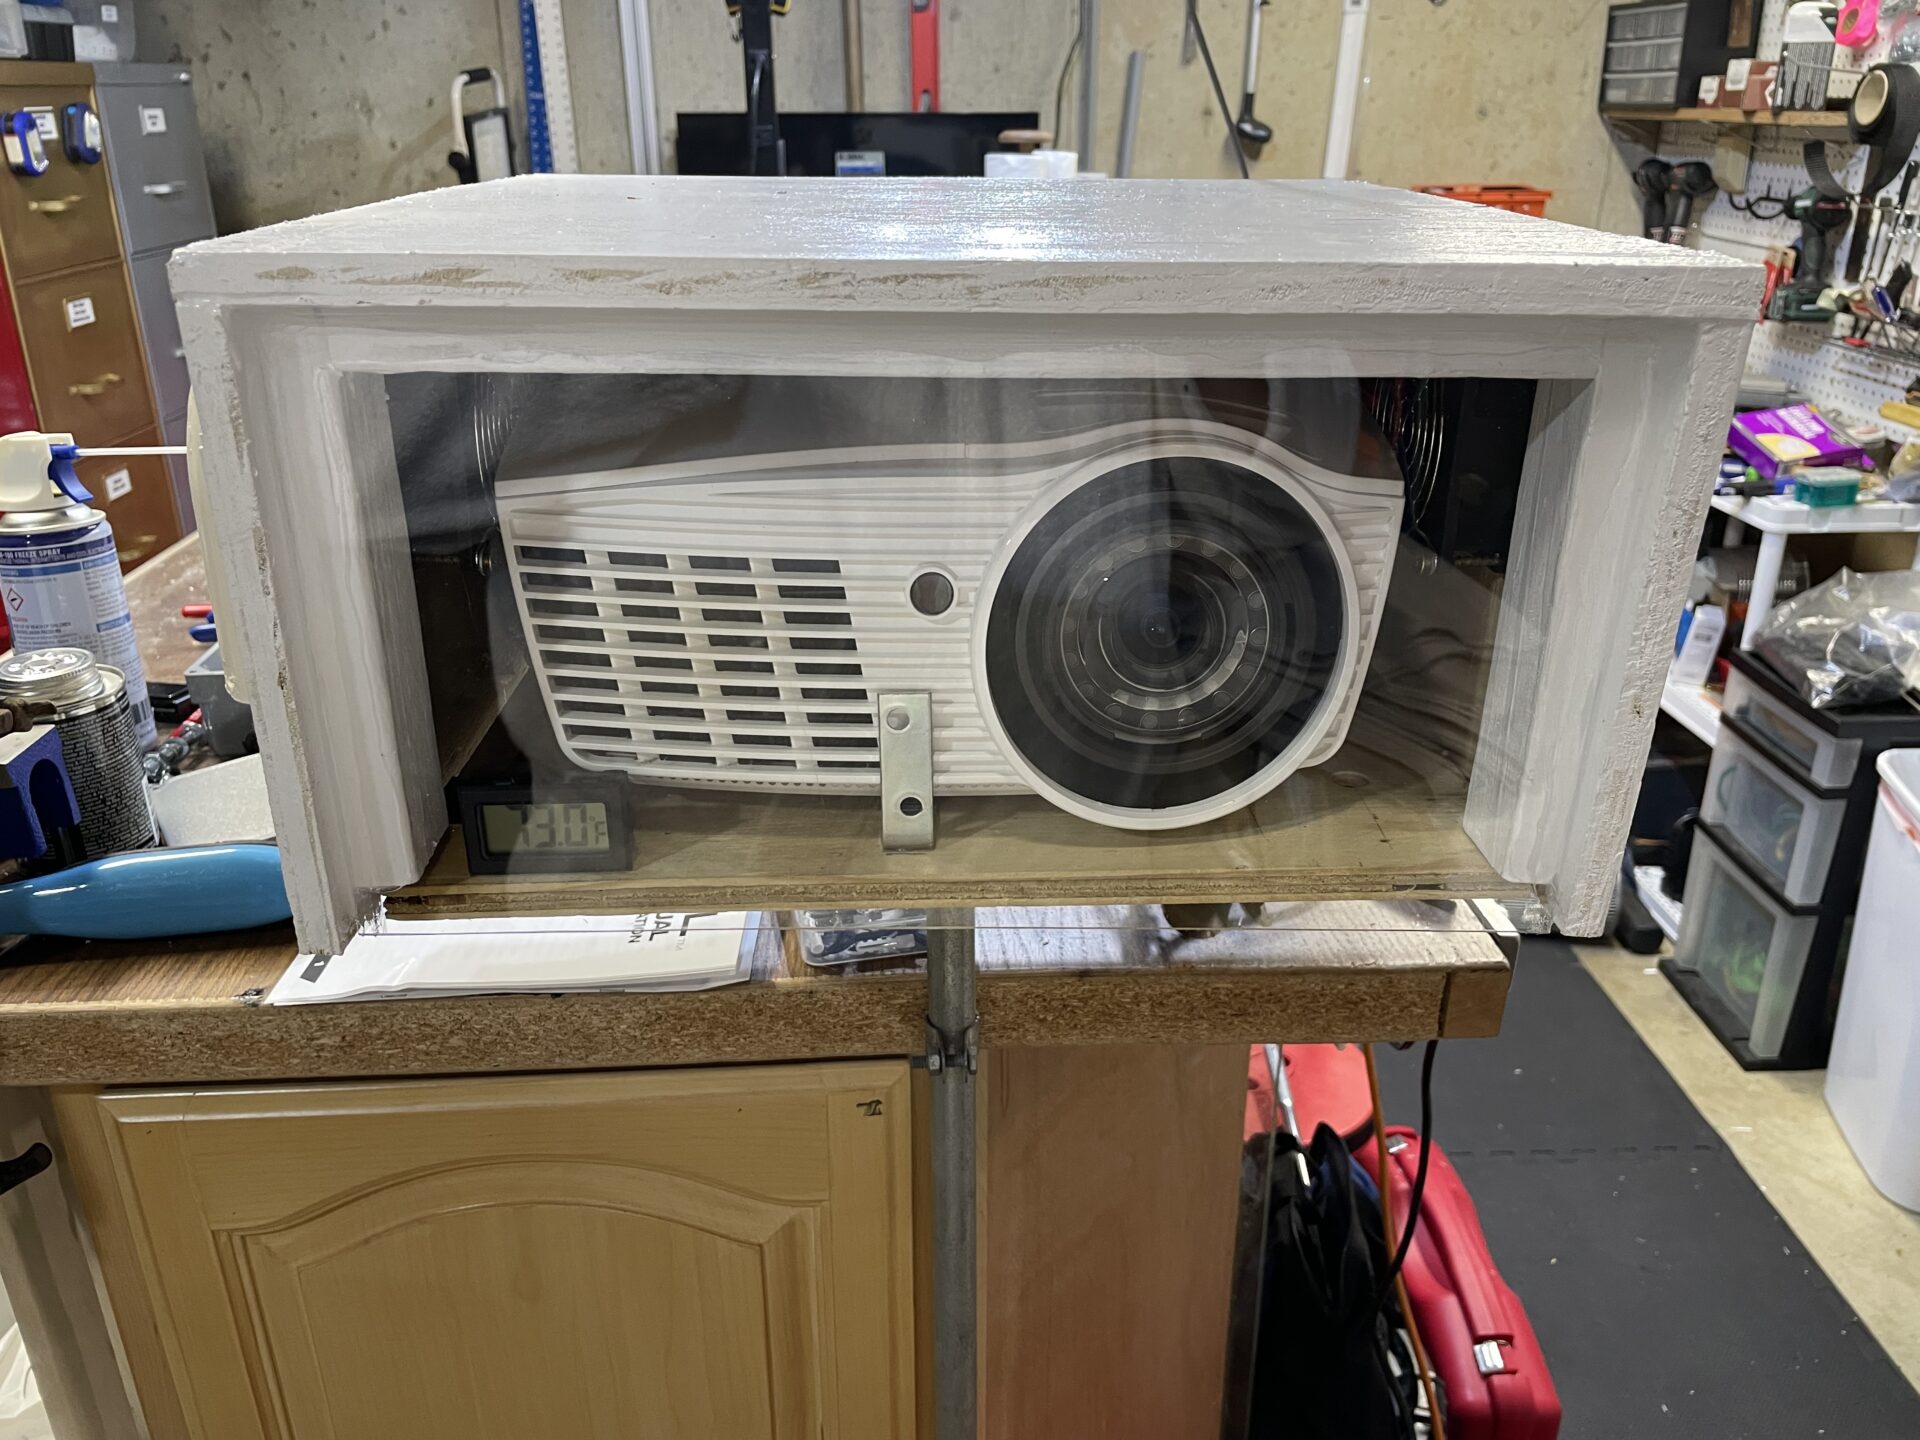
The fans and heater are 12v, and I don’t like having a bunch of different PSUs or using a wall wart for the Raspberry Pi, so I added a small 5v buck converter. It’s the silver box above the heater. The heater is about as hot as a cheap hair dryer. I put some aluminum tape in front of it in case it got any hotter, but it doesn’t. I also added a small digital thermometer to the front of the box so I can watch the inside temperature and make sure the thermostat system is working.
IMPORTANT SAFETY UPDATE:
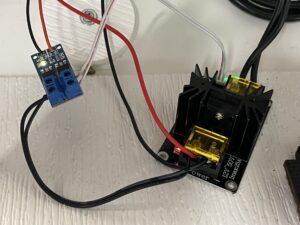
As I noted in this project I found that the SSR (MOSFET) for the heater can’t handle the load, even though it is less than its rated capacity. It overheats quickly. It isn’t pictured, but I had to replace the scorched MOSFET and add a higher-current (25A) one to control the heater.
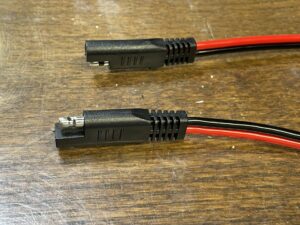
I also found the usual auto/ATV power connectors that I use for power injection and other 5v-12v projects were getting quite hot with the heater running. I didn’t notice this last year with the other enclosure, probably because it was below freezing outside. I replaced the 12v connectors for both of the enclosures with these 12 AWG heavy-duty “SAE” connectors, which are similar to trailer connectors:
The base is cut so it just fits inside the enclosure box, leaving about a 1/2″ gap in front for additional ventilation. The enclosure sits on top of it, on the 1″x2″ corner pieces of wood. Similar to past designs- I drilled 1/2″ holes in it for ventilation. As I found with the other enclosure, a gap between the base and plexi helps keep the plexi clear of frost/condensation. The plexi was cut to fit and attached to the front using silicone sealant. I used hinges to attach the base to the enclosure in the back, and added an angle brace with a bolt to keep the top from falling all the way open behind the base. I also used a bit of parachute cord and some screw eyes on the inside to help keep the top from opening too far. I was afraid because of its weight that the stop on the outside may rip out the hinges. 1/2″ plywood isn’t the most durable thing to use for something like this. You can see that in the pics below…

I screwed up (again!) and didn’t put the power cord thru the slot I cut for it in the base before I attached the cover hinges. They are glued and screwed for added strength, so they aren’t coming off! So, I had to splice it with some Wagos. The 12v power lead comes through the same hole and everything is zip-tied to prevent pull-out. I bolted a 1/2″ galvanized flange to the bottom of the base, and the projector will be attached to 1/2″ galvanized pipe on a base. Unlike the other projector, this one will not be mounted to a tree, but will be free-standing.
Another thing I messed-up (live and learn)- while I measured this to fit the projector and cables, I didn’t account for the heater, which takes away an inch in the back of the enclosure. Standard HDMI and RS232 (Serial) cable connections pushed the projector all the way into the plexi when the enclosure was closed up. This was not ideal, so I got some 90° adapters for both of them:
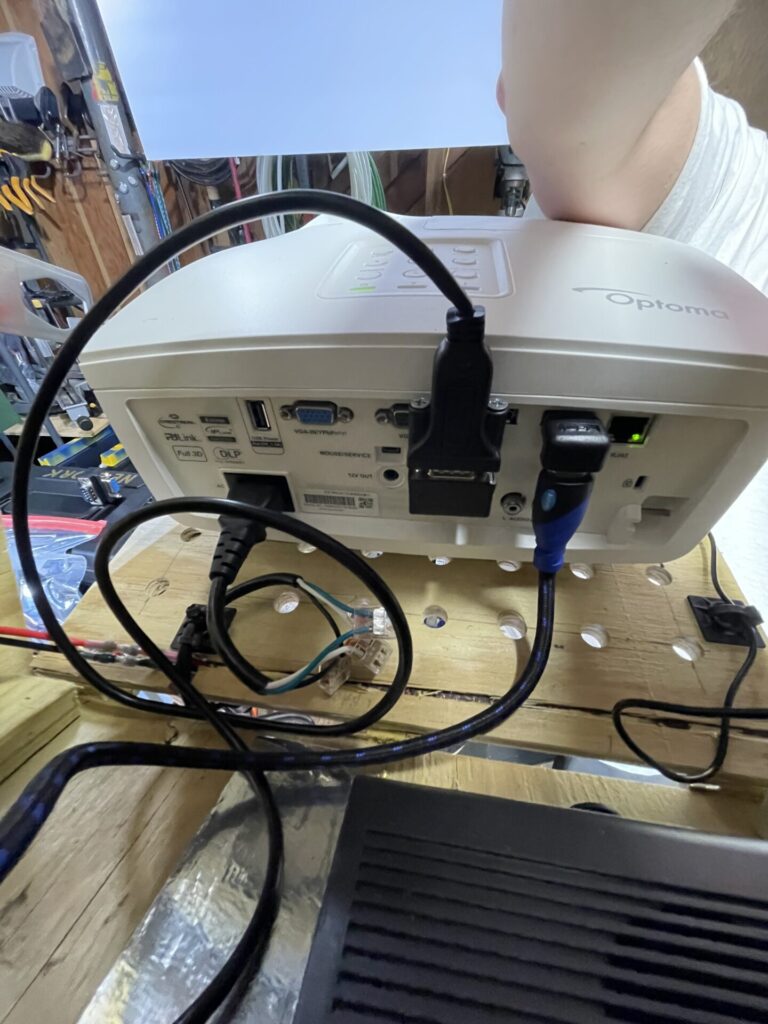
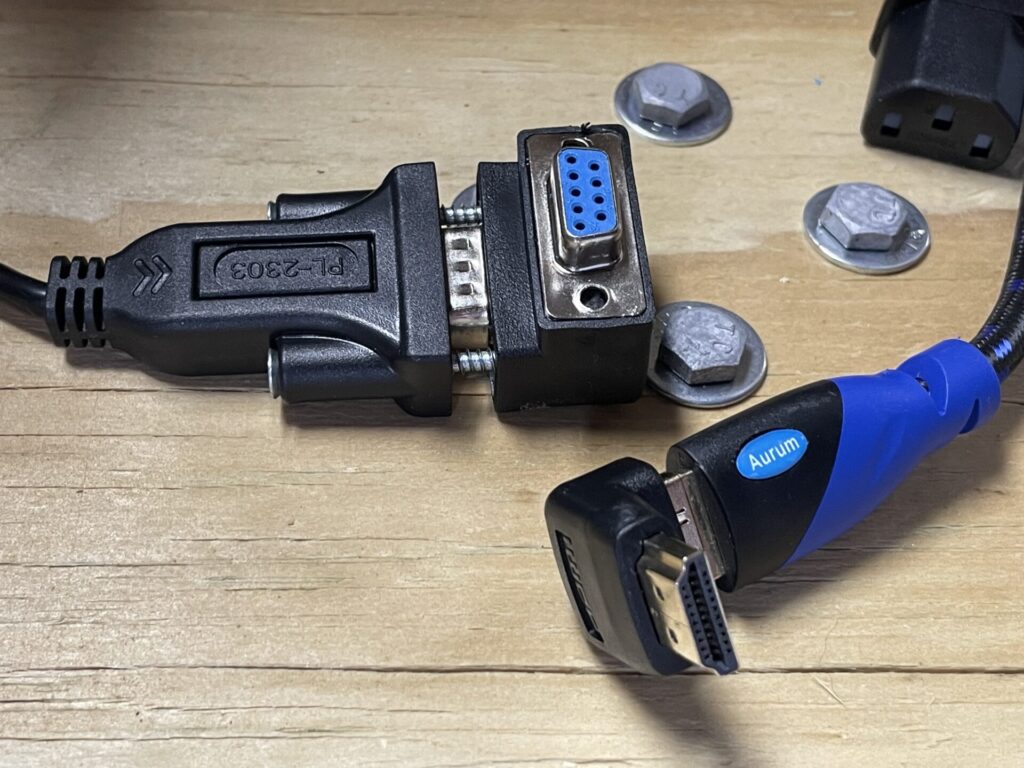
I had to doctor-up the serial adapter as none of the screws that came on it actually worked in this application. The power connector is fine because it doesn’t hit the heater or other components.
A 1/2″ galvanized flange is bolted to center of the base to mount the projector on top of a galvanized pipe. This is the same as my first enclosure. I’m also using locking hasps to fasten the top to the bottom, “to keep honest people honest” and prevent wind from pulling off the top. You can see those in the pics below.
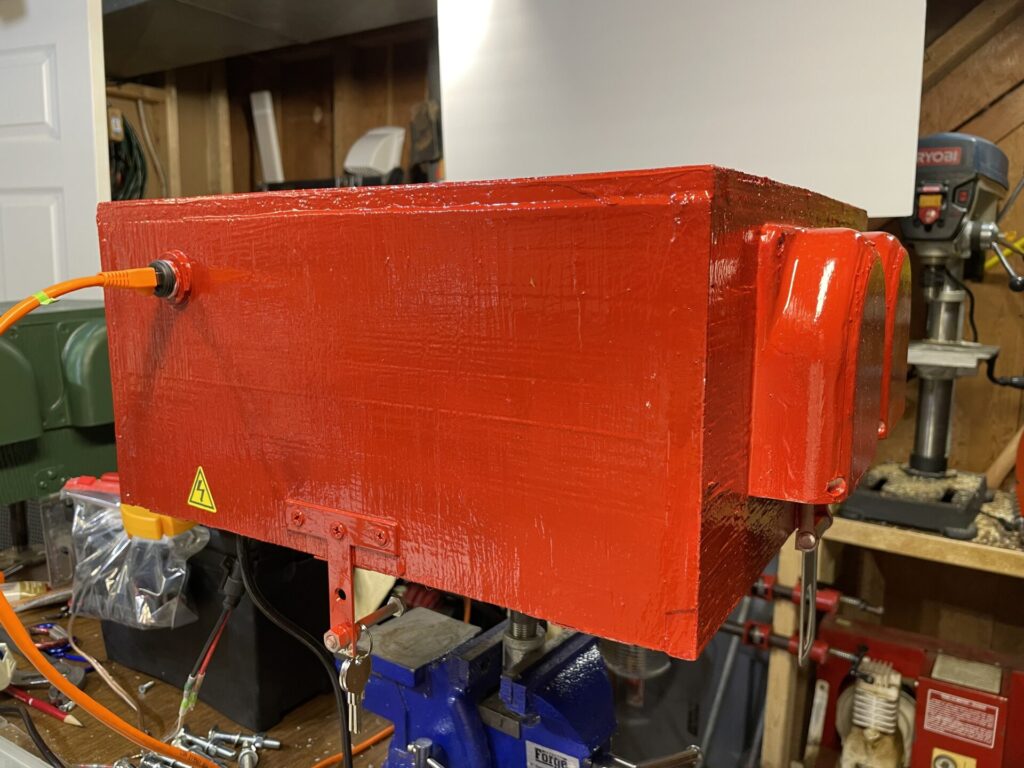
Here is what it looks like on the outside after I painted it…
I got the projector used on eBay for about $200. It is an Optoma EH415ST Short Throw. It only needs to be about 4′ away from the screen, which might be a little bit challenging once I get it in-place for the show as it is going to block our front walk. Nobody uses it anyway, but I’ll need to come up with a detour around it.
It will be stand-alone, basically a “projector on a stick”. I’m debating just leaving it, as it will be mostly hidden behind the mega tree, or stacking some decorative gift boxes around it so it looks like it is on top of a pile of gifts. I’ll post some updated pics once I decide what to do after we set up our show.
I’m already thinking about building two new enclosures for next season (2024), mostly because these are still a bit too small and I had to compromise on the control electronics and heater locations in both. I like the WAGO power busses I made, but they aren’t very efficient space-wise. I would rather have something larger that I can fit almost any projector in, just in case I need to replace these. Ideally the projectors will have more “breathing room” and the electronics and power busses can be installed on a DIN rail for easy access and replacement. I’m also once-again thinking that the electronics should be in their own enclosure, so the main box itself just has the projector, fans, and heater, along the a temperature probe. The controller box could be incorporated into the 12v PSU box and be several feet away from the projector itself.